Do you have a question about the Little Tikes Ice Cream Cozy Truck and is the answer not in the manual?
| Brand | Little Tikes |
|---|---|
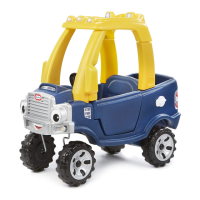
| Model | Ice Cream Cozy Truck |
| Category | Toy |
| Language | English |
Read through all instructions, clear a flat surface, gather tools, and prepare parts.
Critical safety precautions for assembly and use, including adult supervision and choking hazards.
Proper procedures for disassembling and disposing of the equipment safely and responsibly.
Detailed instructions for installing batteries, mixing types, and preventing leakage.
Information regarding the product's compliance with FCC rules for digital devices.
Check all parts are present, note extra hardware, and contact customer service if needed.
Visual guide to required tools and labeled hardware parts (AA, BB, CC, DD).
Press the tail lights into the ice cream truck body.
Combine horn collar, button, and bellows, then attach to the steering wheel.
Attach steering clip and O-ring to the steering wheel column.
Insert the two floorboard buttons into the dashboard.
Assemble the ice cream cone by joining its top and bottom parts with screws.
Align and secure the rear tray into the back of the truck body.
Connect the cooler lid to the main body of the truck.
Adult installation of three AAA batteries into the sound module.
Mount the sound module and assembled ice cream cone onto the roof.
Attach the door latch to the door using a screw.
Insert the door into the main body of the truck.
Match front and rear roof supports marked 'L' and 'R' to the roof.
Insert the front left roof support, rocking and pushing down.
Insert the front right roof support, rocking and pushing down.
Hook the rounded end of front pillars into the roof.
Lift roof rear and snap front pillars into place.
Insert rear pillars into roof and body, ensuring flush fit.
Install red fastener for roof connection and blue fasteners for body connection.
Place top hat into tool and hammer rear axle into the top hat.
Slide hubcap, wheel, bushing, and washer onto the rear axle.
Slide washer and bushing, then wheel and hubcap onto the axle.
Place top hat and tool over axle end, hammer top hat securely.
Slide components onto left front axle and hammer top hat.
Repeat the process for the right front axle.
Slide washer and bushing onto axles, then insert into body.
Ensure hubcaps face outward for correct front wheel alignment.
Insert bushings onto each front axle and push into place.
Align and secure eye bases over front axles with fasteners.
Mount eye covers to the front of the truck using screws.
Hammer axle caps onto the top of each axle.
Align and snap the four center caps onto the wheels.
Line up floorboard openings with buttons and secure.
Clean surface, wipe dry, and prepare decals for application.
Apply decals, removing air bubbles by pressing from center outwards.