Do you have a question about the Little Tikes Ride & Relax 5-in-1 Trike and is the answer not in the manual?
| Weight Limit | 50 lbs |
|---|---|
| Adjustable Seat | Yes |
| Safety Harness | Yes |
| Parent Steering | Yes |
| Material | Plastic, Metal |
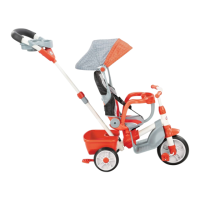
| Removable Accessories | Yes (canopy, footrest, parent handle) |
| Features | 5-in-1 design |
Lists all hardware components included for assembly, referencing specific part numbers.
Specifies necessary tools that are not included with the product for assembly.
Instructions for engaging the pedals in Position 5, involving button press and sliding.
Procedure to thread and secure seat belts through the seat cushion.
Steps to remove the handle and tray and manage the handle lock.
Instructions for removing the seat cover and sun shade.
How to adjust the seat position using the seat lock lever.
Detailed steps for unscrewing and removing the safety bar from the seat.
How to adjust the seat position by manipulating the seat lock lever.
Instructions to engage pedals by pressing a button and sliding.
Crucial directive to read all instructions thoroughly before assembly and use.
Emphasizes that adult assembly is mandatory and requires careful reading of instructions.
Advice to keep instructions for future reference and be mindful of small parts.
Tip to loosely assemble parts first to ensure correctness before final tightening.
Guidelines to prevent serious injury, including supervision, hazard avoidance, and proper use.
Specifies age range (9 months-5 years) and weight limits for safe product usage.
Instructions for regular hardware checks, tightening, and cleaning with mild agents.
Guidance on safely disassembling and disposing of the product to avoid hazards.
Detailed instructions for attaching wheels and brakes to the trike axle.
How to adjust the seat position using the seat lock lever.
Instructions to remove the foot rest situated between the safety bar and handlebars.
Procedure for engaging pedals via button press and sliding.
Instructions for attaching the retractable sun shade.
Instructions to engage or disengage pedals for Stroll mode.
Steps for attaching handlebars, including washer placement and securing with screws.
Instructions for attaching the retractable sun shade.
Procedure to attach the front wheel to the frame until it snaps into place.
How to fit the foot rest over the metal support on the frame.
Instructions to recline the seat by lifting and pulling back the handle.
Steps to engage or disengage pedals for Recline mode.
Instructions for attaching the retractable sun shade.
How to slide the seat onto the frame and secure with twist knobs.
Procedure to slide the seat back onto the seat and fasten with twist knobs.
Instructions for adjusting the handle height and locking it in place.
Detailed steps (20-25) illustrating the assembly and adjustment of the handle.
Instructions to press tabs before inserting the canopy into the seat openings.
Steps to attach the tray by securing one side, adjusting the other, and snapping to lock.
Guide to adjust the center seat belt length by following the specified path.