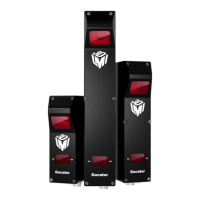
2300
2100
3. STARTING GOCATOR
NOTE: Gocator must be connected to a host computer in order to launch the user interface and set up the sensor.
Gocator sensors are configured by connecting with a web browser. For details on browser compatibility, see the user manual.
An example of the user interface in use
Americas LMI Technologies (Head Oce)
Vancouver, Canada
+1 604 636 1011
EMEAR LMI Technologies GmbH
Berlin, Germany
+49 (0)3328 9360 0
Asia Pacific LMI (Shanghai) Trading Co., Ltd.
Shanghai, China
+86 21 5441 0711
LMI Technologies has sales oces and distributors
worldwide. All contact information is listed at lmi3D.com/
contact/.
Quick Start Guide
For the user manual, CAD drawings, firmware release notes, SDK, and
more, go to lmi3D.com/product-downloads.
15252-01.03_Manual_Quickstart_Gocator_2100_2300_Series
©2023 LMI Technologies Inc. All rights reserved.
TROUBLESHOOTING
PROBLEM SUGGESTED RESOLUTION
Mechanical / Environmental
The sensor is warm. • It is normal for a sensor to be warm when powered on.
Connection
When connecting with a web
browser, the sensor is not found
(page does not load).
• Verify the sensor power is on. This will be indicated by an illuminated POWER LED.
• Verify the Power & Ethernet cordset is connected to the Power/LAN connector and the Ethernet RJ45 plug is connected to the Ethernet switch.
• Verify that the client computer’s network settings are properly configured.
See Getting Started > Network and Sensor Setup in the Gocator user manual or your computer’s documentation on configuring a network adapter.
• Download 14405-x.x.xx.x_SOFTWARE_GO_Utilities.zip from the downloads area of LMI’s website at www.lmi3D.com.
Unzip and run the Sensor Discovery Tool [Tools\Discovery\kDiscovery.exe] to verify that the sensor has the correct network settings.
When attempting to log in, the
password is not accepted.
• Download 14405-x.x.xx.x_SOFTWARE_GO_Utilities.zip from from the downloads area of LMI’s website at www.lmi3D.com.
Unzip and run the Sensor Discovery Tool [Tools\Discovery\kDiscovery.exe] to find the sensor on the network and click Factory Restore.
WARNING: Performing a factory restore resets your configuration settings to their original values. These settings can be recovered from backup files if you
have previously saved them.
Laser Profiling
When the Play button is pressed,
the sensor does not emit laser light.
• Ensure that the decal covering the laser emitter window, normally axed to new sensors, has been removed.
• Verify that the LASER indicator LED on the Gocator is illuminated. If not, the laser safety input signal is o.
To determine the correct solution for your application, see Specifications > Sensor Connectors > Gocator Power/LAN Connector > Laser Safety Input in the
user manual.
• The exposure setting may be too low. For more information, see Gocator Web Interface > Scan Setup > Sensor > Exposure in the user manual.
The sensor emits laser light, but the
Range indicator does not illuminate
and/or points are not displayed in
the data viewer.
• Verify that the measurement target is within the sensor’s field of view and measurement range.
The RANGE indicator LED on the Gocator will illuminate when the target is in range.
• Check that the exposure time is set to a reasonable level.
For more information, see Gocator Web Interface > Scan Setup > Sensor > Exposure in the user manual.
The sensor CPU level is near 100%.
• Review the active measurements and remove any that are unnecessary.
• Consider reducing the trigger speed.
• Consider reducing the laser profiling resolution.
B. RUNNING GOCATOR A. LAUNCHING THE INTERFACE
Step 1
Select the Manage page.
Step 2
Ensure that Replay mode is o (slider set to left) and that the
Laser Safety switch is enabled or the Laser Safety input is
high. Press the Start button in the toolbar to start the sensor
(a laser line should now be visible).
Step 3
Move target into the laser plane and measure!
RECORD SNAPSHOT START
REPLAY (off)
Gocator sensors can also interface directly with HexSight.
Refer to the HexSight Quick Start Guide for more information.
NOTE
In Windows 10
a. From the Start menu, launch the Settings app and click Network &
Internet, and then click Change adapter options under Advanced
network settings..
b. Right-click desired network connection, and then click Properties.
c. On the Networking tab, click Internet Protocol Version 4 (TCP/IPv4),
and then click Properties.
d. Select “Use the following IP address” option.
e. Enter IP Address “192.168.1.5” and Subnet Mask “255.255.255.0”, then
click OK.
In Mac OS 11
a. Click Apple menu > System Preferences, and then click Network.
b. In the list to the left, select Ethernet.
c. Click Advanced, click Hardware, click the Configure pop-up menu,
and set it to “Manually”.
d. Enter IP Address “192.168.1.5” and Subnet Mask “255.255.255.0”, and
then click Apply.
Step 1
Change network setting on the host computer.
Gocator is shipped with the following default network
configuration:
Setting Default
DCHP Disabled
IP Address 192.168.1.10
Subnet Mask 255.255.255.0
Gateway 0.0.0.0
Open a web browser and enter the sensor address.
Step 2
The Gocator interface loads.