21
7000INST Copyright Lockmasters, Inc. 5/25/11
Step 22 - Install the Combination Lock
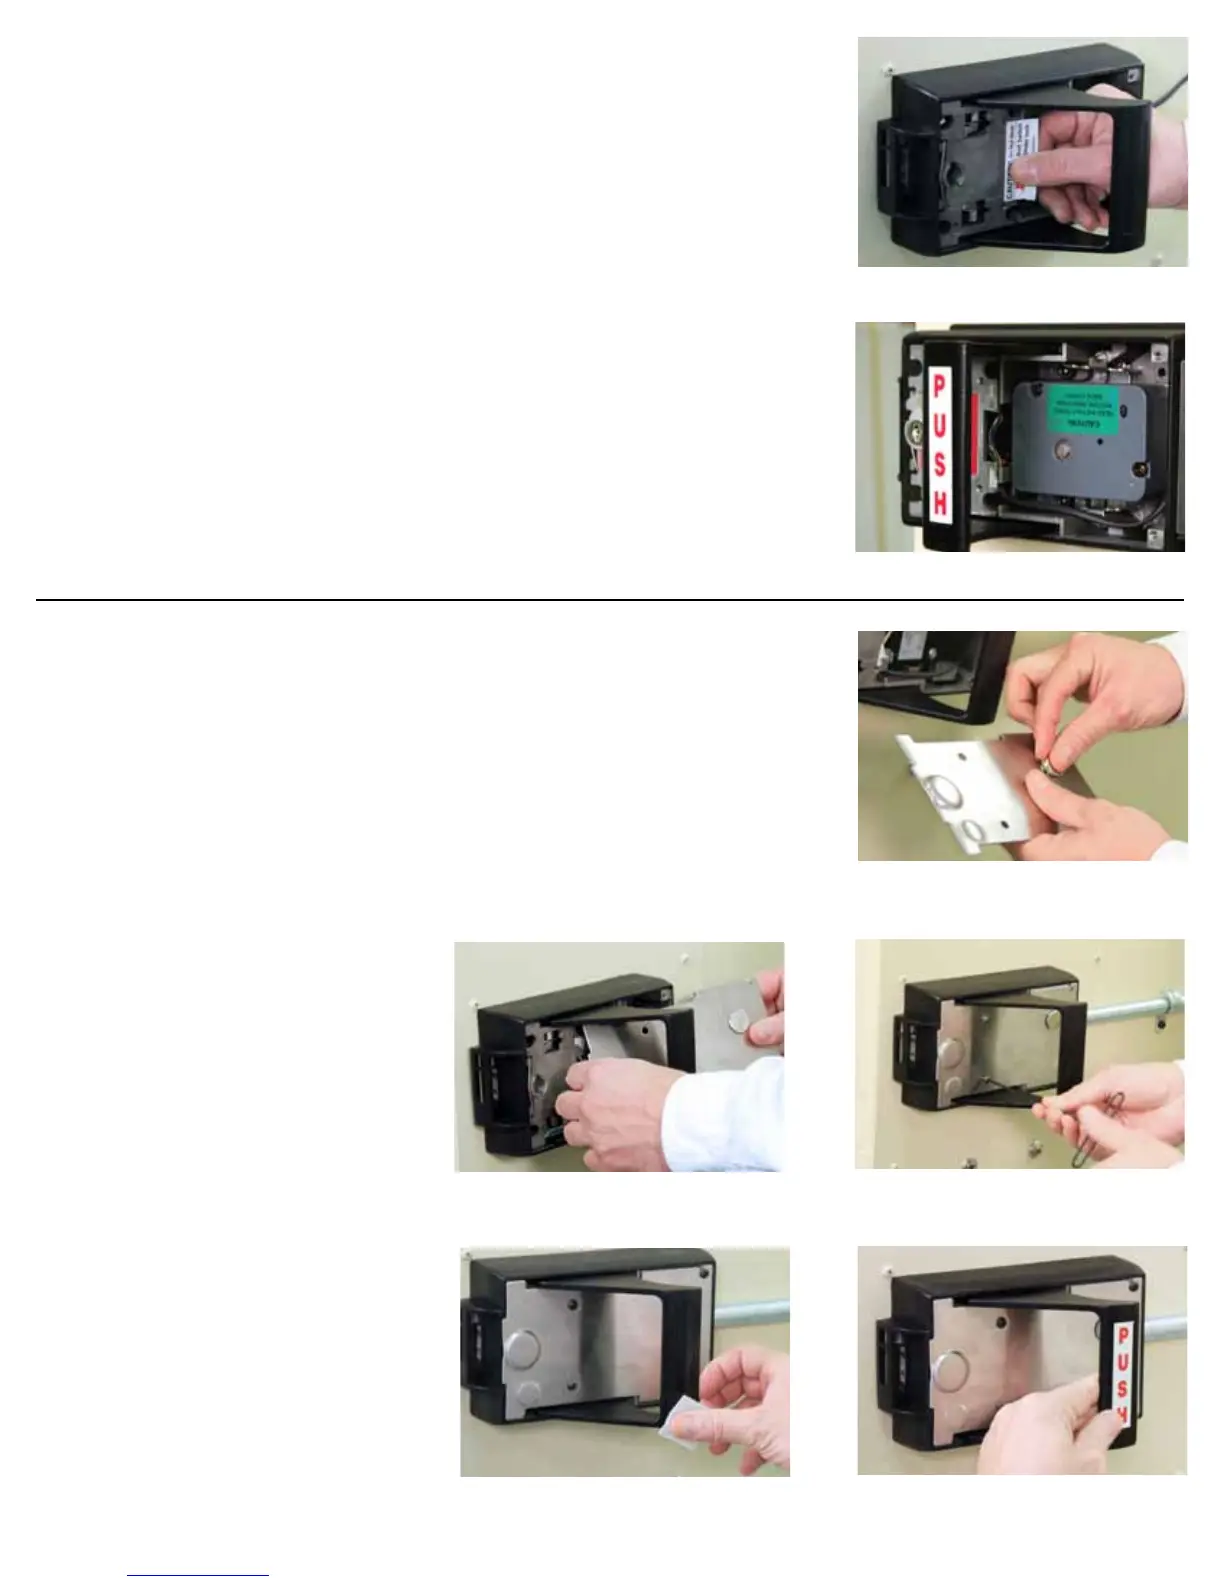
Step 22a - Remove Warning Label
Remove the internal warning label in the Inside Base Plate.
Step 22b - When integrating a combination lock package with the LKM7000 follow the
lock manufacturer’s instructions to install properly.
Step 23 – Re-attach the Inside Base Plate Cover
Step 23A – Insert the Change Key Hole Plug (N) into the Change Key Hole. If the plug
is loose, expand the metal tabs.
Step 23B – Guide the Inside Base Plate Cover through the handle and align the screw
holes.
Step 23C – Reinstall and secure the cover with (4) 8-32 x 3/8” socket head button screws.
Step 23D – Clean the surface of the handle with rubbing alcohol to ensure good label
adhesion.
Step 23 E - Place the push or pull decal
on the inside base plate handle depending
on the swing of the door.
LKM7000 Installation
22 - Lock body installed inside the LKM7000 IBP
23a - Insert Change Key Hole Plug into the
Change Key Hole on the IBP cover.
23b - Guide IBP cover through the handle and
align the screw holes.
23c - Secure IPB cover with (4) 8-32 x 3/8” socket
head button screws.
23d - Clean the surface of the IBP handle with rub-
bing alcohol.
23e - Place the applicable “Push” or “Pull” label on
the IBP handle.
22a - Remove warning label from IBP.
 Loading...