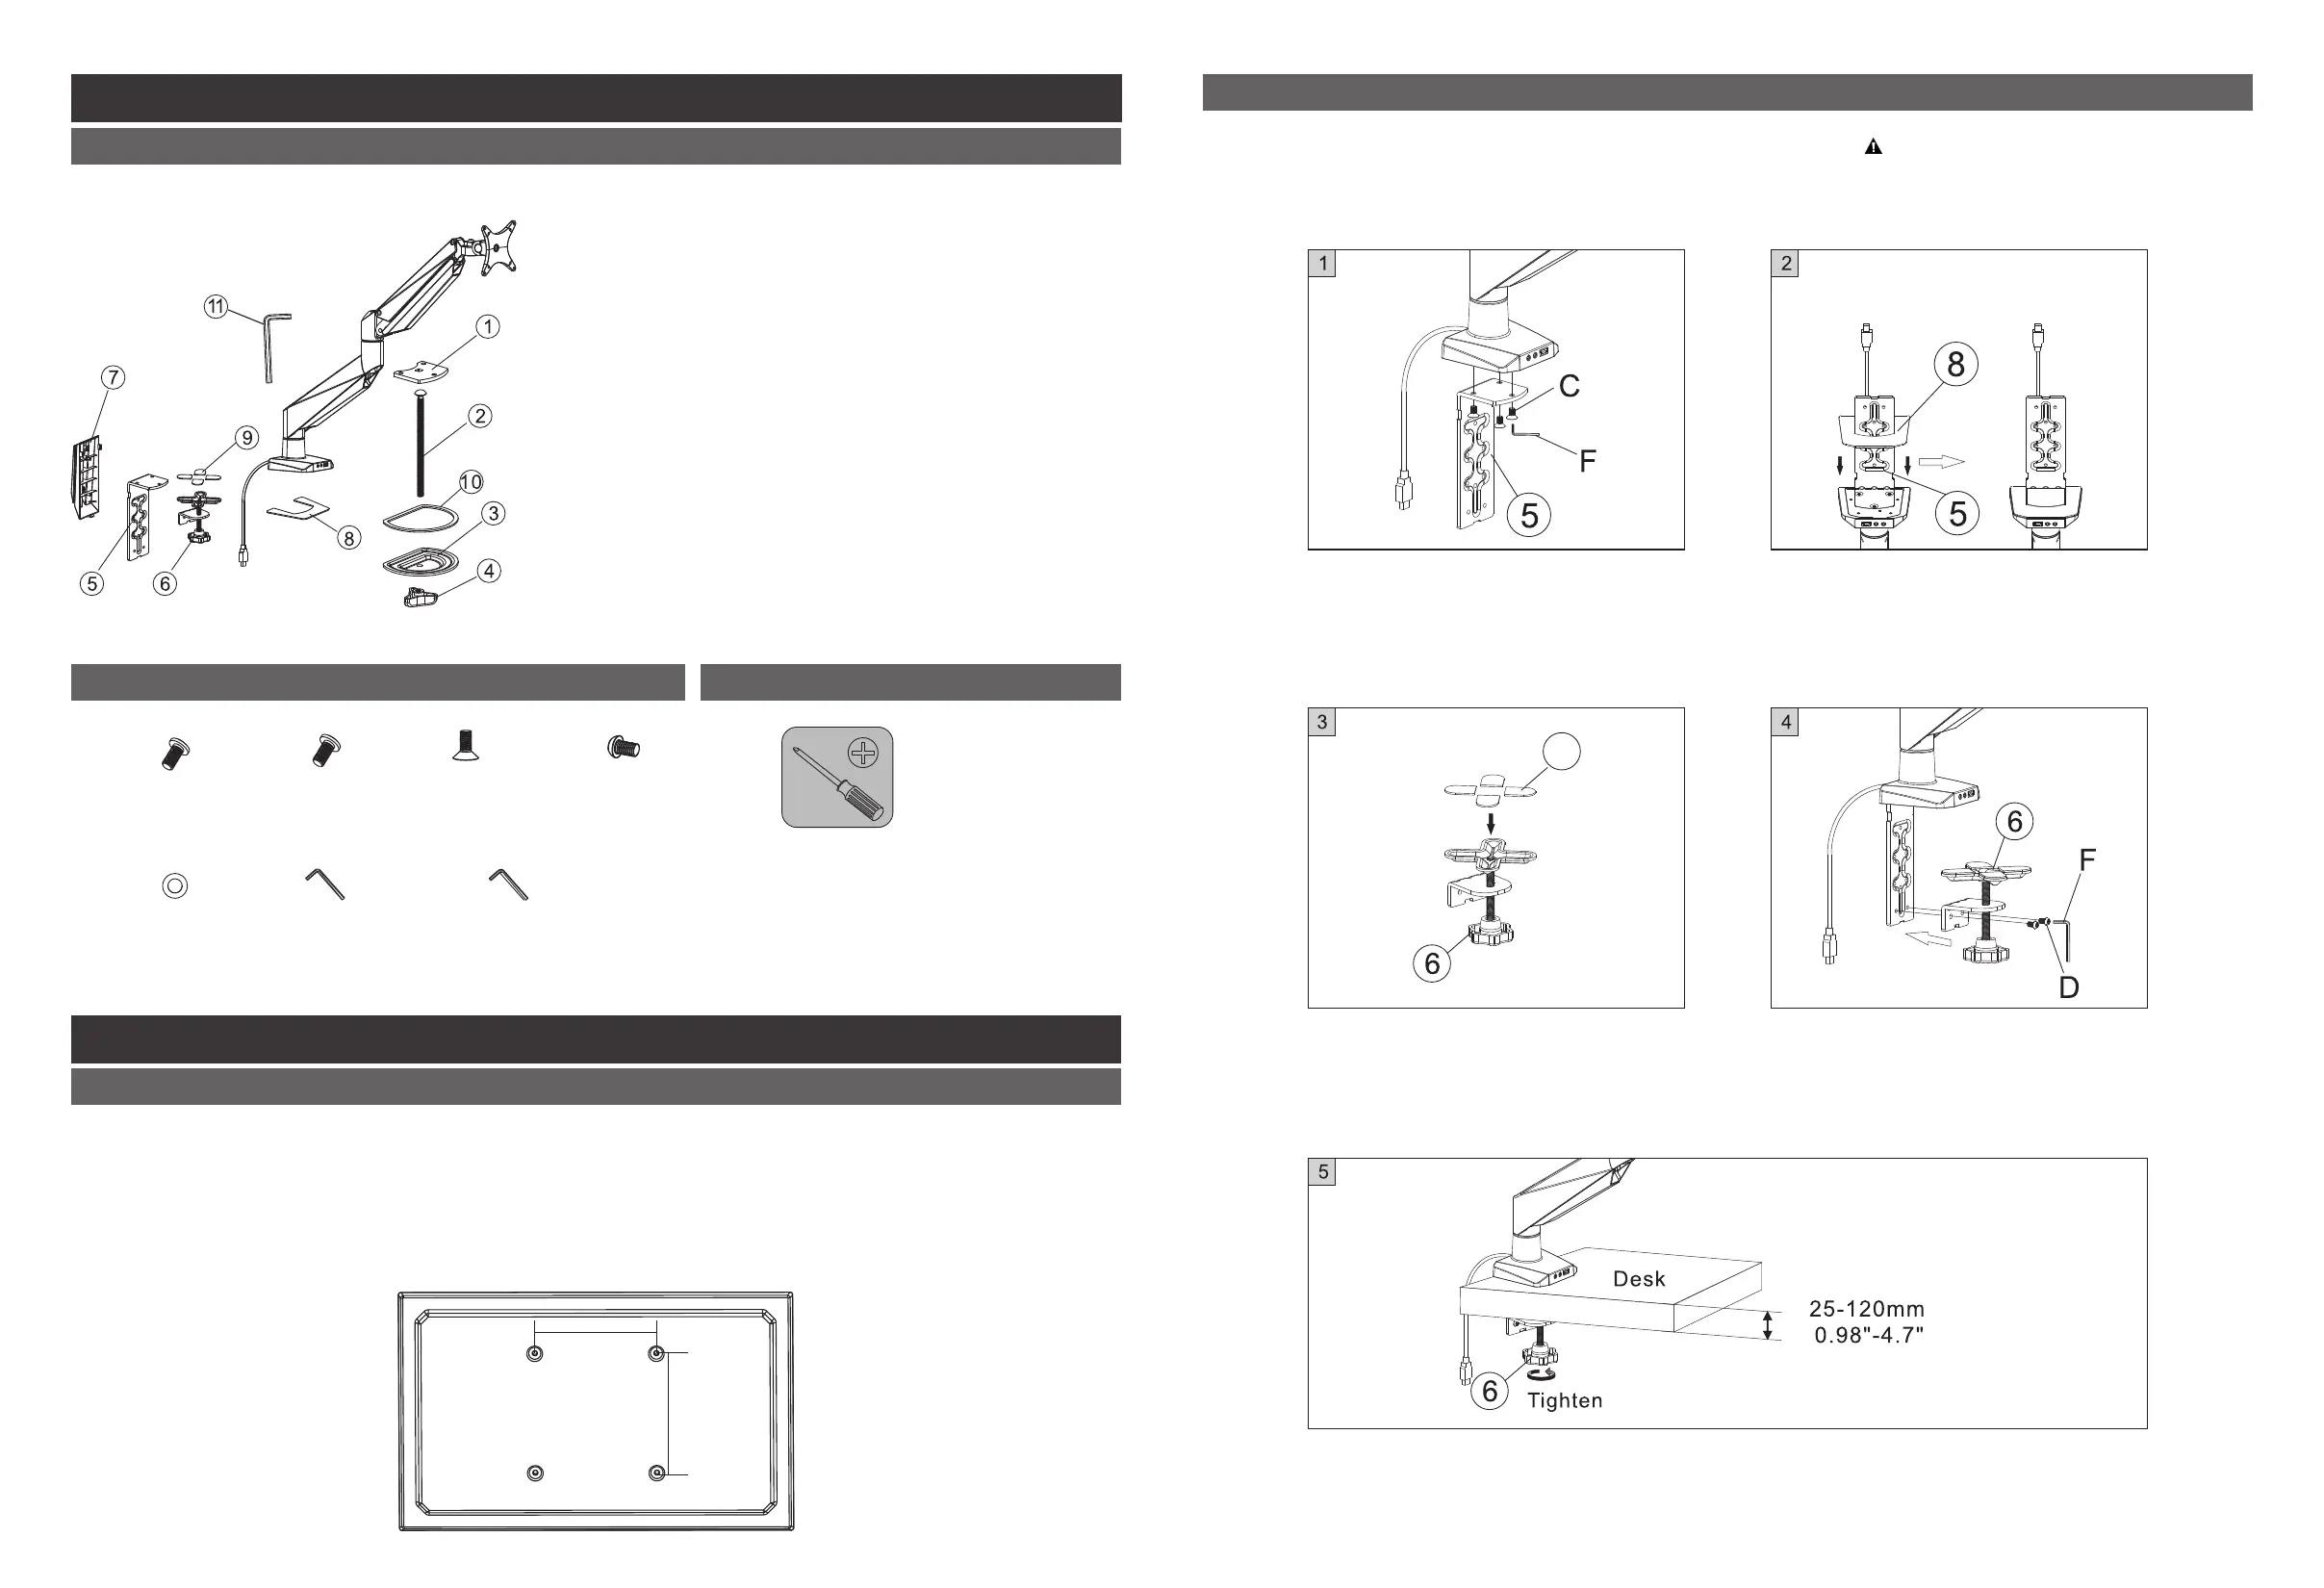
STEP 2 - OptionⅠ: Clamp Installation Method
For table thickness: 0.98" - 4.7"
(25 - 120mm) select appropriate
hole in bottom support according to
the desk thickness
Installation Steps
1. Verify that your monitor has VESA mounting holes spaced either 100 x 100mm or 75 x 75mm
apart; if it does not, the monitor cannot be mounted to this product without the use of an adapter
(not included).
2. Remove your monitor's original base and/or any backplate covering the mounting holes.
Be careful not to scratch the screen.
STEP 1: Preparations before installing monitor
75 x 75 or 100 x 100
75 x 75 or 100 x 100
Package Included
(A) Parts Included
(B) Attachment Screw Set (C)Tools Needed for Assembly
01
02
M4 x12mm
(4 PCS) (4 PCS)
M5 x12mm
A. B. C.
(3 PCS)
M6 x12mm
F.
4 x 4 Hex key
(1 PC)
E.
6.5 x13 x 2.0
washer
(8 PCS)
D.
(2 PCS)
M6 x14mm
G.
5 x 5 Hex key
(1 PC)
9
This option is for desk without a grommet hole.
1. Attach the bottom support 2 (5) to
the tube by tightening screws (C)
with hex key (F). 4 x 4 mm
2. Turn the mount upside-down and
put anti-slip rubber 1 (8) onto the
bottom support 2 (5).
3. Put anti-slip rubber 2 (9) onto the
top of knob (6).
4. Attach the knob (6) to the bottom
support 2 (5) using M6 x14 mm
screw (D). See note below
on selecting the correct screw hole.
5. Position the bottom clamp against
desk surface and fully tighten clamp
knob (6).
Installtion parts required for Two optional
intallation methods are different:
Option Ⅰ:
⑤ Bottom support 2 x1
⑥ Clamp Knob x1
⑦ Cable cover x1
⑧ Anti-slip rubber 1 x1
⑨ Anti-slip rubber 2 x4
⑪ 6x6mm Allen key x1
Option Ⅱ:
① Bottom support 1 x1
② Screw x1
③ Pressure plate x1
④ Knob nut x1
⑩ Anti-slip rubber 3 x1
⑪ 6x6mm Allen key x1
Installtion parts required: ⑤⑥⑦⑧⑨⑪
 Loading...