03
04
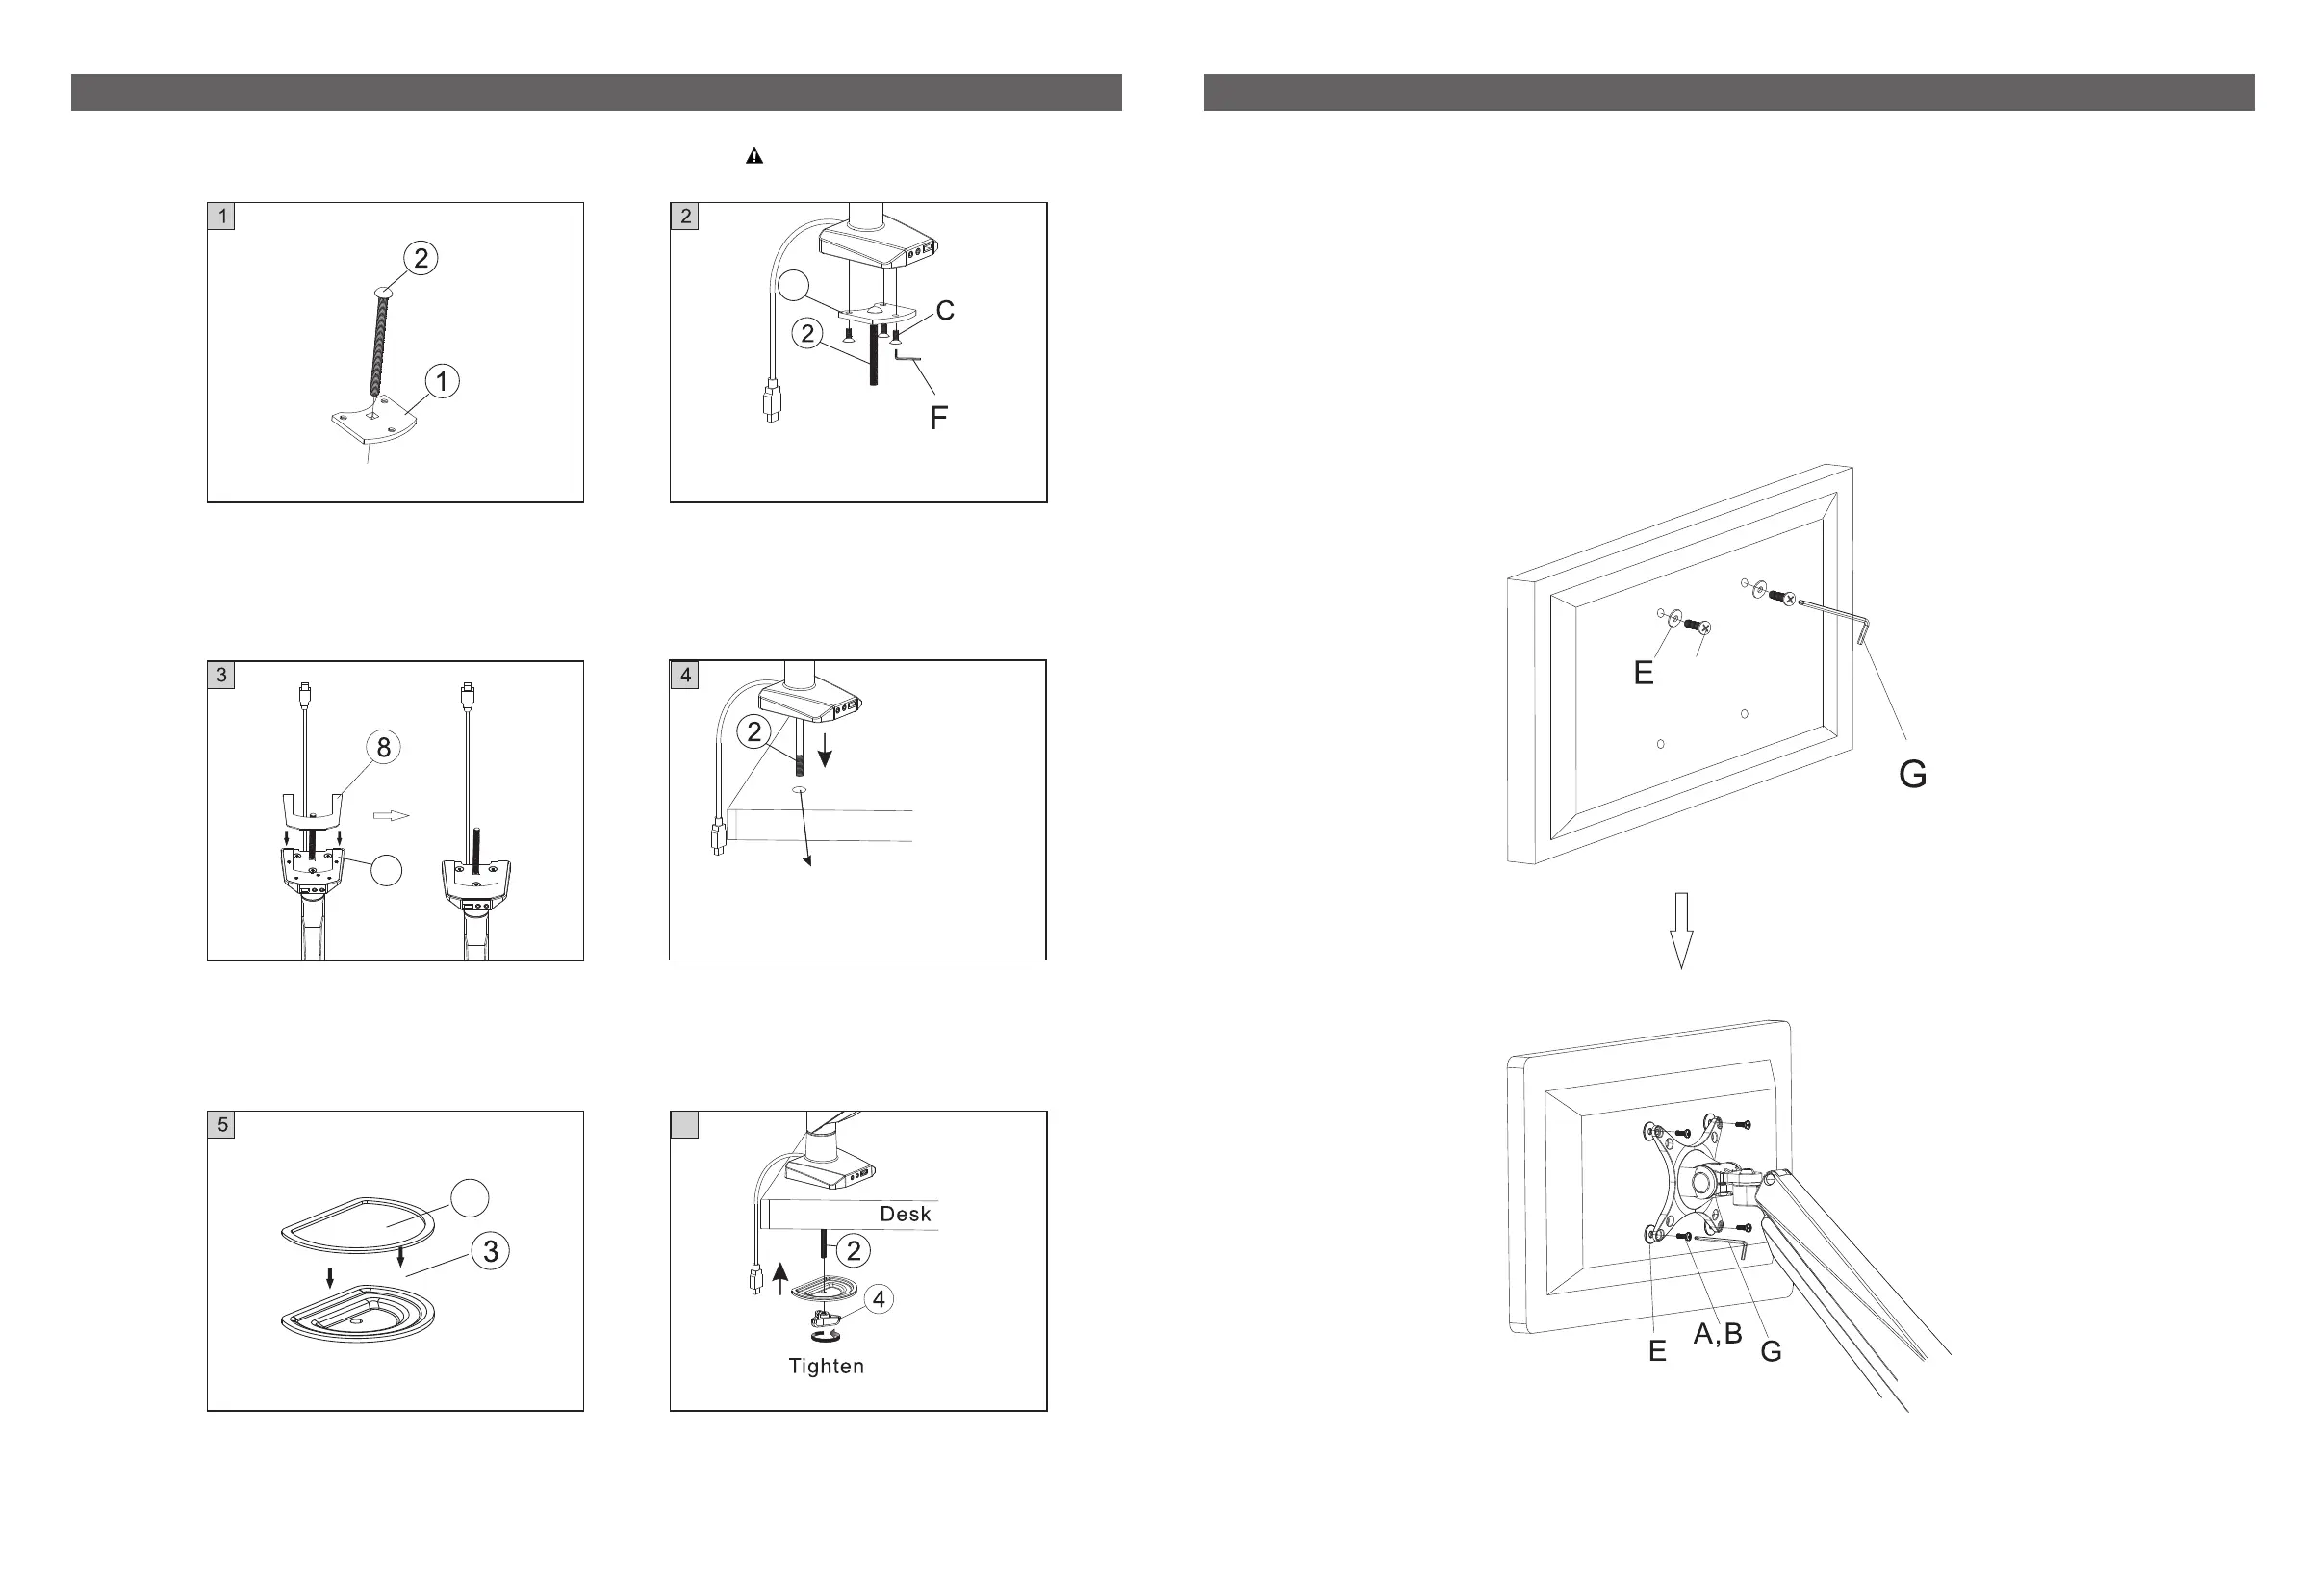
STEP 2 - OptionⅡ: Grommet Installation Method
Keep the screw
side pointing down
Size of the hole:
0.33" - 2.76" (8.5 - 70mm)
Desk
10
For table thickness: 0.98" - 3.94"
(25 - 100mm)
6. Screw in the Pressure plate with
the butterfly knob (4).
6
STEP3: Install Monitor
A,B
1. Add washers (E) to appropriate screws (A/B) depending on monitor screw hole size.
2. For 100 x 100mm pattern holes ONLY, loosely install screws to the top two holes of the
monitor first, then slide the screws into the top grooves of the monitor plate. This will make it
easier to install the final two screws.
3. For 75 x 75mm pattern holes, you may need to ask someone else to hold the monitor up while
you install it to the mount.
4. Ensure all screws are securely hand tightened only before use.
This option is for desk with a grommet hole.
1. Insert the screw (2) into the hole
of the bottom support 1 (1).
2. Attach the bottom support 1 (1) to
the base by tightening screws (C)
with x hex key (F). 4 4 mm
3. Turn the mount upside-down and
put anti-slip rubber 1 (8) onto the
bottom support 1 (1).
4. Insert screw (7) into deskgrommet.
5. Attach anti-slip rubber 3 (10) onto
the Pressure plate (3).
1
1
Installtion parts required: ⑤⑥⑦⑧⑨⑪
 Loading...