0~90°
CAUTION
This product contains small items that could be a choking hazard if swallowed. Keep these items
away from young children.
● Make sure these instructions are read and completely understood before attempting installation.
If you are unsure of any part of this installation, please contact a professional installer for
assistance.
● The desk or mounting surface must be capable of supporting the combined weight of the mount
and the monitor, otherwise the structure must be reinforced.
● Proper tools must be used. A minimum of two people are required for this installation. Failure to
install properly can result in property damage.
● Check joint parts every two months, making sure the screws have not loosened.
This product was designed to be installed on a desk. Before installing, make sure the mount will
support the combined load of the equipment and hardware. Never exceed the maximum load
capacity 33 lbs (15 kg), or else it may result in product failure.
Note: This product is intended for indoor use only. Use of this product outdoors could lead to product
failure.
STEP 5: Cable Management
7
05
06
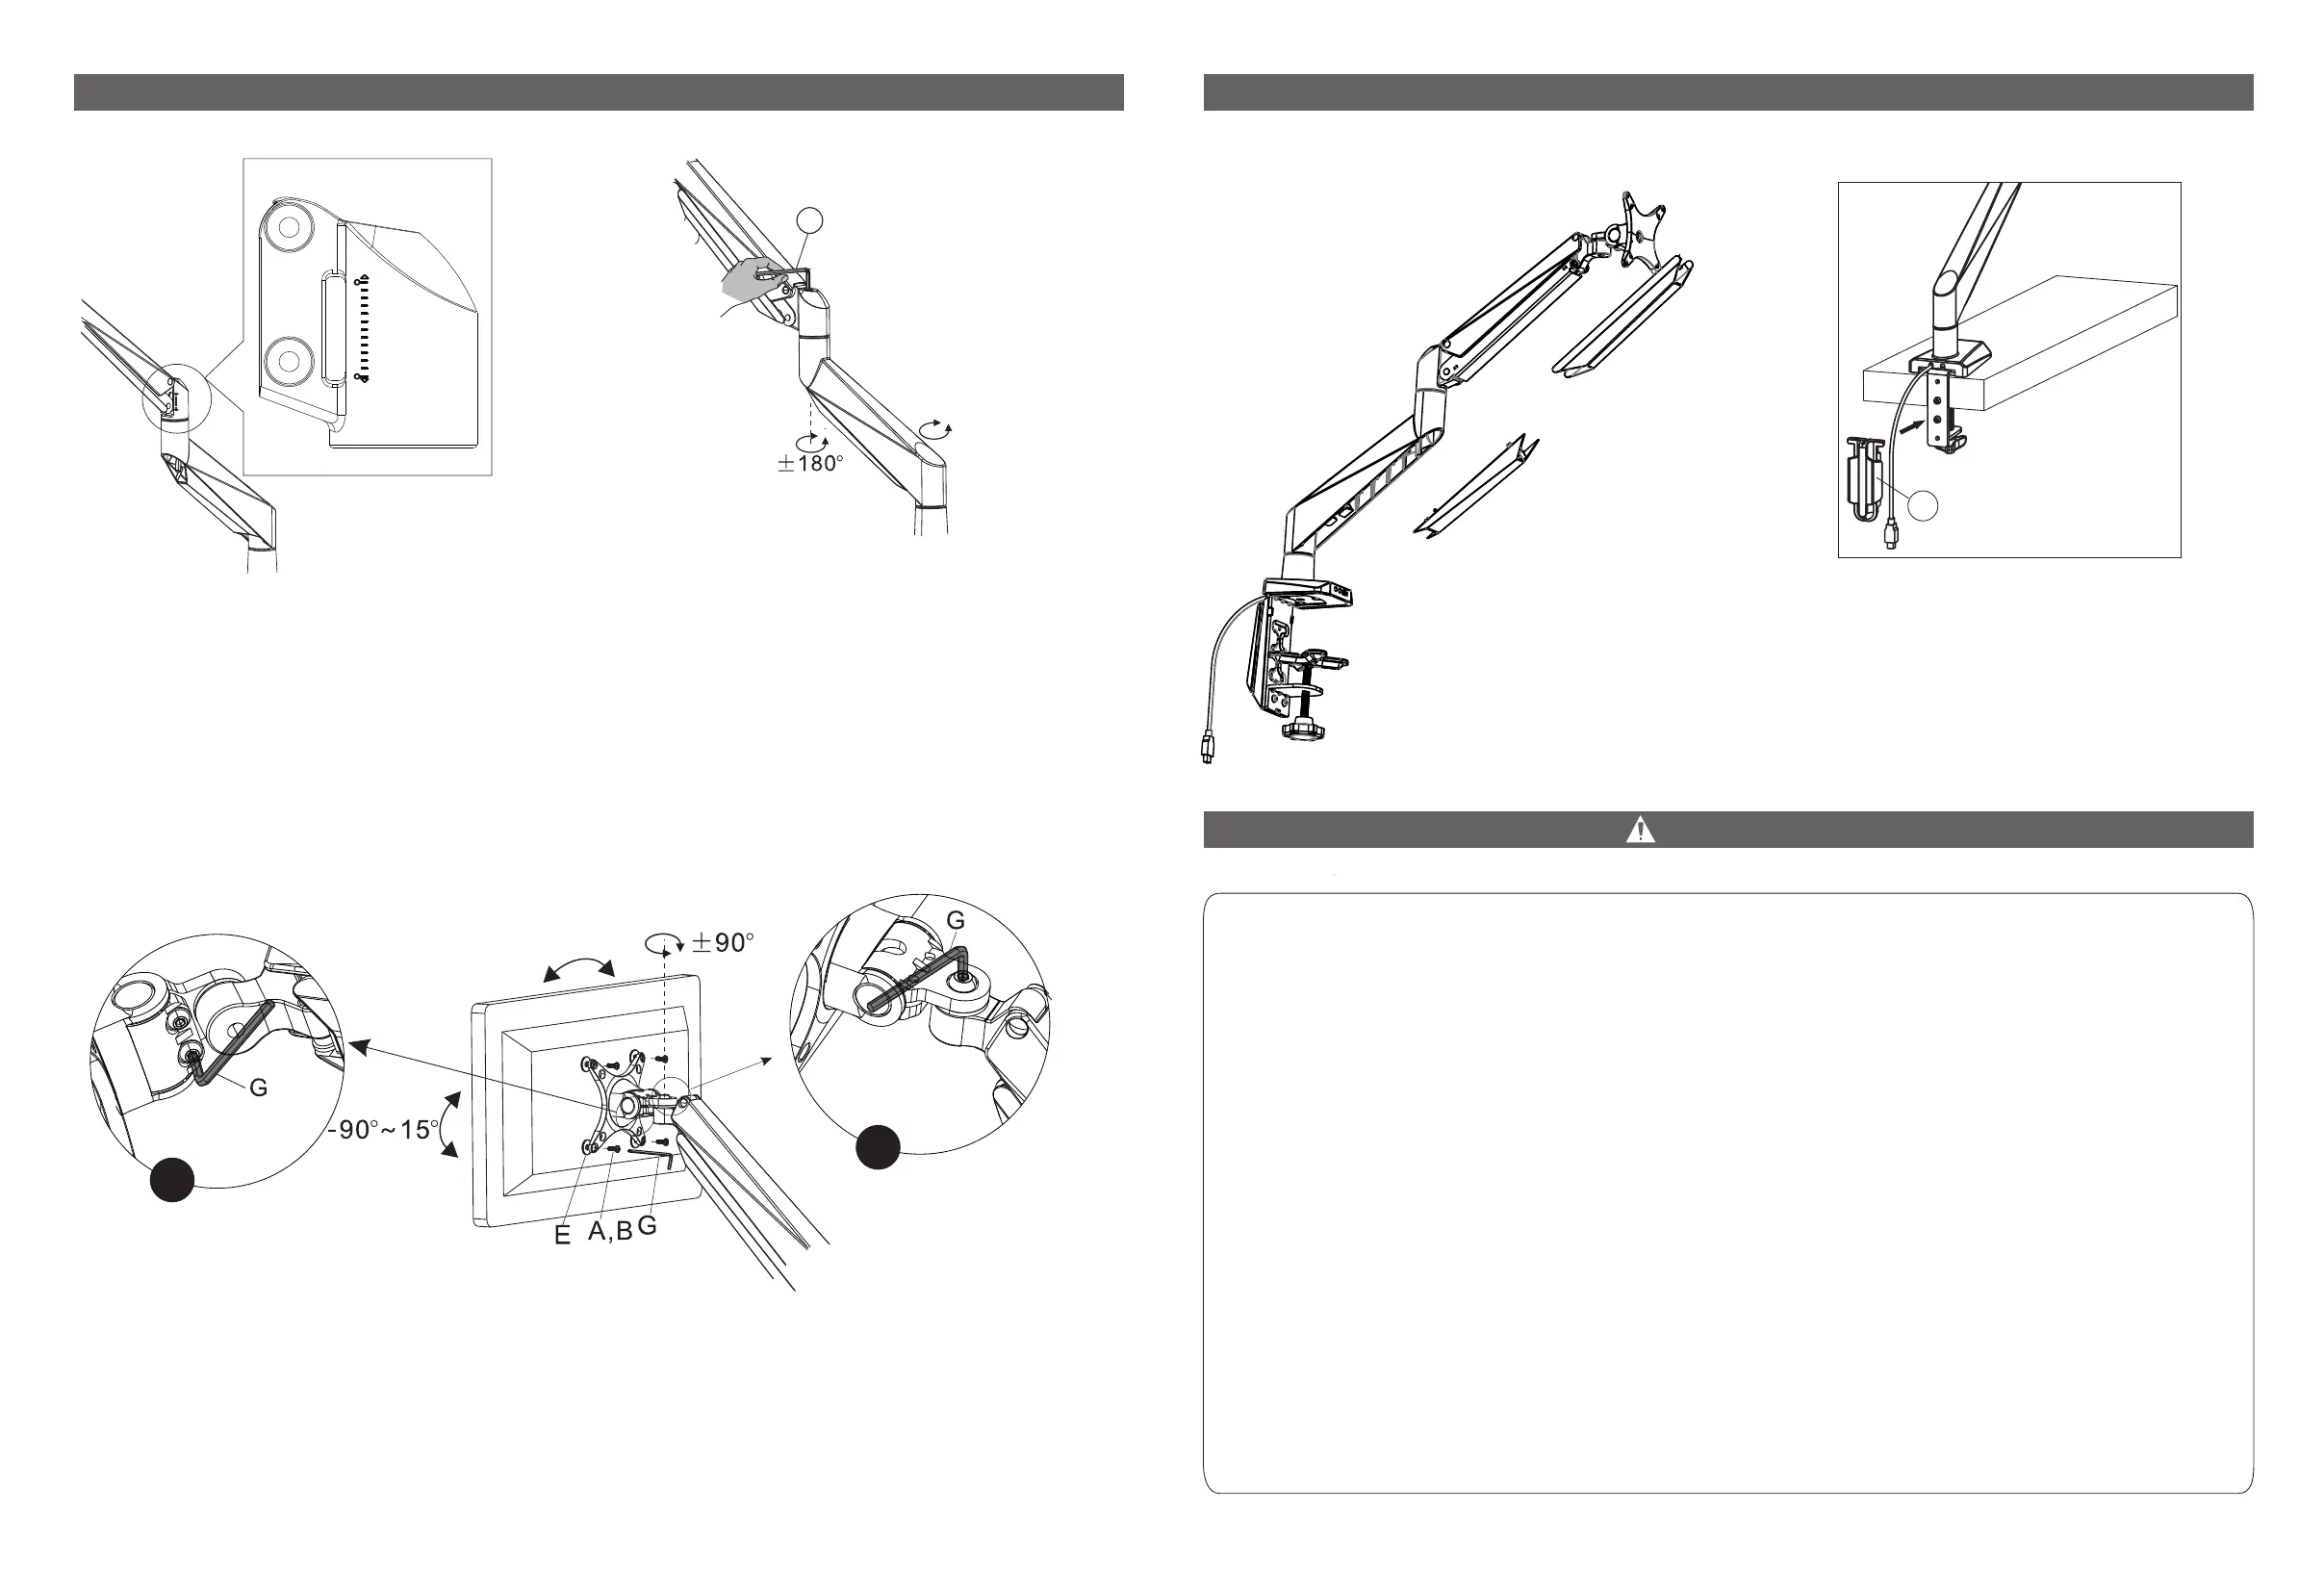
STEP 4: Adjust Monitor Counterbalance
6
15
±135°
11
1. The mount has a visible force adjustment window showing its current tension level (6-15kg,
equals to 13-33lbs). For best results, roughly adjust the red line to the weight of your monitor
before fine tuning the tension.
2. Adjust bolt in arm joint to control monitor height. If monitor raises or lowers on its own, turn
bolt to adjust tension according to your monitor weight (turn in "+" direction if monitor keeps
lowering; turn in "-" direction if monitor keeps raising).
a
b
a. Adjust bolts behind and under monitor plate to control monitor tilt. Tighten if monitor keeps
tilting forward on its own.
b. Adjust bolt behind and above monitor plate to control monitor swivel. Tighten if monitor
keeps swiveling around on its own.
Rotate your
monitor to level.
If you are using grommet
installation method (optionⅡ),
then, pass cables through the
slots in cable cover (7) and attach
cable cover to bottom support B
(5).
Slide cables through cable
guides, removing cable guides
by pressing on them from the
sides if necessary.
 Loading...