Application Note
Falcon-NEO System Restore v3.2u3 Page 6 of 12
Revised date: December 2020
Logicube, Inc. • 19755 Nordhoff Pl.,Chatsworth, CA 91311 USA• tel:+1-818-700-8488• fax:+1-818-435-0088
www.logicube.com
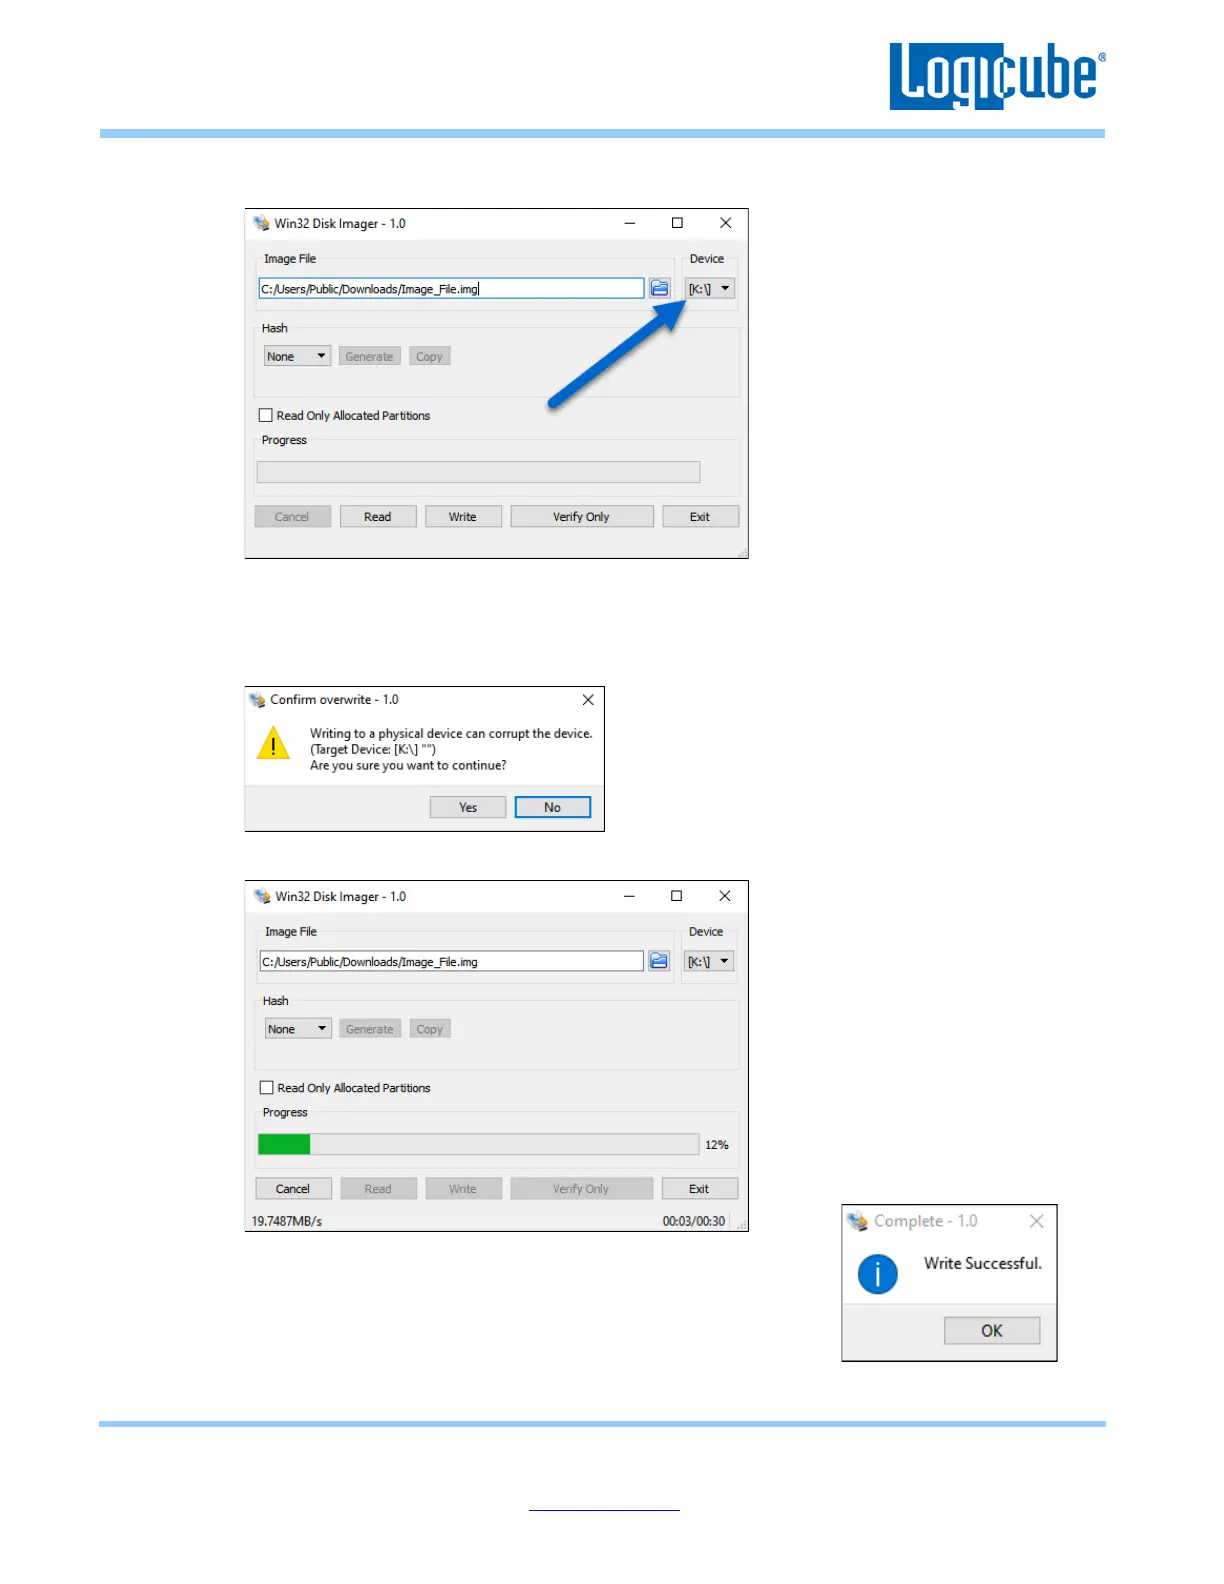
9. Under ‘Device’, select the drive letter for the USB flash drive that was connected during step 3
then click the Write icon.
10. A confirmation screen will appear. Make sure that the “Target Device” is set to the correct drive
letter. If it is the correct drive letter, click Yes to continue. If it is showing the wrong drive letter,
click No. This will take you back to the previous screen where you can select the correct drive
letter (back to step 9).
11. The USB flash drive is now being prepared and the progress bar should be advancing.
12. When it is finished, a prompt should appear stating the write was
successful. Click the OK icon to continue. Close the Win32 Disk
Imager window. The USB flash drive is now ready to be used.
13. Disconnect the USB flash drive from the computer.

 Loading...