23
6. Assembling Hanging Plate Holes
Drill (A, B, C, D, E) holes on marked points by using
a Ф8mm drill bit. Push 5 pcs of plastic wall plugs
into the drilled holes (A, B, C, D, E). Put the hanging
plate on the holes A, B, C. Using the supplied 4 x
40mm screws; screw the hanging plate into the A,
B, C holes.
7. Mounting the Hood to Wall
Hang the hood on the two hooks (F, G) on Hanging
Plate. Using the supplied 4 x 30mm screws, screw
the Hood into Ф8mm wall plugs (D, E) fixed in the
wall.
Ensure the hood is level and then fully tighten all
the screws.
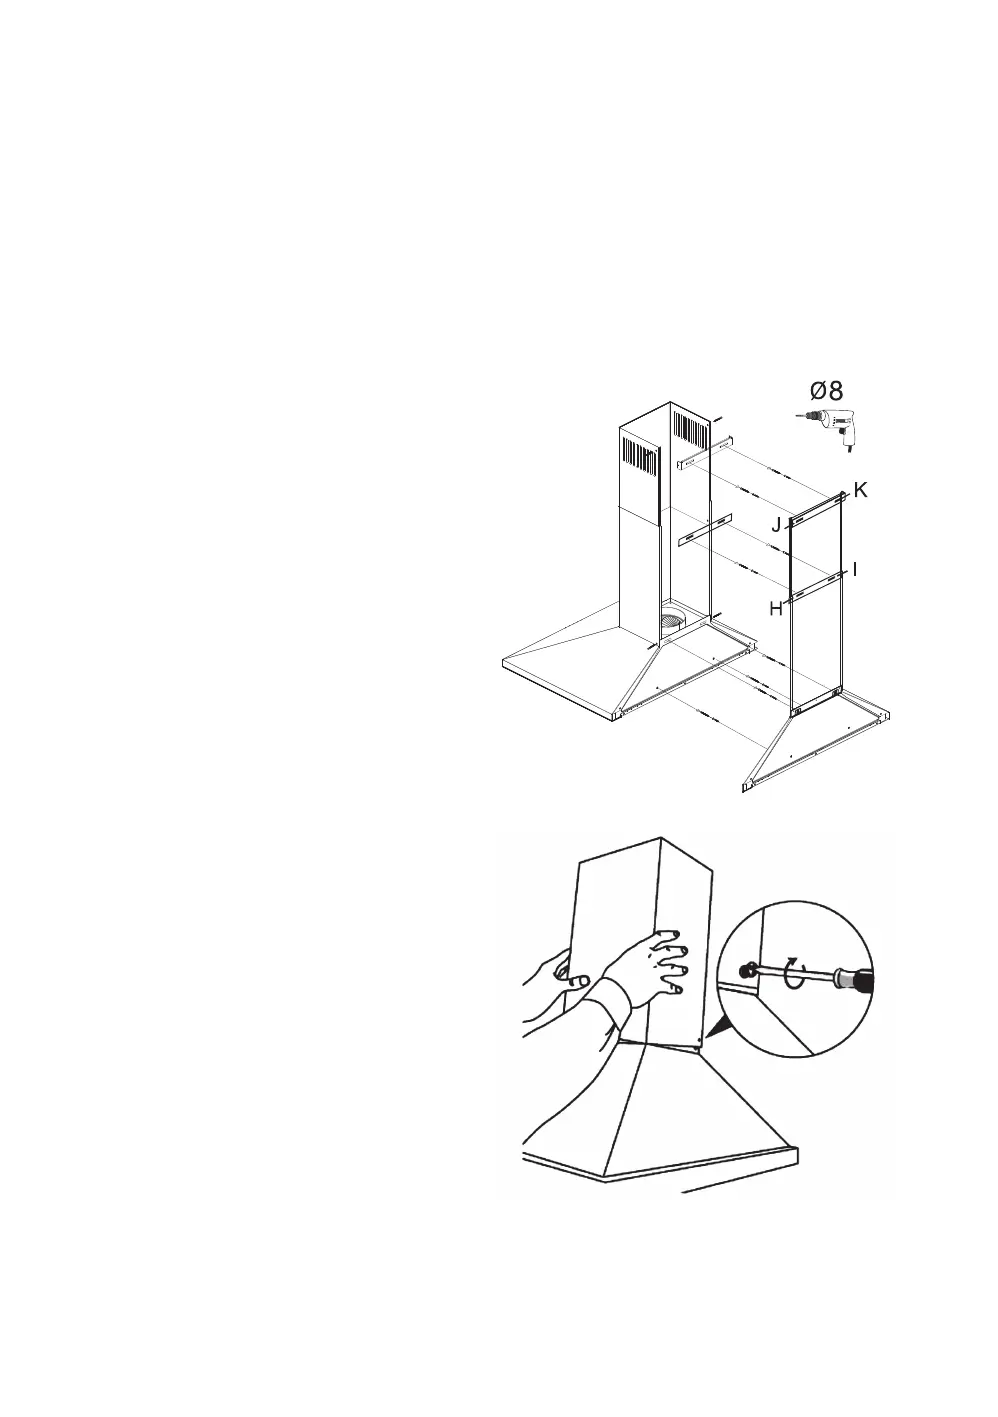
8. Mounting the Chimneys to Wall
Place the External Chimney over the Internal
Chimney and over the hood motor enclosure. Adjust
the height you want for the Internal Chimney. Mark
the positions "H" "I" "J" "K" as shown. Drill (H, I, J, K)
holes on marked points by using a Ф8 mm drill bit.
Push 4 pcs of plastic wall plugs into the drilled holes
(H, I, J, K).
Screw the External Chimney into Ф8 mm wall plugs
(H.I) fixed in the wall.
Screw the Internal Chimney into Ф8 mm wall plugs
(J, K) fixed in the wall.
9. For H,I,J,K holes; use 4X40mm screws. Screw
the internal chimney to the casing with 2 of the
supplied 4 x 8mm screw.
10. Ensure all protective coverings have been removed
from the metal surfaces prior to use.
11. Follow the operation instructions in this manual for
safe operation of this appliance.
8mm
8mm
8mm
8mm
8mm
L60_90CHDX17_IB_RC_190411_grace.indd 23 11/4/2019 3:52 PM
 Loading...