20
Door Removal
1. Turn off the oven and make sure that it is cold. Switch
off its isolation switch.
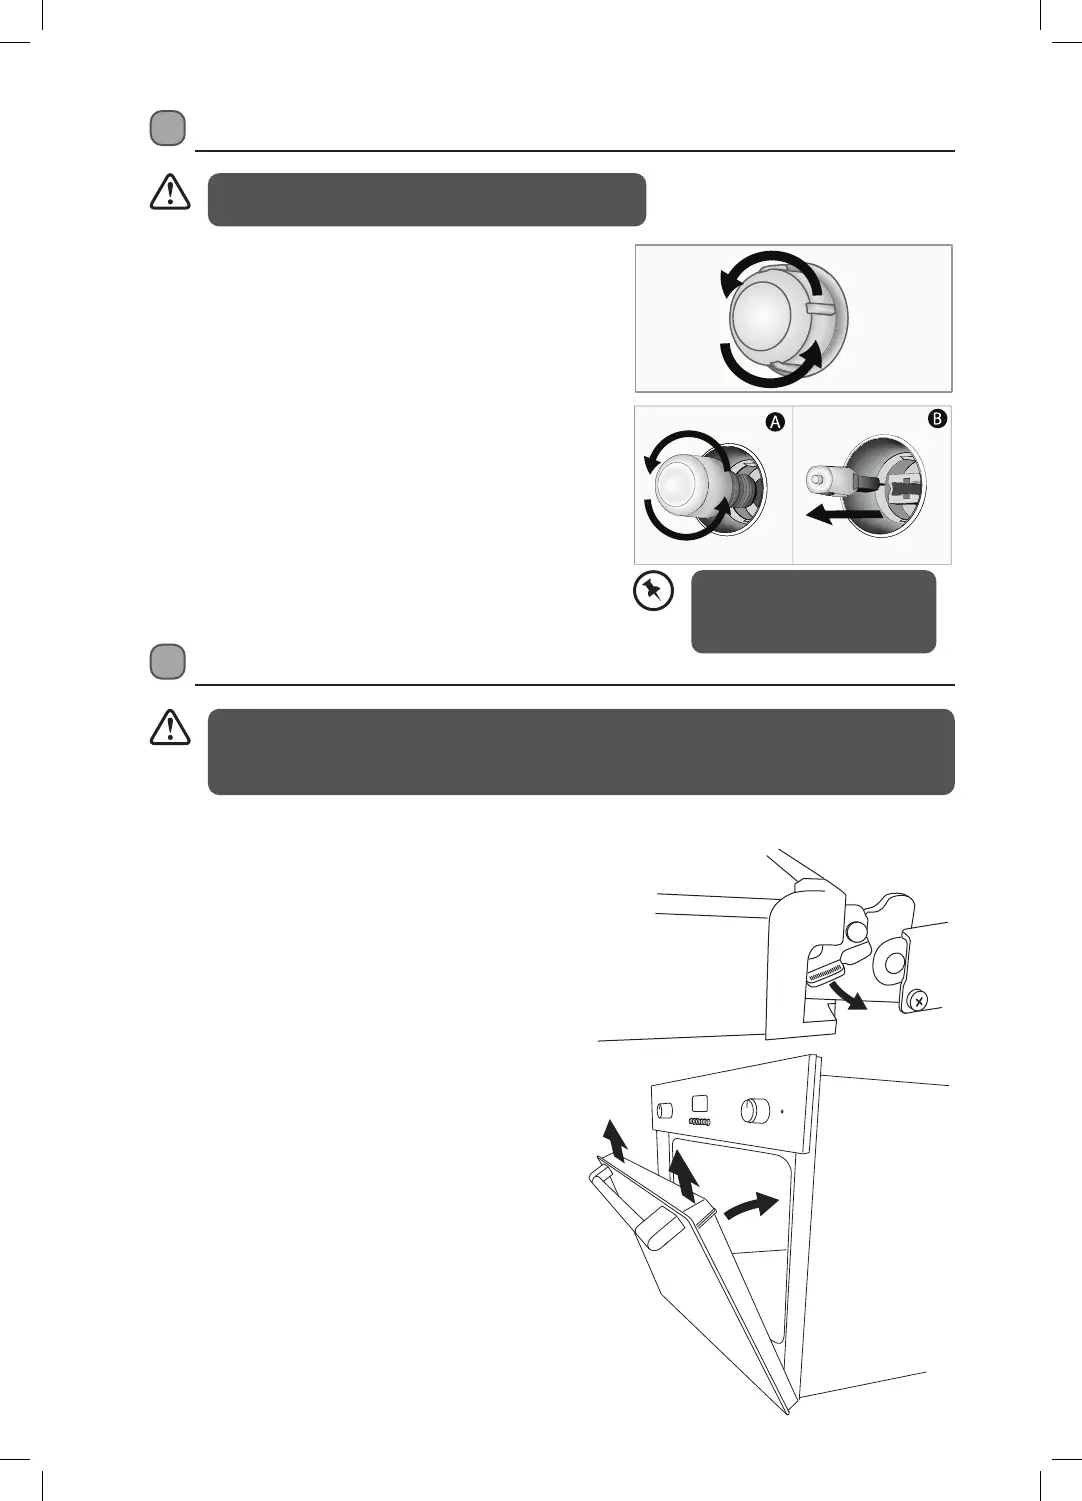
2. Turn the bulb cover anti-clockwise to remove the
cover. If your oven lamp is of type (A) shown in the
figure below, remove it by rotating as shown and
replace it. If it is of type (B), pull and remove it as
shown in the figure and replace it.
3. Insert the new bulb, which should be resistant to
300°C. For replacement bulbs contact your local
service centre or Partmaster Direct (details at the back
of this guide).
4. Re-fit the cover by turning clockwise.
5. If in any doubt, consult a qualified electrician for help.
Replacing the Oven Lamp
Ensure that the appliance is switched off before replacing
the light to avoid the possibility of electric shock.
• Take care when handling parts with glass, knocks, chips, heavy handling and dropping could cause
the glass to shatter.
• Allow the door to cool down before removing it.
It is possible to remove both oven doors. Follow the steps below to remove the door. This may be required if
easier access to the cavity is required or if you wish to clean the door parts.
1. Fully open the door.
2. Press down on the hinge clips on the left and right of
the door. You may need to use a pair of pliers as the
clips can be stiff.
3. Open the door half way.
4. Pull the door upwards, the door will
now release from the hinge.
To replace the door, repeat the above steps
in reverse order. Ensure to locate the hinge
correctly. Close the hinge clips on both
sides of the door. If the door does not close
properly, repeat the steps again.
Bulb specifications
Bulb A - 230V~ 50 Hz, 25W, E14
Bulb B - 230V~ 50 Hz, 25W, G9
Logik Electric Built in Oven LBMFMX17 Manual.indd 20Logik Electric Built in Oven LBMFMX17 Manual.indd 20 16/02/2021 13:5716/02/2021 13:57