9
A
P
U
T
O
A
P
U
T
O
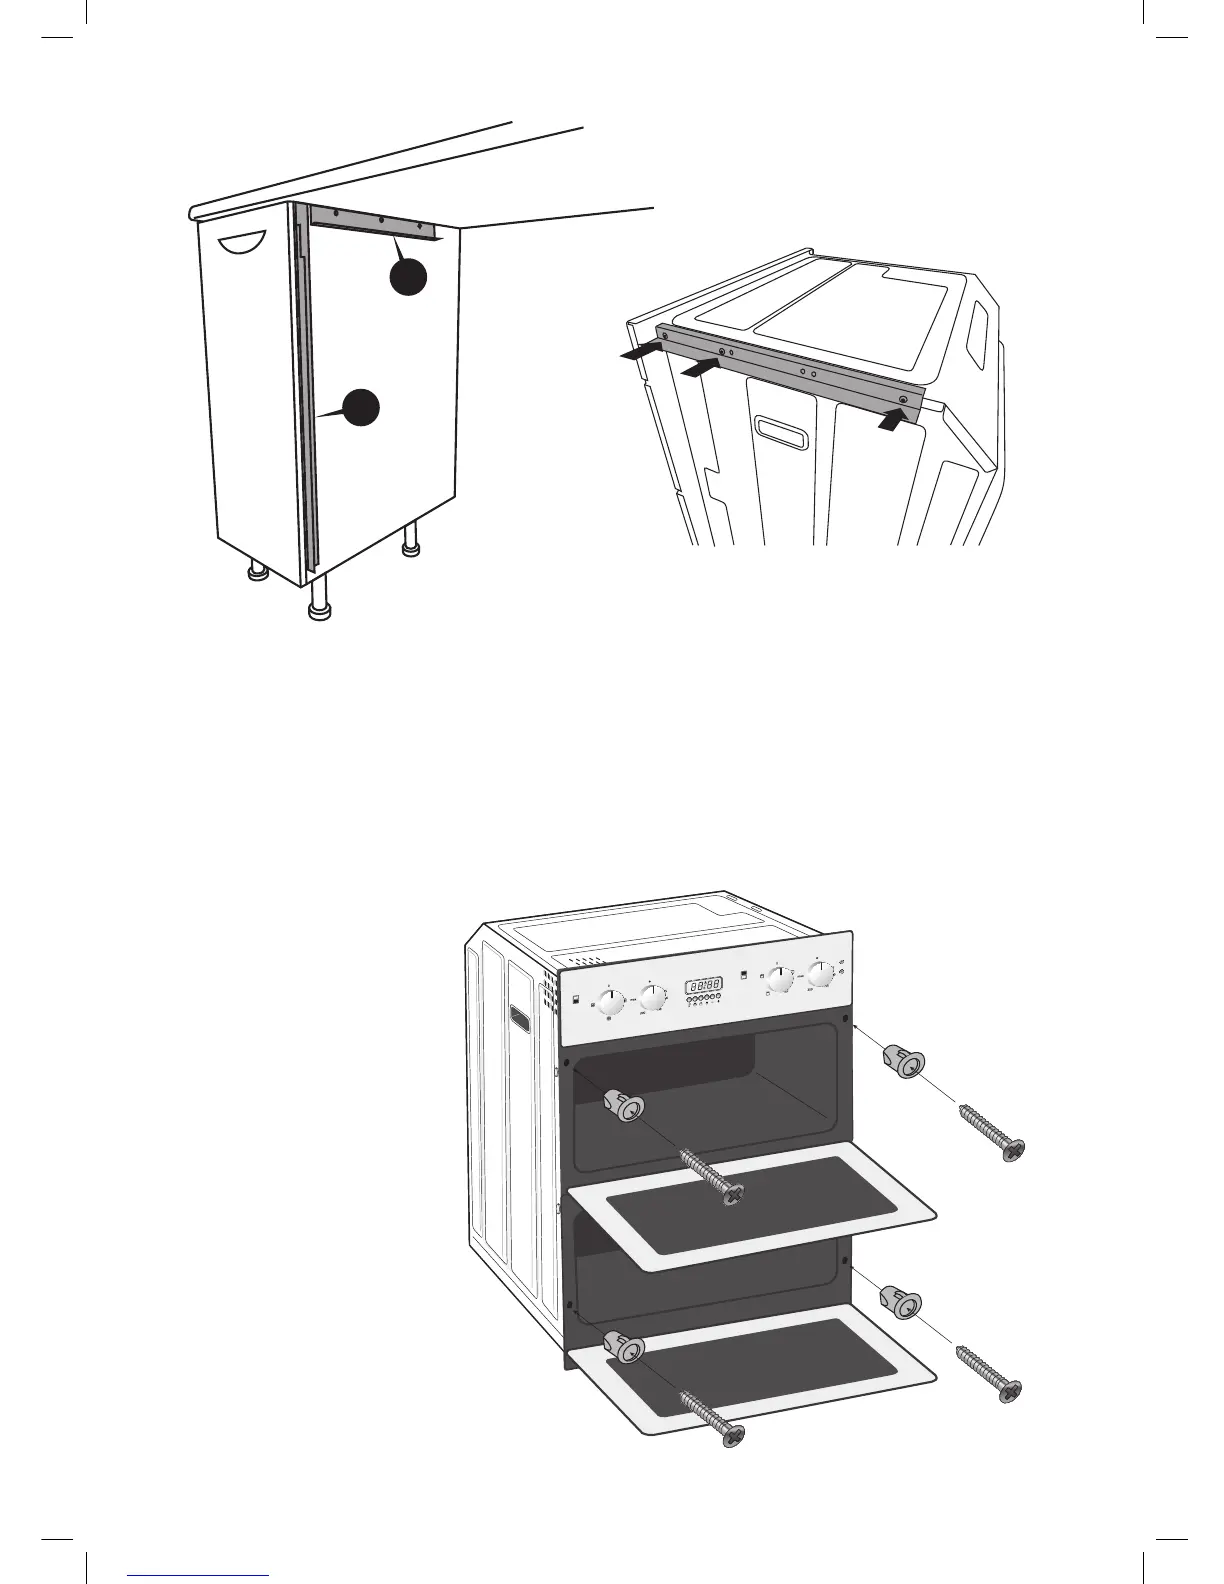
4. Lift and slide the oven onto
the brackets then pushing it
back into the space within
the cabinet. Take care not to
trap or kink the mains lead.
Open the oven doors and
insert the screw Inserts and
screws into the holes located
on the oven frame, tighten
the screws.
1. Align bracket A with the front edge of the
cupboard carcase. Attach with 2 screws.
2. Align bracket B with the under side of your
worktop. Place the bracket 50mm back
from the carcase front.
B
A
3. Remove the 3 screws in the top edge of the oven
and use these screws to attach bracket C to the
oven. Ensure the electrical connections have
been made.
LBUDOX16_IB.indd 9 09/06/2016 14:16