EasyManua.ls Logo

Logitech PM5 User Manual

Logitech PM5
7 pages
To Next Page IconTo Next Page
Page #1 background imageLoading...
Page #1 background image
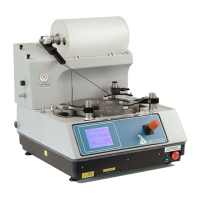
Lapping & Polishing System Logitech PM5 user manual
Eric (Mita Lab) 2017/05/08
Please, leave this manual here. You can nd an electronic version in the TakedaCR Wiki:
hp://takeda-cr.t.u-tokyo.ac.jp


               
 !
"#
$%
 !"#$%
$$#&'#(
$#""&'"$)*
$)&'$(+$
&'(
))
,$)-$
*
./+
+       

0+,
,-
1.%%

2/%-0
1%
*)
3$+,2
3'+34
*5

-
67
Question and Answer IconNeed help?

Do you have a question about the Logitech PM5 and is the answer not in the manual?

Logitech PM5 Specifications

General IconGeneral
BrandLogitech
ModelPM5
CategorySander
LanguageEnglish

Summary

Preliminary remarks

Emergency stop and safety warnings

Critical safety information including emergency shutdown and handling precautions for the equipment.

Description of the equipment

PP6 jig and measurement instruments

Covers the PP6 jig, dial gauge, and load adjuster.

Preparations

Plate and roller arm installation

Mounting the processing plate and setting the roller arm height.

Machine operational configuration

Selecting process, jig type, arm control, and sweep.

Sample fixing and load adjustment

Sample mounting with wax

Applying wax, placing sample, and securing it.

Wax solidification and jig load calibration

Waiting for wax to set and calibrating the PP6 jig load.

Polishing

Polishing process execution

Setting parameters, positioning jig, and starting the polishing cycle.

Lapping

Lapping operation and slurry management

Increasing speed, adding slurry, and managing the process.

Unload the sample

Wax melting and sample removal

Heating the plate to melt wax and removing the sample.

Recipe Guide