Do you have a question about the Lorenz Excalibur 7 Speed and is the answer not in the manual?
Essential operational precautions including water resistance, heat exposure, and polarity.
Explains key notation, command sequences, and terminology used throughout the manual for clarity.
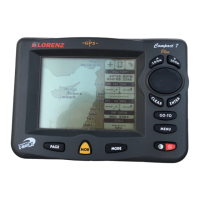
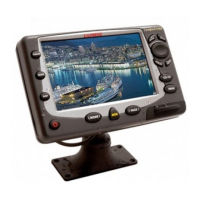
Details the chartplotter's core functionalities, design, and primary applications in navigation.
Describes the function and operation of each key on the chartplotter's control panel.
Step-by-step instructions for powering the device on and off safely and correctly.
Guides users on how to adjust display brightness and contrast for optimal viewing.
Specific instructions for connecting an external GPS receiver to the chartplotter for positioning data.
Guidance on wiring and configuring an autopilot system to interface with the chartplotter.
Instructions for connecting other NMEA 0183 compatible devices to the chartplotter.
Step-by-step guide on how to properly insert a C-CARD into its slot.
Instructions on how to safely eject a C-CARD from its slot.
Guides users on customizing the chart display layout and information shown on screen.
Explains how to configure the screen to display charts and text data in different layouts.
Allows setting or disabling the course vector display for navigation reference.
Explains the screen amplifier function for map positioning relative to the vessel's direction.
Guides on switching between Basic and Advanced modes to access more functions.
Controls the display of user point names and symbols on the chart.
Sets the data format for serial input on ports 1, 2, and 3, including NMEA settings.
Configures the serial port output interface, selecting NMEA formats for data transmission.
Customizes which NMEA-0183 sentences are transmitted on each serial port.
Allows configuring connected GPS receivers, including internal GPS enable/disable and restart.
Details the procedure for placing A, B, C, and D points on the chart for navigation segments.
Shows how to view distance and bearing information when a navigation target is set.
Describes where the Time To Go (TTG) value is displayed for a set navigation target.
Guides on how to remove a set navigation target from the chart display.
Accesses the menu for configuring various map display settings and preferences.
Allows setting the map to a panoramic perspective view for enhanced situational awareness.
Guides on selecting display palettes to optimize visibility under different lighting conditions.
Explains how to view associated pictures for cartographic objects in Quick and Full Info modes.
Locates and displays the nearest available facilities or services based on type.
Enables searching for ports by name or within a specified range on the C-CARD.
Locates and displays the nearest tide stations, with an option to view their tide graphs.
Searches for nearby wrecks and allows locating selected wrecks on the chart.
Details how to activate the MOB function, marking the vessel's current position.
Explains the process for deactivating and clearing the MOB marker.
Covers advanced operations for creating, managing, and using routes and waypoints.
Explains how to add, delete, move, and find waypoints for navigation planning.
Step-by-step instructions for adding a new waypoint at the cursor's current position.
Guides on choosing an active route from the list of stored routes.
Details the process for permanently removing a selected route.
Explains how to reverse the direction of a route for navigation purposes.
Allows viewing a detailed report summarizing a selected route's waypoints and data.
Details how to place, manage, and find marks on the chart for later reference.
Step-by-step instructions for placing a new mark at the cursor's current position.
Explains how to remove a selected mark from the chart.
Allows setting a mark as a navigation target, displaying bearing and distance.
Details how to place an event directly at the vessel's current position.
Explains how to remove a selected event from the chart.
Allows setting an event as a navigation target, showing bearing and distance.
Guides on modifying an event's name and symbol.
Details how to insert A, B, C, D points, including creating segments and information windows.
Explains how to delete individual A, B, C, or D points from a segment.
Guides on deleting an entire A-B-C-D segment, including all its points.
Describes how to reposition A, B, C, or D points to new locations on the chart.
Allows selecting which of the available tracks will be actively recorded or displayed.
Explains how to turn track recording on or off, requiring a valid GPS fix.
Guides on enabling or disabling the visual display of recorded tracks on the chart.
Allows choosing the visual style (pattern, color) for displayed track lines.
Guides on saving marks, events, routes, or tracks to the User C-CARD.
Explains how to load previously saved data files from the User C-CARD.
Details how to remove files from the User C-CARD to free up space.
Guides on preparing a new User C-CARD for use by formatting it.
Explains the operational mechanism of the C-Link system and its requirements.
Covers the operational modes and data exchange within the C-Link system.
Explains the basic principles and data exchanged during C-Link navigation transfers.
Describes the physical serial cable connection required for C-Link functionality.
Configures the chartplotter to operate as the master unit sending navigation data.
Accesses general chartplotter settings, including auto info and time references.
Configures the chartplotter to use UTC or local time for its internal clock.
Allows selection between 12-hour and 24-hour time display formats.
Allows enabling or disabling corrections to the positioning system for improved accuracy.
Explains how to calculate and store position corrections from the positioning instrument.
Guides on manually adjusting the fix position using coordinates and an offset value.
Enables a position filter to stabilize the vessel's position and smooth the track.
Allows selection of preferred coordinate systems like Lat/Lon, UTM, or TD.
Guides on selecting the appropriate datum for accurate position fixing and mapping.
Allows selection of bearing display between magnetic and true North.
Guides on calculating magnetic variation automatically or manually.
Explains how to calibrate the compass using the chartplotter's variation table.
Allows setting an alarm to trigger when the vessel approaches a waypoint or route.
Enables an alarm for Cross Track Error, alerting when deviating from a planned course.
Configures an alarm to detect anchor dragging by monitoring distance from a saved position.
Allows setting an alarm to trigger when a specific depth threshold is reached.
Guides on activating and configuring the chartplotter simulator for training.
Allows setting the vessel's speed within the simulator for practice.
Allows setting the vessel's heading within the simulator for practice.
Displays physical dimensions and specifications for different chartplotter models.
Lists common issues and their corresponding troubleshooting steps for resolution.
Explains how to access the chartplotter's built-in online help system.
Provides guidance on seeking further assistance from dealers or support.
Accesses RAM tests and options to clear memory and restore default settings.
Allows adjustment of screen contrast and backlight settings.
Guides on checking C-CARD connectors and testing background ROM.
Chartplotter operating mode offering expanded functionality and features.
The height of the GPS antenna above mean sea level.
Estimated time of arrival at the destination based on current speed and track.
Areas requiring special mariner attention due to hazards or regulations, marked with a symbol.
Lists technical specifications including physical, electrical, and GPS performance characteristics.
Details physical attributes like color, dimensions, weight, and cable specifications.
Outlines electrical parameters such as input voltage and power consumption.
Specifies GPS performance metrics like geodetic datum, channels, and frequency.
Guides on selecting a location and installing the GPS antenna, including drilling instructions.