c
Before You Start:
• Make sure you
have a router
and high-speed
Internet access
(not included).
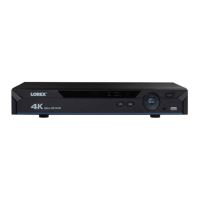
LNR6100 SERIES
Congratulations! You can now connect over the Internet to view and playback video on your computer.
• Connect your NVR
to your router
using an Ethernet
cable (see the
Quick Connection
Guide for details).
• Upgrade your NVR
firmware and client
software or mobile
app to the latest
versions.
LNR6100_QNG_EN_R1
PC / Mac Setup
a
• PC Users: Download and install the FLIR Cloud Client
Software for PC from lorextechnology.com.
Download and install the client software:
• Mac Users: Download and install the FLIR Cloud Client
Software for Mac from lorextechnology.com. Double-
click to extract the software, then drag the software to
Applications.
b
c
Once installation is finished, double-click the
FLIR Cloud Client™ icon (
) on the desktop or
Applications list.
Find Your Device ID
Record your information below:
DEVICE ID:
2
The Device ID is printed on a label on the top panel of the NVR.
Device ID: xxxxxxxxxxx
1
2
• Please note that an upload
speed of 2 Mbps is required
for remote video streaming
(3 Mbps and above
recommended). Up to 3
devices may connect to the
system at the same time.
Log into the Client Software using the user name
(default: admin) and password (default: admin) and
then click Login.
e
4K Network Video Surveillance Recorder
LNR6100 Series
Quick Networking Guide
User Name: admin
Password: admin
d
Click Add Device.
1
2
3
4
5
Enter the following information:
Device Name: Choose a name for your system.
Device ID: Manually enter the Device ID printed on the label.
Client Port: Enter the Client Port (default: 35000).
User Name: Enter the NVR’s User Name
(default: admin).
Password: Enter your new, secure password recorded on the
Quick Connection Guide.
1
2
3
4
5
Click Add.
EXAMPLE
f
Click then .
g
Click and drag Default Group to the display
window to open your cameras in live view.