EasyManua.ls Logo

Lorex N862 Series - User Manual

Lorex N862 Series
2 pages
Print Icon
To Next Page IconTo Next Page
Loading...
N862_QSG_EN_R1
Test your cameras prior to selecting a permanent mounting location by temporarily
connecting the cameras and cables to your NVR using one of the following 2 methods:
a. Connect cameras directly to the recorder (recommended).
N862 Series
Quick Setup Guide
Physical setup of recorder and essential system settings
b. Connect cameras to a PoE switch or router on your network (not included).
1 / 2
Connect the recorder to your router using the included Ethernet cable.
NOTES:
It may take up to 1 minute for cameras to start up and transmit video to your recorder.
This guide covers connecting IP cameras to your security recorder only. For full instructions on
installing your cameras, please refer to your cameras documentation at lorex.com.
Connecting cameras to a router, or a network switch without PoE, requires a power adapter for
each camera. Refer to your cameras documentation at lorex.com for the correct power adapter
model number.
OR
NOTES:
If you are using a PoE switch, ensure the switch is connected to the same network as your
recorder.
To receive automatic rmware updates and enable remote viewing with mobile apps, a high
speed Internet connection is required (minimum upload speed of 5Mbps required for 4K viewing;
3.5Mbps for lower resolutions). All other system features can be used without an Internet
connection.
Copyright © 2020 Lorex Corporation
As our products are subject to continuous improvement, Lorex reserves the right to modify product design, specications
and prices, without notice and without incurring any obligation. E&OE. All rights reserved.
Need Help?
Visit us online for up-to-date software
and complete instruction manuals
Click on the Downloads tab
4
Visit lorex.com
Search for the model
number of your product
Click on your product
in the search results
3
2
1
See the steps below (expanded instructions to the right) to complete initial setup of the
recorder:
* Not included / sold separately.
For camera compatibility information, visit lorex.com/compatibility.
STEP 1:
Connect cameras*
STEP 3:
Connect router*
STEP 4:
Connect mouse
STEP 5:
Connect power
STEP 2:
Connect monitor*
Overview of extra ports:
NOTE: For full instructions on using the extra ports, please refer to your security recorder’s instruction
manual at lorex.com.
Audio In/Out
Connect microphone / speaker*
Setting Up Your Recorder
4K Ultra HD Security NVR
Package Contents
Dimensions
s
STEP 1: Connect cameras*
Connect the recorder to a monitor using the included HDMI cable or a VGA cable (not
included). The HDMI port supports up to 4K resolution, and VGA supports up to 1080p.
Connect the included mouse to a USB port on the recorder.
Use the included power adapter to connect the recorder to a nearby outlet. Turn the recorder
on using the power switch on the back panel.
OR
IMPORTANT: To optimize picture quality, set the recorder’s video output to match the resolution of your
monitor. See the section Changing the Recorder’s Output Resolution on the rear for details.
Back panels shown below are for illustration only. Your recorder’s back panel
may appear different, with all the same ports in different locations.
STEP 3: Connect router*
STEP 4: Connect mouse
STEP 2: Connect monitor*
STEP 5: Connect power
14.7” / 375mm
12.9” / 327mm
2.1”
53mm
RS232
Connect access control systems*
Alarm Block
Connect alarm devices*
STEP 6:
Lorex Setup
Wizard
Record your password below and store in a secure place:
When you rst power up your recorder, the
Lorex Setup Wizard will begin. The Wizard will help you
congure core system settings.
You will also create a secure password. For future reference,
it is recommended that you record your password here:
STEP 6: Lorex Setup Wizard
To quickly open a window that displays vital system information such as device ID, model
number, rmware version, and IP address:
Reference: Quick Access to System Information
Tap the button on the front panel of the recorder.
Right-click to open the Quick Menu and click Info.
OR
USB MouseEthernet CablePower Cable HDMI Cable
Lorex Fusion supports connectivity with select wireless devices to the NVR. To learn more
about fusion connectivity and which Lorex devices are compatible with this feature, visit
lorextechnology.com/articles/fusion.
Lorex Fusion
Question and Answer IconNeed help?

Do you have a question about the Lorex N862 Series and is the answer not in the manual?

Summary

Quick Setup Guide

Connect Cameras

Connect cameras to the NVR using either direct connection or a PoE switch/router for initial testing.

Connect Monitor

Connect the NVR to a monitor using an HDMI or VGA cable for video output.

Connect Router

Connect the NVR to your network router using an Ethernet cable for internet access.

Connect Mouse

Connect the included USB mouse to the NVR for system navigation.

Connect Power

Connect the NVR to a power outlet using the included adapter and power it on.

Lorex Setup Wizard

Follow the on-screen wizard to configure core system settings and create a password.

Using the Mouse

Quick Menu

Access system functions like Main Menu, Playback, and Camera Settings by right-clicking the live view screen.

Smart Motion Detection & Deterrence Settings

Playback and Search

Adding Cameras from the LAN

Backup

Changing the Recorders Output Resolution

Overview

This document describes the setup, operation, and maintenance of the Lorex N862 Series 4K Ultra HD Security NVR. It serves as a quick start guide for physical setup and essential system settings, followed by more detailed instructions for advanced features.

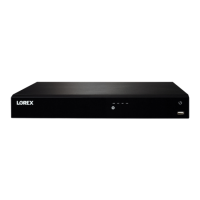
The Lorex N862 Series NVR functions as a central recording unit for a security camera system, capable of managing and storing video footage from multiple cameras. It supports 4K Ultra HD resolution, providing high-quality video surveillance. The system is designed for both local and remote viewing, offering flexibility in how users monitor their property.

Initial Setup and Connectivity:

The initial setup involves connecting cameras, a monitor, a router, and a mouse to the NVR. Cameras can be connected directly to the recorder (recommended) or via a PoE switch or router on the network. The NVR supports both HDMI (up to 4K) and VGA (up to 1080p) for monitor connectivity. An Ethernet cable connects the NVR to a router for network access, enabling remote viewing and firmware updates. A USB mouse is used for navigating the system's interface. The NVR is powered by an included adapter.

Upon the first power-up, the Lorex Setup Wizard guides users through configuring core system settings and creating a secure password. It's recommended to record this password for future reference.

Core System Features and Usage:

  • Mouse Control: The mouse is the primary input device for navigating the NVR's interface. In split-screen display mode, clicking a channel expands it to full-screen, and clicking again returns to split-screen. During live view, clicking anywhere on the screen opens the Quick Menu. The scroll wheel allows for zooming in/out during live view.
  • Quick Menu: The Quick Menu, accessed by right-clicking in live view, provides quick access to essential functions such as the Main Menu, playback, PTZ controls (if applicable), camera registration, manual recording, face preview (with compatible cameras), auto-focus controls (if applicable), camera settings, system information, sequence mode, and options to disable audible warnings.
  • Smart Motion Detection & Deterrence: This feature allows users to configure smart motion detection for persons and vehicles, as well as active deterrence settings with compatible cameras. Users can define specific detection areas and set weekly schedules for when these features are active. The system can trigger warning lights and sirens on deterrence cameras when motion is detected.
  • Playback and Search: The NVR allows users to search and play back recordings stored on the hard drive. Users can select specific dates from a calendar, choose channels, and specify video quality (Main Stream or Sub Stream). Playback starts immediately at the selected time on the video bar.
  • Adding Cameras: Cameras can be added to the system either directly to the NVR's PoE ports or from the local area network (LAN) if they are connected to a router or switch on the same network as the NVR. The Camera Registration menu facilitates searching for and adding new cameras, with status indicators showing successful connections.
  • Output Resolution Adjustment: The NVR automatically matches the resolution of the connected monitor upon first use. Users can manually adjust the output resolution through the Display settings in the Main Menu to match the highest resolution supported by their monitor (e.g., 4K or 1080p).
  • Lorex Fusion: This feature enables connectivity between the NVR and select wireless Lorex devices, expanding the system's capabilities.
  • Quick Access to System Information: Users can quickly view vital system information (device ID, model number, firmware version, IP address) by tapping a button on the front panel of the recorder or by right-clicking to open the Quick Menu and selecting "Info."

Maintenance Features:

  • Firmware Updates: The NVR supports automatic firmware updates when connected to a high-speed internet connection, ensuring the system remains up-to-date with the latest features and security enhancements.
  • Backup: Recordings can be backed up from the NVR's hard drive to a USB flash drive. Users can search for specific recordings by channel, type, quality, and time range, then select files for backup. The system also offers a "Onekey Backup" option to back up all matching files.
  • Password Management: The system prompts users to create a secure password during the initial setup and provides recommendations for recording it for future reference. This is crucial for maintaining system security.

Important Notes:

  • A high-speed internet connection (minimum 5Mbps upload for 4K viewing, 3.5Mbps for lower resolutions) is required for automatic firmware updates and remote viewing via mobile apps. However, other system features can be used without an internet connection.
  • For optimal camera positioning for person and vehicle detection, users should refer to their camera's documentation.
  • For full instructions on using extra ports (Alarm Block, RS232, Audio In/Out), users should refer to the security recorder's instruction manual.
  • Lorex continuously improves its products, reserving the right to modify product design, specifications, and prices without notice.

Lorex N862 Series Specifications

General IconGeneral
Video OutputHDMI, VGA
SeriesN862
TypeNetwork Video Recorder
Video Input8 channels
Recording ResolutionUp to 4K (8MP)
Operating SystemLinux
Remote ViewingLorex Home App
ONVIF CompatibilityYes