Step Two: Place or mount the camera
6
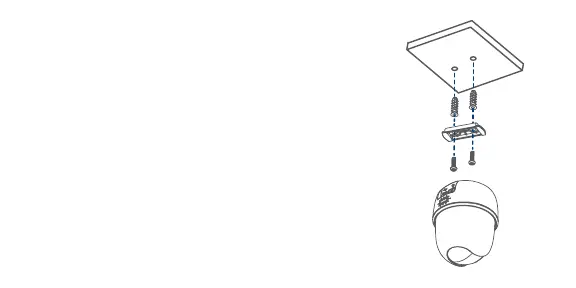
1. Use the mounting template to mark two holes for screws.
2. Drill the holes using a
(6mm) drill bit. If mounting to
masonry or drywall, gently tap the anchors into the holes.
3.
4. Use a Phillips screwdriver and two screws to secure the
mounting plate to the mounting surface.
5. Twist the camera’s base clockwise onto the mounting plate.
6. Open the camera’s settings on the app and enable Image
Rotation
below to mount it to an indoor ceiling.
 Loading...