4 Second Tier
3
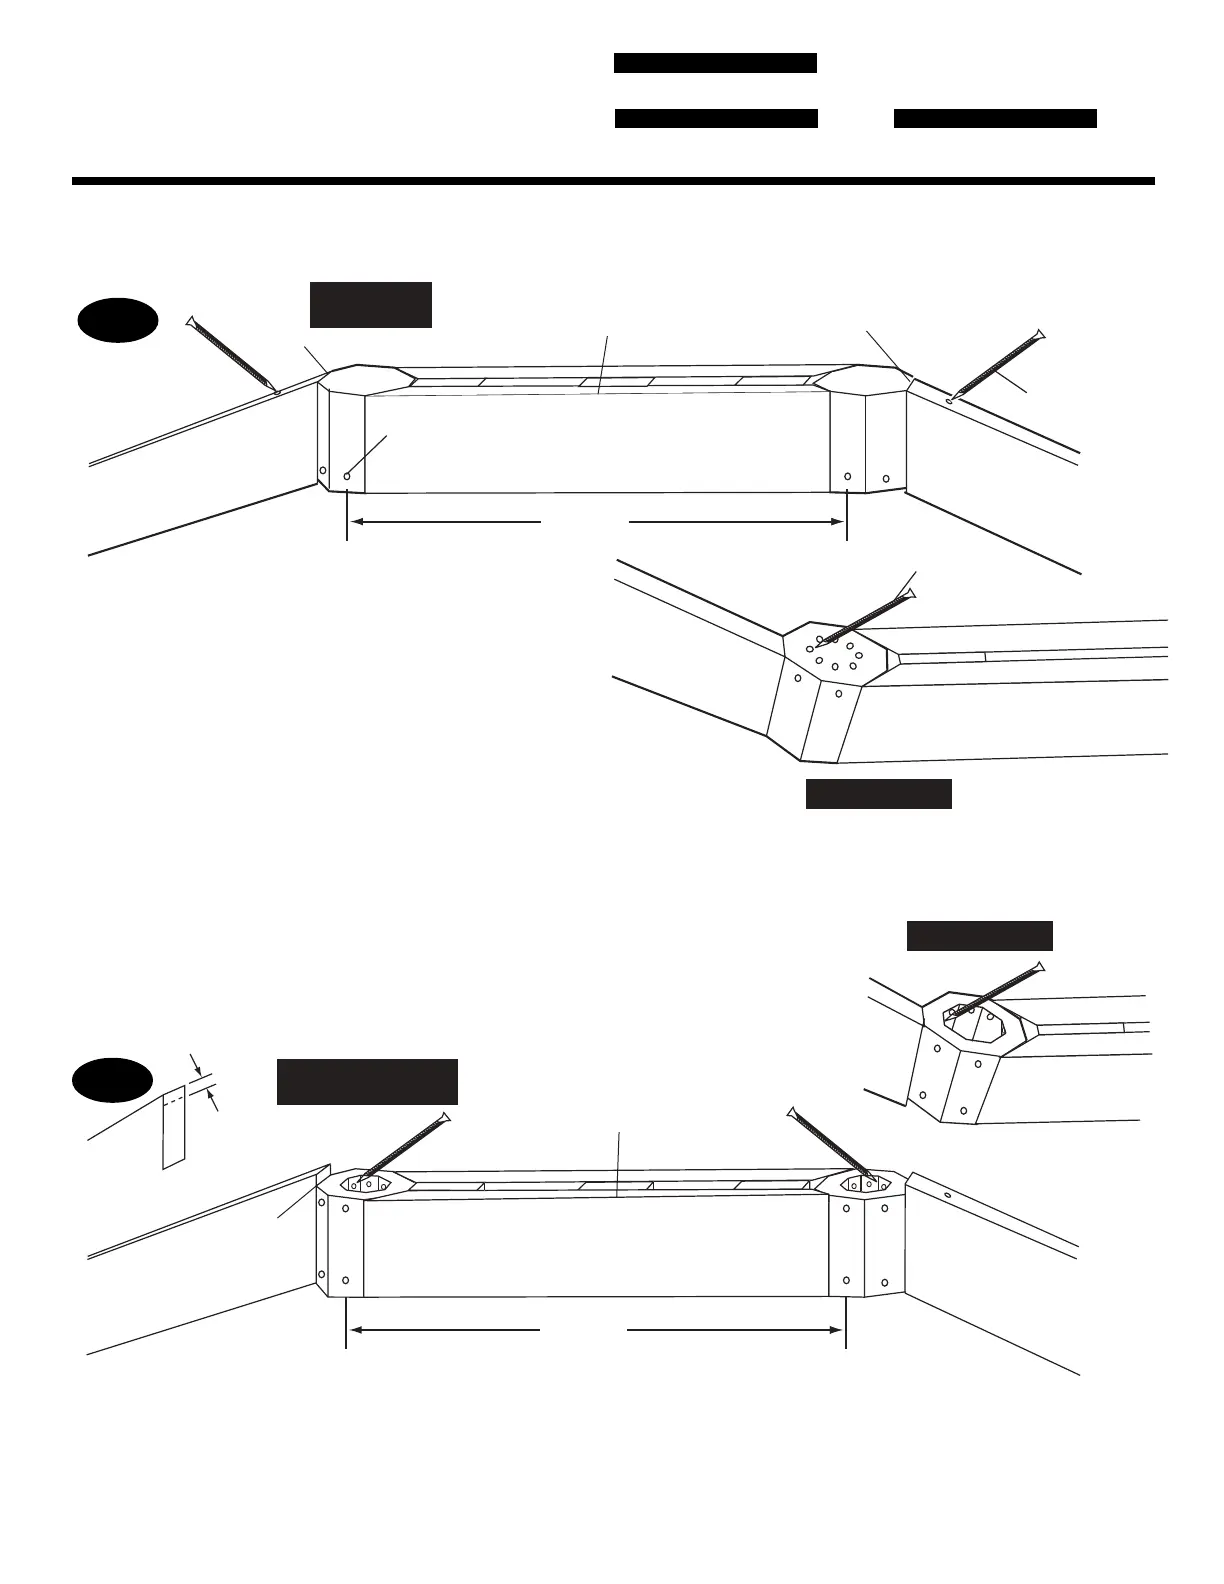
SECOND TIER
ERECTING RAFTERS
❑ 12 pcs. Rafters 2 x 4 x 27”
❑ 1 pc. Assembled Ridge from 2-A
PARTS LIST 10’ GAZEBO
PARTS LIST 12’ GAZEBO
❑ 14 pcs. Rafters 2 x 4 x 33-1/8”
❑ 1 pc. Assembled Ridge from 2-A
❑ 16 pcs. Rafters 2 x 4 x 38-5/8”
❑ 1 pc. Assembled Ridge from 2-A
PARTS LIST 14’ GAZEBO
10' GAZEBO
TOP VIEW
3" Screw
RafterRafter
Flush
at top
Flush to Top
Keep Center Rafter
Flush to Top
10' Gazebo
Ridge Block Eight
Pre-Drilled Holes
Facing Down
44-3/4"
3-A
3-A: For a 10’ Second Tier, assemble Rafters (with
predrilled holes facing up) by joining two Rafters
on opposite sides to Ridge Block (with predrilled
holes in Ridge Block Assembly facing down) using
3” screws through predrilled hole in top of Rafter.
Once two Rafters are connected to Ridge Block,
carefully turn over and attach 3” screws through
predrilled holes in Ridge Block into Rafter. The 10’
Monterey has twelve Rafters.
3-B
RafterRafter
12' & 14' GAZEBO
TOP VIEW
3" Screws
Maintain
1/2"
Space
3" Screws
1/2"
Mark
Keep Center Rafter
1/2" above Top
44-3/4"
If you are assembling a 12’ or 14’ Second Tier, please begin with step 3-B, if you are assembling a 10’ Second
Tier, please go to step 3-A. Note: Step 3-A and 3-B only show the method for securing rafters to ridge as-
sembly. Follow step 3-C for layout and attachment to Gussets.
3-B: For 12’ and 14’ Gazebo, assemble Rafters by joining two Rafters on opposite sides to Ridge Block As-
sembly using 3” screws through predrilled hole in top of Hollow Center Block. Leave a 1/2” gap between the
top of the rafter and the Ridge block.
Once two Rafters are connected to Ridge Block Assembly, carefully turn over and attach 3” screws through
predrilled holes in Ridge Block into Rafter. The 12’ has fourteen Rafters and the 14’ has sixteen Rafters.
BOTTOM VIEW
3" Screw
BOTTOM VIEW
3" Screws
 Loading...