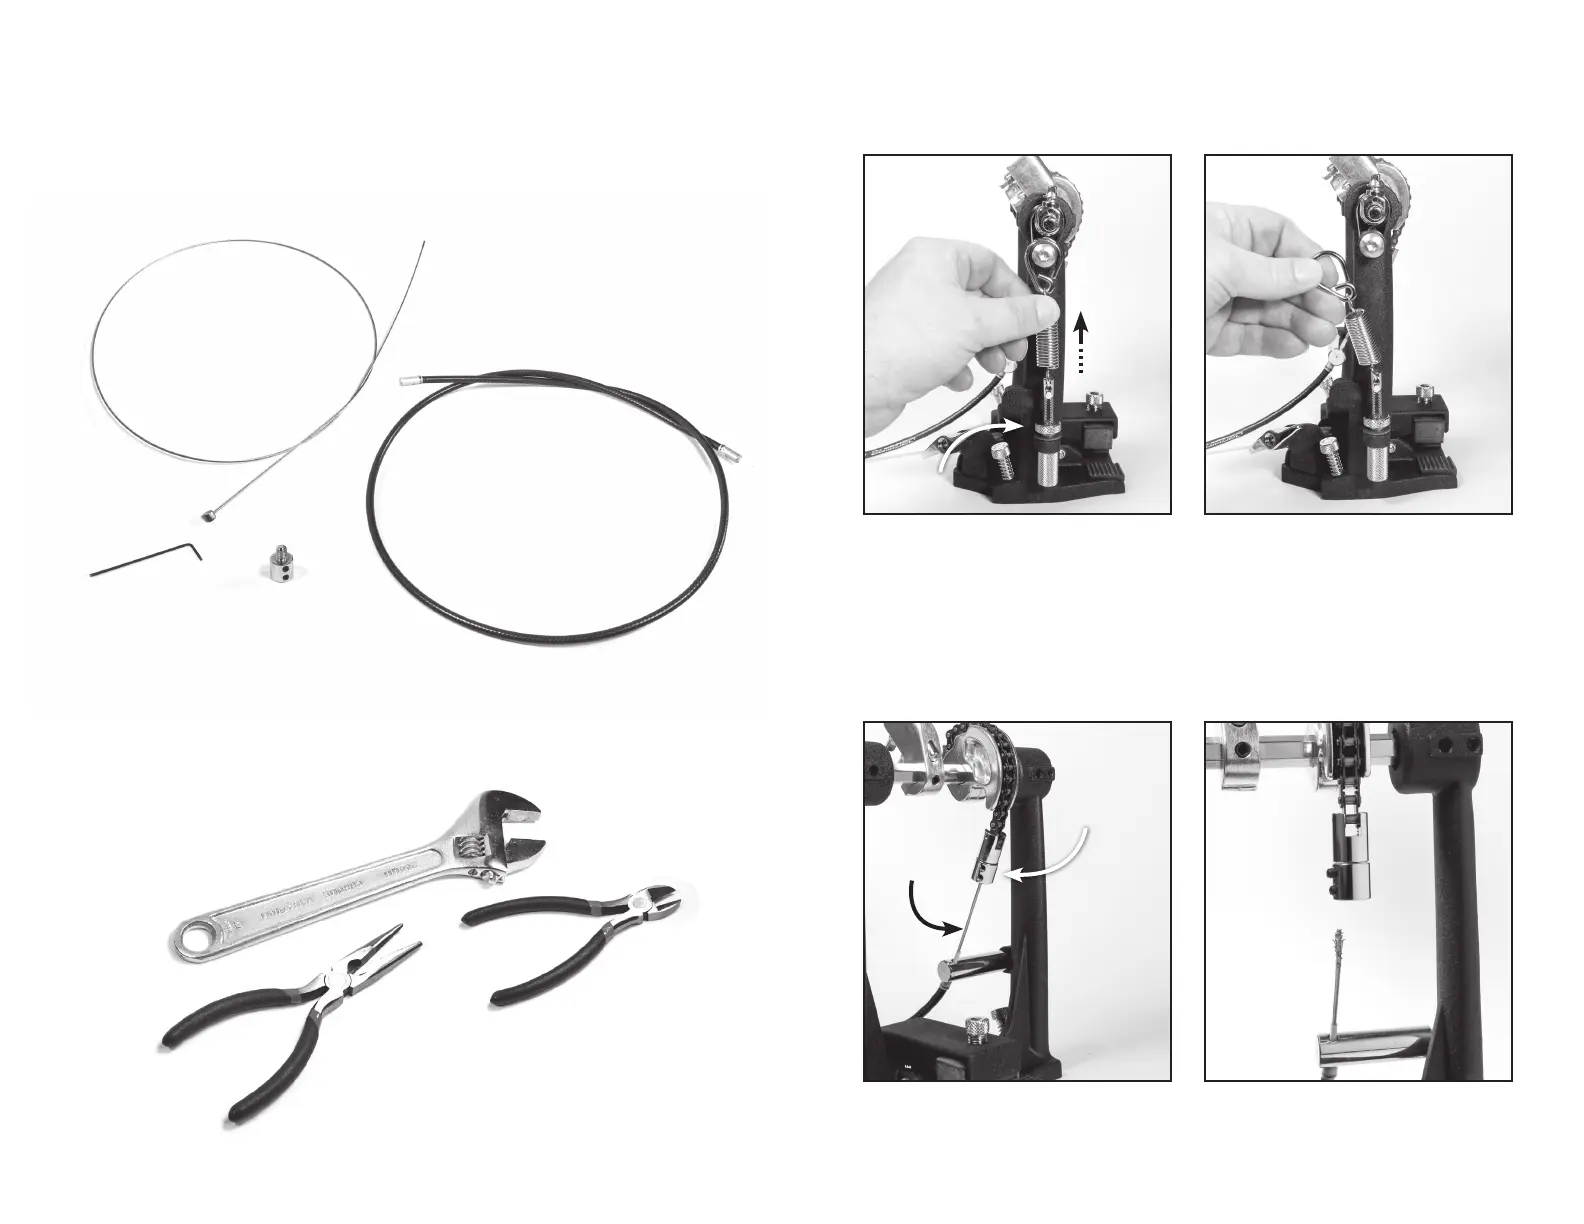
STEP 1
Pull the top end of the tension spring upwards and away from the beater frame, and remove the spring
attachment hanger from the black bearing ring, as shown in Figures 1.1 and 1.2. If it is too difficult to
pull the spring upwards, try loosening the tension adjustor at the bottom of the spring.
Figure 1.1
Figure 2.1
Figure 1.2
Figure 2.2
STEP 2
Use the included the 2mm hex key to loosen both retention screws on the cable attachment barrel
(see Figure 2.1). You do not need to pull the screws all the way out of the barrel. Once you have
loosened the retention screws, the cable may fall out of the barrel on its own (see Figure 2.2), causing
the footboard to drop. TO AVOID INJURY, KEEP YOUR FINGERS CLEAR OF THE FOOTBOARD WHILE
YOU ARE LOOSENING THE RETENTION SCREWS.
2 3
Pull up
on spring
Tension
adjustment
Loosen set screws
If old cable
cannot be
pulled out,
cut here...
...then twist apart
just above set
screws and
replace bottom
piece
You will need the following items to install your replacement cable:
INCLUDED WITH REPLACEMENT KIT:
• Steel cable
• Black, vinyl cable housing
• 2mm hex key
• Bottom piece for Cable Attachment Barrel
NOT INCLUDED:
• Adjustable crescent wrench or ¾-inch wrench
• Needle-nose pliers
• Small wire cutters (if needed)
 Loading...