10
LR600
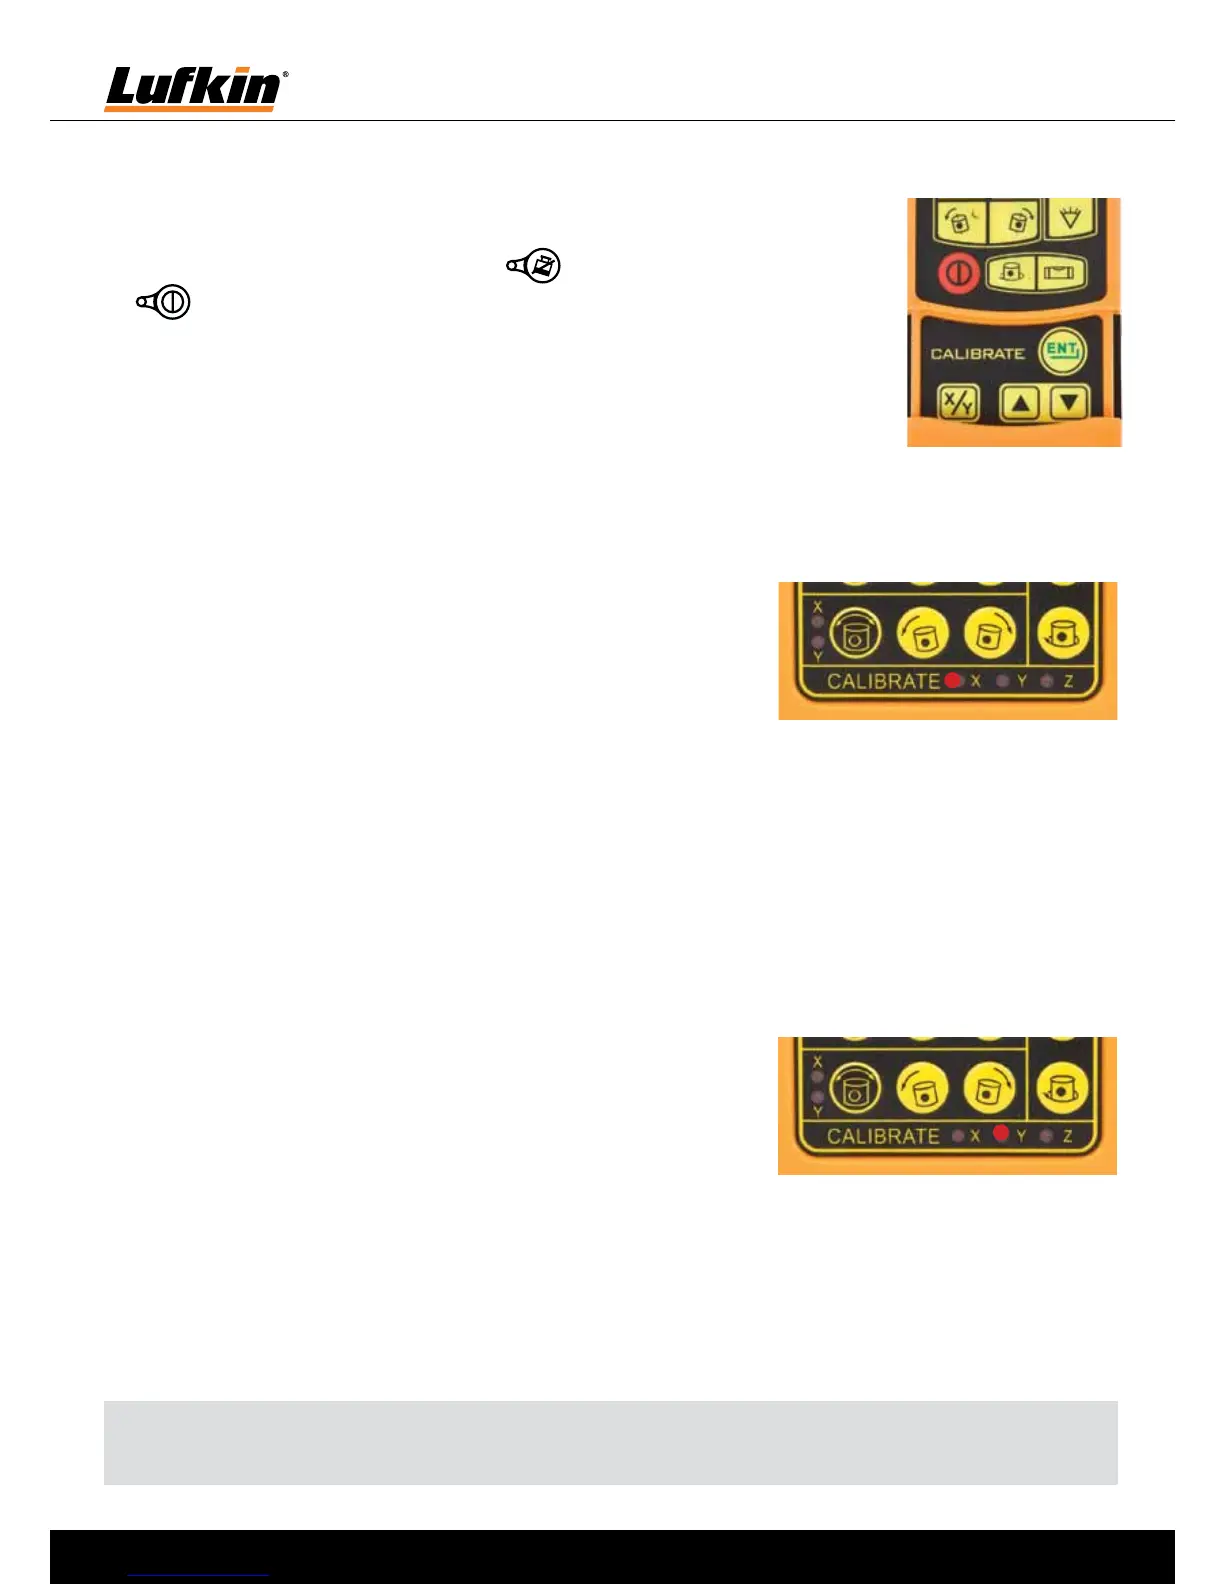
Calibration Adjustment
1. Switch the LR600 off.
2. Hold down the safety mode button and briefly press on/off button
. Keep holding the safety mode button down until the LED’s on the
control panel flash 2 times. (Approximately 10 seconds).
3. Calibration adjustments are all made using the calibration panel on the
remote control.
X Axis Adjustment
1. Turn the LR600 so that the X axis faces a wall or post (reference surface).
2. Activate calibration adjustment mode as described above.
3. Press the X / Y button on the remote control twice. The X
LED on the calibrate panel will illuminate as shown on the
right. The laser head will start rotating and the X axis can
now be adjusted.
4. Adjust the position of the beam using up down buttons on
the remote control until the desired position is achieved.
5. To save the new setting press ENT button on the remote control. The X axis LED will now
turn off.
Y Axis Adjustment
1. Turn the LR600 so that the Y axis faces a wall or post (reference surface).
2. Activate calibration adjustment mode as described above.
3. Press the X / Y button on the remote control 3 times. The Y
LED on the calibrate panel will illuminate as shown on the
right. The laser head will start rotating and the Y axis can
now be adjusted.
4. Adjust the position of the beam using up down buttons on
the remote control until the desired position is achieved.
5. To save the new setting press ENT button on the remote control. The Y axis LED will now
turn off.
Note: When either the X or Y axis has been adjusted, perform a full calibration check as
adjustment of 1 axis can sometimes affect the other axis.
 Loading...