GB
16
• The permitted maximum temperature of the
water flowing through the system may not be
exceeded (► Technical data – p. 17).
• Only use clean freshwater.
• The unit may only be operated in the permitted
pressure range (► Technical data – p. 17).
• Prevent torsion loads. Do not pull on the con-
nected hose.
• Symbols affixed to your tools may not be
removed or covered. Information on the device
that is no longer legible must be replaced imme-
diately.
Scope of delivery
► Scope of delivery – p. 3
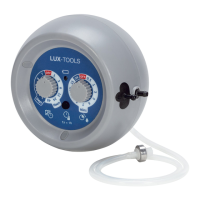
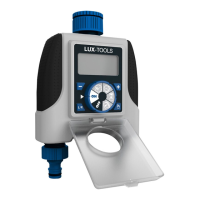
1. Controller
2. Filter assembly
3. Barb tee (10×)
4. Dripper (10×)
5. End plug (2×)
6. Tube holder stake (10×)
7. USB charging line
8. Bottle adaptor
9. Hanger
10. Micro tube
11. Single valve
Assembly and installation
► P. 4, item 1
– Assemble the watering system as shown in the
illustration. Cut the tube (10) into the desired
lengths. Use T-pieces (3), plugs (5) and drip
heads (4) to assemble the watering system in the
desired configuration and connect it to the con-
troller’s side connection. It is easier to put on the
tube if the ends of the tube are held in hot water
beforehand. Connect the filter tube section (2) to
the controller’s supply connection.
► P. 4, item 2
The system can use different water sources:
A. A small plastic bottle can be attached from above
the controller without a bottle adapter. This is
ideal for watering miniplants that require little
water.
B. For larger bottles, e.g. 4L, 5L, 6L, the controller
must be connected to the top of the bottle, use an
adapter (8).
C. Any open container, e.g. a bucket, can be used.
To hang the controller on the container, use the
bracket (9).
► P. 5, item 3
• When the flower pots is above the water level, it
is not necessary to connect the single valve.
► P. 5, item 4
• When the flower pots is under the water level,
you need connect the single valve.
Controller programming
– Set the desired span between waterings with
the [] knob.
– Set the watering time with the [] knob. The
duration of watering cannot be greater than the
value of the frequency of watering!
– Set the start time for watering by delaying the first
watering from the current time. To do this, press
the [] button for more than 2 seconds until the
LED is constantly on. Each subsequent press of
the button adds one hour to delay the start of
watering. For example: if the time is now 12:00,
and you need to start watering at 18:00, you need
to postpone watering for 6 hours. To do this,
press the [] button six times.
Example:
• You need to water every day for 5 minutes. Set -
[] = 24 hours; [] = 5 minutes.
• The next watering time will be recalculated if you
change the frequency or duration of watering.
Notes:
• LED will blink every 4 seconds, if it flashes
quickly, like 1 blink each second, it means low
battery, the battery can be recharged with USB
charging cable. In low battery, controller is shut
off.
Power button [] or manual watering:
• If press longer than 5 seconds, it can be used as
a Power ON/OFF button. If press for 1 second, it
is for manual watering. Manual watering will be
automatically turned off after 15 minutes.
Extend the Duration of the Battery
You can use extra energy from a powerbank to
extend the duration of the system. Make same dura-
tion tests before leaving plants alone during your hol-
idays, to make sure of a good result. Total duration
will depend of the kind of powerbank used.
Important: Please make sure powerbank is safe from
water. Do not use it outdoors. Humidity on the enviro-
ment and sun could spoil it. At the same time spoiled
powerbank can spoil the unit too.
More Important Precautions
• Prolong the life of the product you have just
bought, leaving it protected from the sun and
rain. Do not use it with temperatures below 0 °C
or above 45 °C.
• Never put the timer to be charged to the wall by
the USB connection while the system is in use
with water. Remove the unit from any water
source and dry it before charging it.
Preparing for disposal
Removing the battery
At the end of the device lifetime, you should remove
all batteries before disposing of the item.
Before putting the unit into operation, read
and observe the instructions for use.
Note: The battery is not replaceable.
CAUTION! Risk of injury by splintering!
Do not break device forcefully.
Bewaesserungspumpe_110234.book Seite 16 Montag, 25. November 2019 12:11 12