www.allstarlighting.com
FIGURE 3
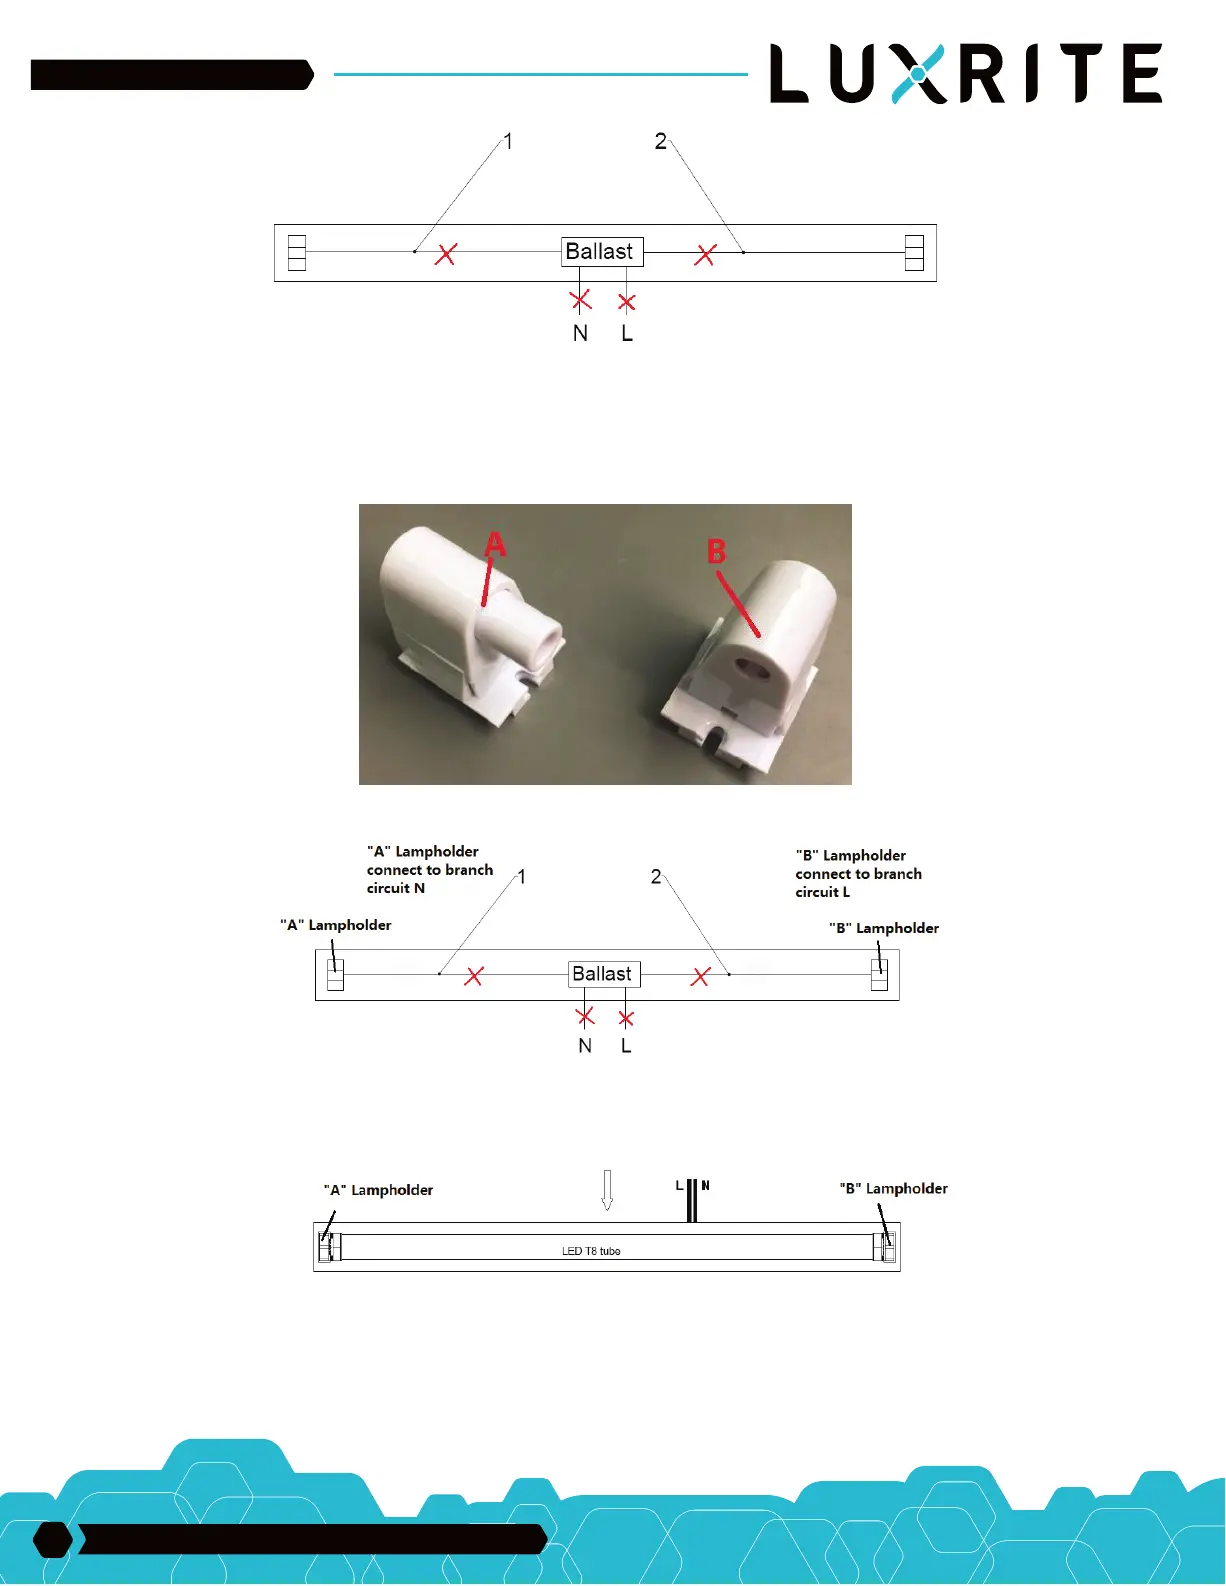
FIGURE 4
FIGURE 5
FIGURE 6
STEP 5. Please check whether the existing lampholders are the same as shown in Figure 4. If yes, skip to Step 7: if not go to next Step 6.
STEP 6. Remove the original lampholders, check the holes of original lampholders to see whether they are suitable to install the attached
lampholders: if not, drill new holes for mounting lampholders.
STEP 7. The attached “A: and ”B” lampholders as shown in Figure 4, with “A” lampholder connecting grounded (neutral) branch circuit “N”
and “B” lampholder connecting ungrounded branch circuit “L” as shown in Figure 5. NOTE: Ballast must be retained in place.
STEP 8. Attach the Luminaire Marking Label to the luminaire. Install ballast cover (if applicable) back on Luminaire, and make sure T8 LED
tube insert into the “A” lampholder first, then “B” lampholder as shown in Figure 6.
STEP 9. Turn on the AC power source, LED Tube will light.
THE WIRING OF TWO LAMPS IS THE SAME AS ABOVE.
2
33 Randolph Ave. • Avenel NJ 07001 | 732-882-1500
 Loading...