5
SECTION 2
Setting Trim Length
The Case Trim Xpress is supplied with 10
different bushings covering a wide range
of popular bottleneck cases. Additional
bushings can be purchased for calibers
that are not covered by the supplied
bushings. Please refer to the bushing
chart on back for caliber information and
part numbers.
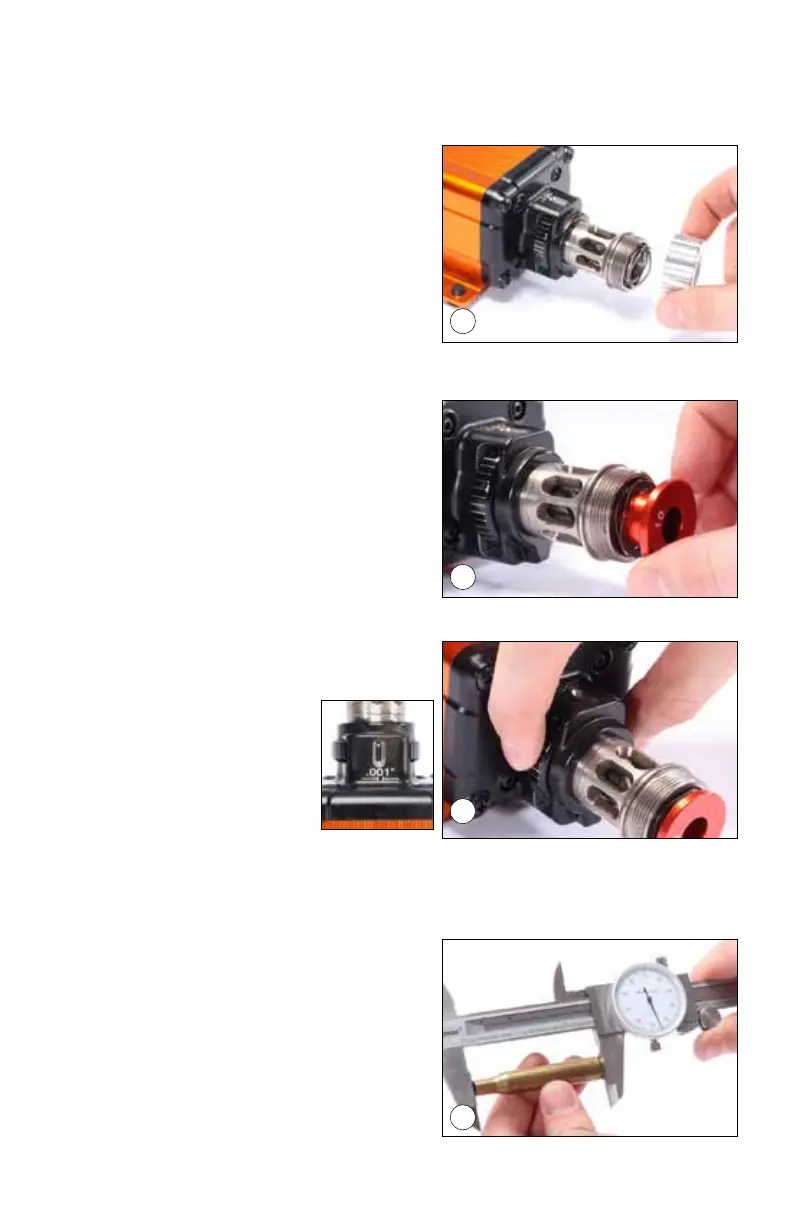
1. Select the proper bushing for the caliber you are trimming. Unthread the
bushing cap (pic 3). Under the bushing
cap you will find a compression spring,
this spring must be installed in order for
the trimmer to function correctly.
2. Place the bushing into the adjuster barrel
as shown (pic 4) with the bushing num-
ber facing you. Reinstall the bushing
cap and tighten.
3. Locate the Cutting Depth Adjustment
wheel (pic 5). Each white graduation
mark represents .001” increments.
Turning the adjustment
wheel clockwise will
DECREASE your cut-
ting depth (less material
removed). Turning the
adjustment counter-clock-
wise will INCREASE your cutting depth (more material removed). A viewing
window is located at the top of the adjustment wheel housing, this window
will allow the user to view the graduation marks to ensure a proper setting.
4. Measure a case to be trimmed, making
note of the untrimmed length. (pic 6)
TRIMMING TIP: Because the bush-
ing uses the shoulder of the case to
determine trim length, all cases should
be cleaned and sized before trimming
to ensure an accurate and consistent
result. If your cases have been sized at
3
4
5
6