Page 16
3.16 Installing Wired Door/Window Contact Detector
(available separately as an accessory)
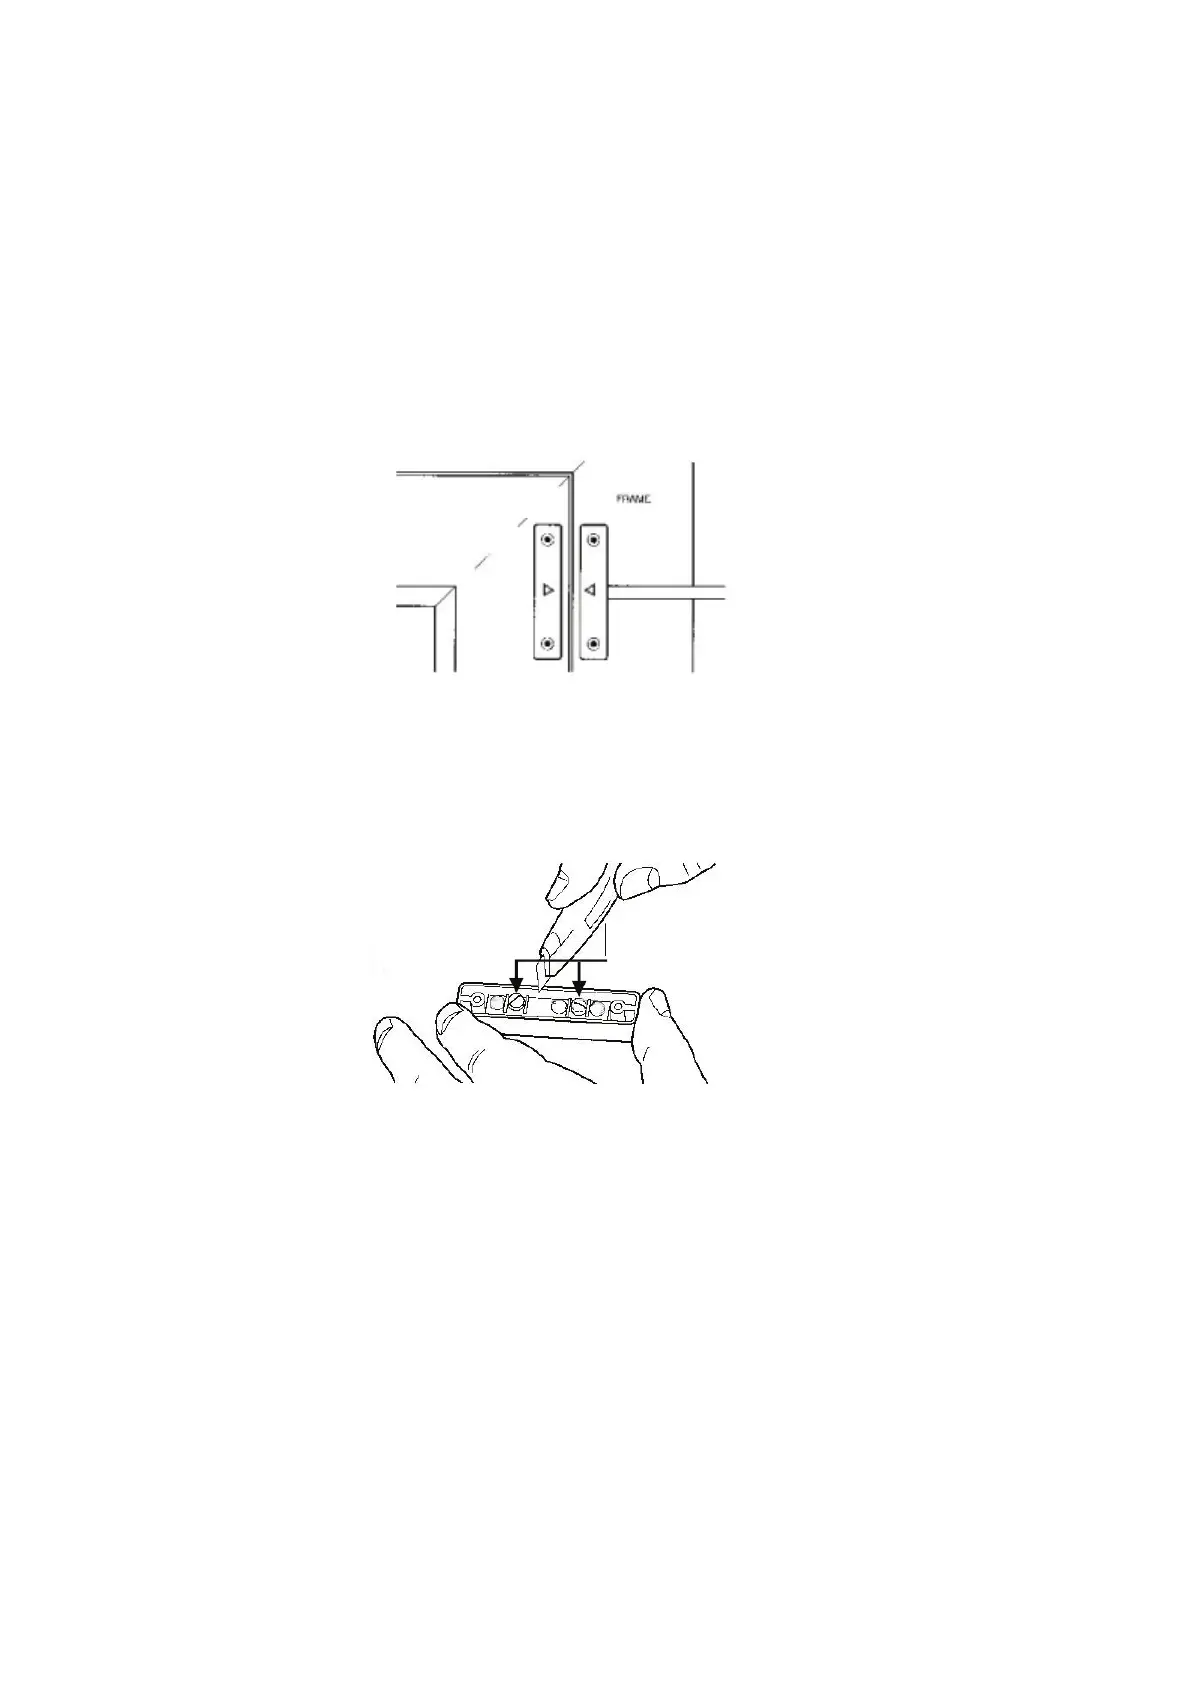
i. Choose the location for each magnetic contact (remembering the need to wire them back to the
Control Unit). Each contact consists of a magnetically operated switch (with screw terminals at the
back) and a magnet in an identical housing.
ii. The switch (the part with screw terminals and cable) should be mounted on the frame. The magnet
should be mounted on the door or window itself directly opposite the switch, no more than 8mm
apart when the door or window is closed (Illustration 19). Mark two mounting holes for the magnet
on the door or window and two mounting holes for the switch on the frame.
Illustration 19
iii. Choose a convenient entry point for the cable on the switch housing and carefully remove part of
the plastic using a sharp knife to create a hole (Illustration 20). Connect the 2 wires to the two
screw terminals.
Illustration 20
iv. Fixed the contact and magnet in position using the four mounting screws provided.
v. Run the cable back to the Control Unit.
vi. Connect to zone 1, 2, 3 or zone 4 terminals of the Control Unit as required. Connection polarity is
not important.
WINDOWS / DOOR
 Loading...