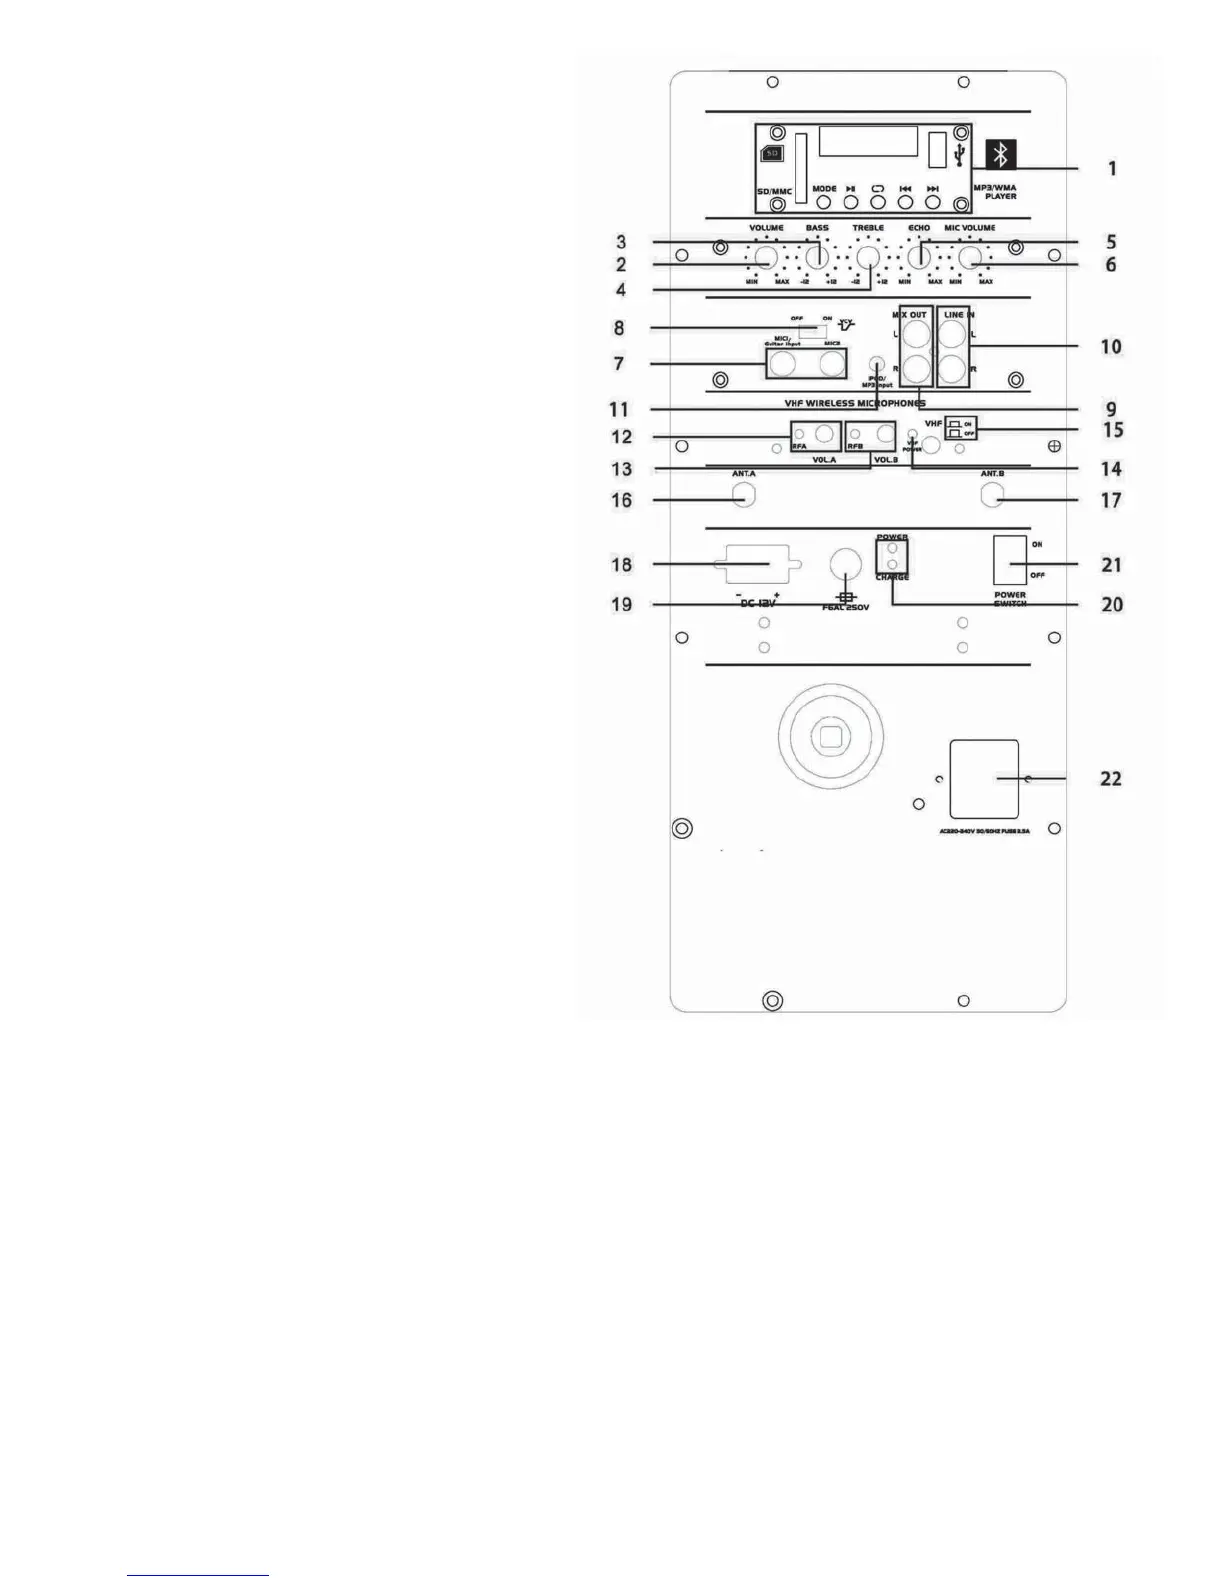
Location of Controls
1. USB Playback
a. MODE Exchange between USB / SD /
BLUETOOTH /REMOTE CONTROL
b. BLUETOOTH
c. Play/Pause
d. Repeat
e. Last
f. Next
2. Volume: Control master sound level
3. Volume: Bass level control
4. Volume: Treble level control
5. Volume: Echo level control
6. Volume: Mic. level control
7. MIC 1 /GUITAR / MIC 2 input
8. VCV Voice control volume switch to control the
priority for Mic.
9. Left / Right Mic. output
10. Left/ Right Line input
11. Aux input
12. Indicator light for wireless mic A / Volume control for
wireless mic A
13. Indicator light for wireless mic B / Volume control for
wireless mic B
14. Indicator light for VHF power
15. Switch to control the VHF
16. Antenna for wireless mic. A
17. Antenna for wireless mic. B
18. DC 12V input
19. F6AL 250V fuse
20. Light indicator for battery charge
21. Power switch: Switch the unit on / off
22. Main supply input: Connect an IEC main power cable in order
to power the unit through electrical outlet connection.
Operations Overview
Charging the battery
• When not in use but connected to the main power supply, if the POWER switch is in the off position, the internal battery
will be re-charged from the main. This is indicated by the CHARGE LED, which lights when charging.
• When fully charged, the CHARGE LED will go out.
Powering the Unit On
• Turn the VOLUME, ECHO and MIC VOLUME controls down and turn the POWER switch to the on position (the power LED
will light).
• Switch VCV (voice controlled volume) off.
Using the VHF Wireless Microphones
1. Insert 9V batteries into the handheld microphones by carefully unscrewing the base of each one and connecting the “+” and “-“
terminals of the battery to the corresponding clips inside the microphone body. Make sure to observe the correct polarity.
2. With the VOL A and VOL B controls turned down, press the VHF ON/OFF button in so that the VHF POWER LED lights. Switch on
each wireless mic in turn – the RF LEDs will light as a result.
3. Gradually increase VOL controls, testing each microphone in turn for output through the speaker.
4. Turning the ECHO control clockwise adjusts a pre-set echo function for singing and special effects. BASS and TREBLE can be
cut or lowered by turning counter-clockwise or increased by turning clockwise.
5. When not in use, switch the wireless microphones off.
2
 Loading...