EasyManua.ls Logo

MAAX 103901 User Manual

MAAX 103901
20 pages
To Next Page IconTo Next Page
Page #1 background imageLoading...
Page #1 background image
SAVE THIS GUIDE FOR FUTURE REFERENCE.
CONSERVER POUR UN USAGE ULTÉRIEUR.
Read all instructions carefully before proceeding.
Lire toutes les instructions attentivement avant de commencer
l’installation.
Serial number Numéro de série
IMPORTANT Record the serial number
IMPORTANT Noter le numéro de série
A two person installation is recommended.
Une installation par deux
personnes est recommandé.
INSTALLATION INSTRUCTIONS
GUIDE D’INSTALLATION
FREESTANDING BATHTUB
BAIGNOIRE AUTOPORTANTE
MODEL • MODÈLE
103901 • 103903 • 105516 • 105797 • 105798 • 106150 • 106151
106192 • 106193 • 106426
1 2
1. F² Drain video (english)
2. Vidéo pour F² Drain (français)
View F² Drain Video - Scan QR
code with a mobile device
Voir Vidéo de F² Drain - Balayer QR
code avec un dispositif mobile
Ver video de F² Drain - Escanear
código QR con un dispositivo mobil
Question and Answer IconNeed help?

Do you have a question about the MAAX 103901 and is the answer not in the manual?

MAAX 103901 Specifications

General IconGeneral
BrandMAAX
Model103901
CategoryBathtubs
LanguageEnglish

Summary

Installation Instructions

Before You Begin

Read all instructions, consult local codes, and prepare the workspace before starting installation.

Required Tools

Lists essential tools like a level, drill, screwdriver, measuring tape, and safety equipment for installation.

Recommended Supplies

Details optional supplies such as silicone sealant, screws, and wooden shims for proper bathtub installation.

Step 1: Unpacking the unit

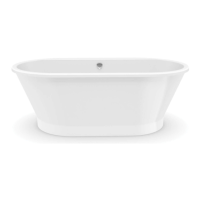
Instructions for safely removing the bathtub from its packaging, inspecting for damage, and initial checks.

Step 2: Leveling legs adjustment

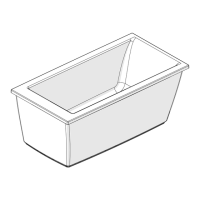
Guide to adjusting the bathtub legs to ensure proper leveling, skirt alignment, and stability.

Step 3: Bathtub skirt and drain positioning

How to position the skirt, mark the floor for drain/overflow, and ensure the floor is level.

Step 4: Installing faucets

Instructions for drilling pilot holes and mounting faucets onto the bathtub according to instructions.

Step 5: Bathtub preparation and installation

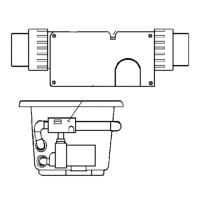
Connecting waste, overflow, faucets, and final placement of the bathtub, including specific model notes.

Troubleshooting and Maintenance

Troubleshooting Common Issues

Addresses common problems like water accumulation, incomplete draining, and a moving bathtub base.

Maintenance Guidelines

Provides advice on daily cleaning, acrylic surface care, stain removal, and avoiding abrasive products.

Limited Warranty

Warranty Terms and Conditions

Details express limited warranty for acrylic/fiberglass units, coverage periods, and general exclusions.

Commercial Limitations

Specifies warranty periods and conditions for products installed or used in commercial ventures.

Obtaining Warranty Service

Outlines procedures for reporting issues, providing proof, and receiving warranty service from MAAX.