This document is an owner's guide for Mabe automatic/no frost refrigerators, covering models such as RMV21WI, RMV21YI, RMV31WI, RMV41WI, RMV51YI, RMV51ZL, RMV61WI, RMV71YI, RMV71ZL, RMV81WI, RMV91YI, MA021WI, MA021YI, MA041WI, MA051YI, MA061WI, MA071YI, and MA081WI.
Function Description
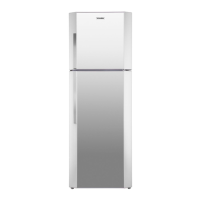
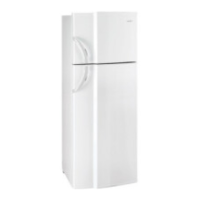
The refrigerator is designed to preserve food using a no-frost cooling system, eliminating the need for manual defrosting. It features separate compartments for fresh food (cooler) and frozen food (freezer), each with independent temperature controls. The "Vita Nova" cooling system utilizes multiple air flow vents to provide uniform, enveloping cold air, ensuring food maintains its flavor, freshness, and quality for longer, regardless of its placement within the refrigerator.
Important Technical Specifications
- Electrical Characteristics:
- Frequency: 60 Hz
- Voltage: 115 V~
- Electrical Installation Requirements:
- Residential use, preferably with a main switch and separate balanced circuits.
- Protected by fuses and/or circuit breakers of 15 to 20 Amperes Max.
- Equipped with a polarized Y-type power cord with integrated grounding.
- Avoid using extension cords; if absolutely necessary, use a UL-listed 3-wire grounding type plug and outlet with an electrical rating of 15 Amperes (minimum) and 120V.
- Do not connect other electrical appliances to the same AC outlet as the refrigerator to prevent power surges and overheating.
- Shelf Load Capacity: Maximum recommended load for shelves is 25 kg (55 lb).
- Door Compartment Bin Load Capacity: Maximum recommended load is 2 kg (4 lb).
Usage Features
- Temperature Control:
- Fresh Food Compartment (Cooler): Adjustable from level 1 (less cold) to 9 (colder).
- Freezer Compartment: Adjustable with maximum, medium, and minimum settings, controlling the amount of cold air flow.
- Initial setup recommends keeping both controls in the medium position for 6 hours to stabilize temperature before making adjustments.
- Environmental factors like room temperature and door opening frequency influence performance; higher ambient temperatures and more frequent door openings may require a colder setting.
- Avoid placing food directly against air flow vents to ensure proper circulation and prevent freezing.
- Drawers:
- Gourmet Snack Pan: Can be placed under any shelf (recommended in the first three positions) for storing cheeses, cold cuts, sausages, and pizzas.
- Vegetable and Fruit Drawers: Designed to keep fruits and vegetables fresh. Luxury models may have two separate drawers for independent storage.
- Humidity Control: Available on some drawer models to regulate air flow, preserving the natural characteristics of food. Keep closed for leafy greens and open for fruits.
- Shelves: Multipositional tempered glass or wire shelves.
- Door Bins:
- Door Compartment Bins: For butter, cans, small jars. Not recommended for cheeses and cold cuts.
- Ultra-capacity Bin: Large capacity for big containers and 4-liter bottles.
- Inclined Shelf for Bottles and Cans: Provides space for cans in front and tall bottles in the back, ergonomically designed for easy access.
- Two-depth Bin: Suitable for small containers like yogurt, juice, nail varnish.
- Egg Trays: For storing a large quantity of eggs.
- Easy Ice (Practihielo): A device located in the freezer door for optimal ice making, freeing up internal freezer space.
- Removal: Pull the drawer, then slide out the cassette.
- Filling: Turn the cassette counterclockwise to horizontal, fill with water (molds have a level control to prevent overfilling), then turn clockwise to horizontal.
- Unmolding: Turn each knob clockwise to drop ice cubes into the drawer below. The drawer can store ice from three molds. Ensure the drawer is empty before unmolding the next batch.
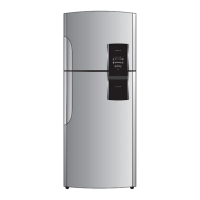
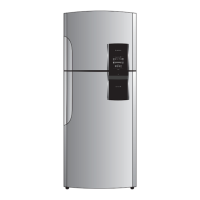
- New External LCD Control (Super Luxury Models - Stainless Steel):
- Vacation Function: Saves energy during absences (up to 15 days). Activates/deactivates by pressing the button. Deactivates automatically if the freezer door is opened for more than 10 seconds. Cannot be used simultaneously with the Turbo function.
- Turbo Function: Accelerates cooling and freezing speed. Activates/deactivates by pressing the button or automatically after optimal cycle completion (1 hour). Cannot be used simultaneously with the Vacation function.
- Alarm Function: Warns with animation and sound if the door remains open for more than one minute, indicating energy inefficiency. Activates/deactivates by pressing the button.
- Lock Function: Blocks LCD control to prevent programming changes. Activates/deactivates by simultaneously pressing the alarm and vacation buttons for 3 seconds.
- Temperature Level Function: Sets the cold level for the refrigerator from 1 (less cold) to 9 (coldest). Pressing the "level" button cycles through numbers 1-9.
Maintenance Features
- General Cleaning:
- Always disconnect the refrigerator before cleaning.
- Do not use toxic (ammonia, etc.), abrasive products (pastes), or fibers that can damage the refrigerator.
- Use a soft sponge or cloth with water and mild soap, or a solution of one tablespoon of baking soda in two liters of warm water for the interior. Rinse and dry thoroughly.
- Avoid sharp objects that could scratch surfaces.
- Clean the condenser (if present) with a brush, cloth, or sponge every six months to remove accumulated dust.
- For LCD screens, use a soft, wet cloth; avoid metallic or hard fibers.
- Easy Ice Cleaning:
- Disassemble by removing door shelves, ice drawer, and cassette.
- Slide the Easy Ice unit to the left in the freezer door.
- Remove the upper part of the Easy Ice from its mount by pulling it towards you.
- Disassemble cassette components by pushing pin C outwards to free ice molds.
- Wash parts with a soft sponge, water, and mild soap. Avoid abrasive products.
- Reassemble by aligning the cover's lower guides with mount holes, then the lateral guide, pressing until it fits. Insert pin A into hole O, ensuring pin B enters slot R, and pin C is fixed.
- Reattach the Easy Ice unit to the freezer door, sliding it into its original position.
- Replace shelves, cassette, and ice drawer.
- Light Bulb Change:
- Disconnect the refrigerator.
- Remove shelves and gourmet drawer (if necessary).
- Remove the temperature control button (for models with internal controls).
- Pull the bulb cover from the bottom and slide it down.
- Remove the lamp by twisting it counterclockwise.
- Replace with a bulb of the same electrical characteristics and dimensions.
- Reassemble the bulb cover, temperature control, shelves, and gourmet drawer.
- For freezer light, slide it sideways towards the back, then pull it towards you.
- For top fresh food compartment light, remove the bulb cover from the far side, push towards you, and pull out.
- Conservation Recommendations:
- Store food in lidded containers, wrapped in aluminum foil, plastic containers, or plastic wrap.
- Allow hot food to cool to room temperature before placing it in the refrigerator or freezer.
- Minimize door opening time to reduce energy consumption.
- If the door is difficult to open after closing, wait 10-15 seconds for the vacuum to dissipate.
- Store onions in plastic bags or hermetically-sealed containers to prevent odor contamination.
- Do not store garlic in the refrigerator as cold and dark environments promote germination.
- Freeze food in small portions for quicker freezing.
- Place food for rapid freezing or ice cubes on the freezer shelf.
- Observe expiration dates on frozen products.
- Do not refreeze thawed food.
- Liquids expand when frozen; do not fill containers to the brim.
- Do not store closed glass containers with liquids in the freezer.
- Trips and Absences:
- For prolonged absences, disconnect the refrigerator, clean it, empty it, and leave the door ajar to allow air circulation and prevent odors.
- For short absences, the refrigerator can remain connected, but be aware of potential power outages.
- Moving:
- If laying the unit down for transport, do so only on its left side (when viewing from the front).
- Before moving, screw the leveling screws all the way in.
- Power Outages:
- Most power interruptions are short; internal temperature is not affected for up to 4 hours.
- For outages longer than 6 hours, place ice bags in both compartments to help preserve food.
- If the model has Vacation and Turbo functions, they will return to their deactivated state after a power failure.
- No damage to the refrigerator is expected upon power restoration.
- Normal Operating Sounds:
- Crunching: Heard when ice breaks or ice trays are removed from the freezer.
- Compressor Noise: Characteristic motor sound, indicating operation.
- Gas Expansion Noise: Similar to filling a gas cylinder, due to gas expansion in the refrigeration system.
- Defrosting Noise: Sounds like running water during the defrosting process.
- Bubbling Water Noise: Occurs during the defrosting cycle, preventing heat entry.