34 35
MPWP2100-2 By MacAllister MPWP2100-2 By MacAllister
In more detail . . .
In more detail . . .
Care and maintenanceOperation
8.
Press the unlock button (13a) and disconnect nozzle (19) (Fig. 34) or the
rotary nozzle (14) from the extension lance (13) (Fig. 35).
1.
2.
1.
2.
13a
13a
13
13
14
19
Fig. 34 Fig. 35
9.
Press the accessory towards the spray gun (16) and turn it anti-clockwise to remove
it. (Fig. 36).
13
2.
1.
3.
Fig. 36
10.
Push the latch (16b) on the spray gun (16) to open the connecting port and disconnect
the high pressure hose (15) by pulling it out (Fig. 37).
1.
2.
16b
15
16
Fig. 37
11. Check, clean and store the product as described below.
General operation
WARNING! Always switch the product off, disconnect it from power supply
and let the product cool down before performing inspection, maintenance and
cleaning work!
1. Keep the product clean. Remove debris from it after each use and before storage.
2.
Regular and proper cleaning will help ensure safe use and extend the life of the
product.
3.
Inspect the product before each use for worn and damaged parts. Do not operate
WARNING! Only perform repairs and maintenance work according to these
General cleaning
1. Clean the product with a dry cloth. Use a brush for areas that are hard to reach.
2. In particular clean the air vents after every use with a cloth and brush.
3. Remove stubborn dirt with high pressure air (max.
3 bar).
NOTE: Always keep a reasonable distance between the nozzle and the object
to be washed in order to avoid damage.
4. Check for worn or damaged parts. Replace worn parts as necessary or contact an
authorised service centre for repair before using the product again.
General operation
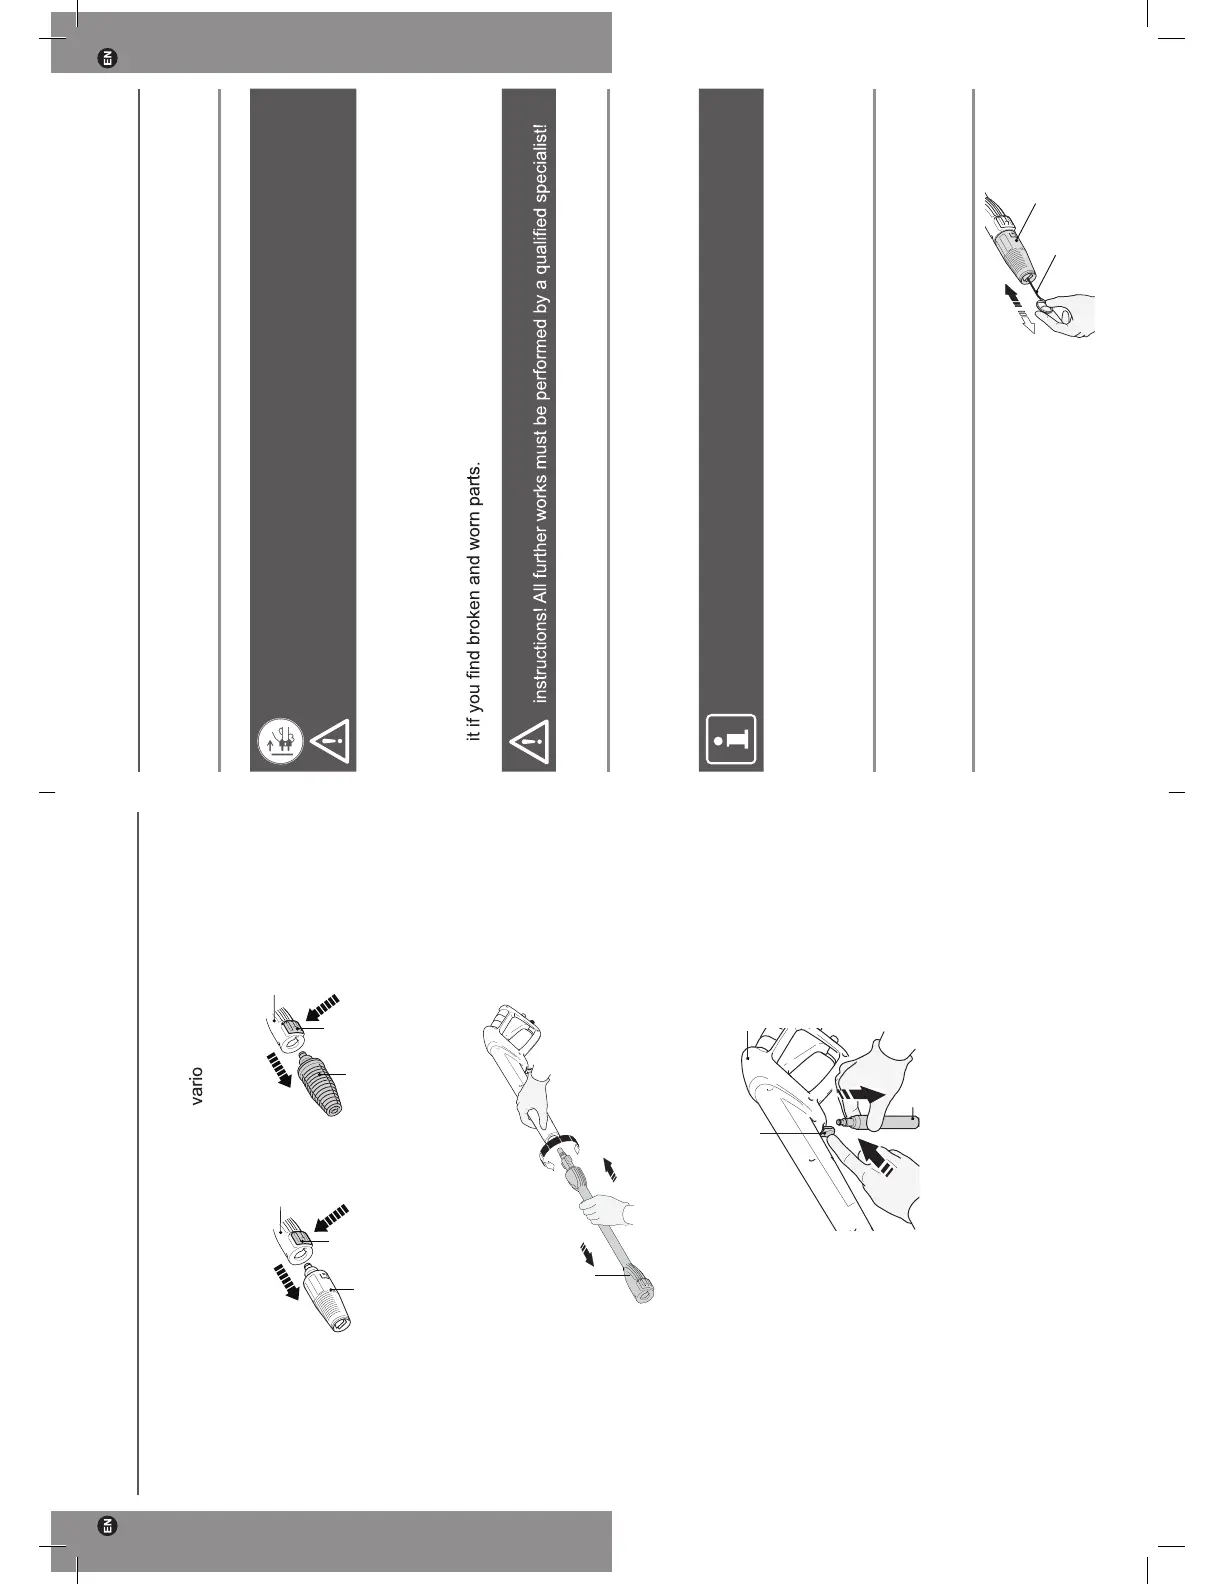
A cleaning needle (4a) is supplied with this product and stored on the back side of
instruction manual.
Vario nozzle
Remove any dirt deposits from the nozzle
hole using the cleaning needle (4a) (Fig. 38).
Fig. 38
4a
19
GP65-3663602939702-EN-V06.indd 34-35 11/2/16 6:05 PM
 Loading...