14 15
Patient Preparation
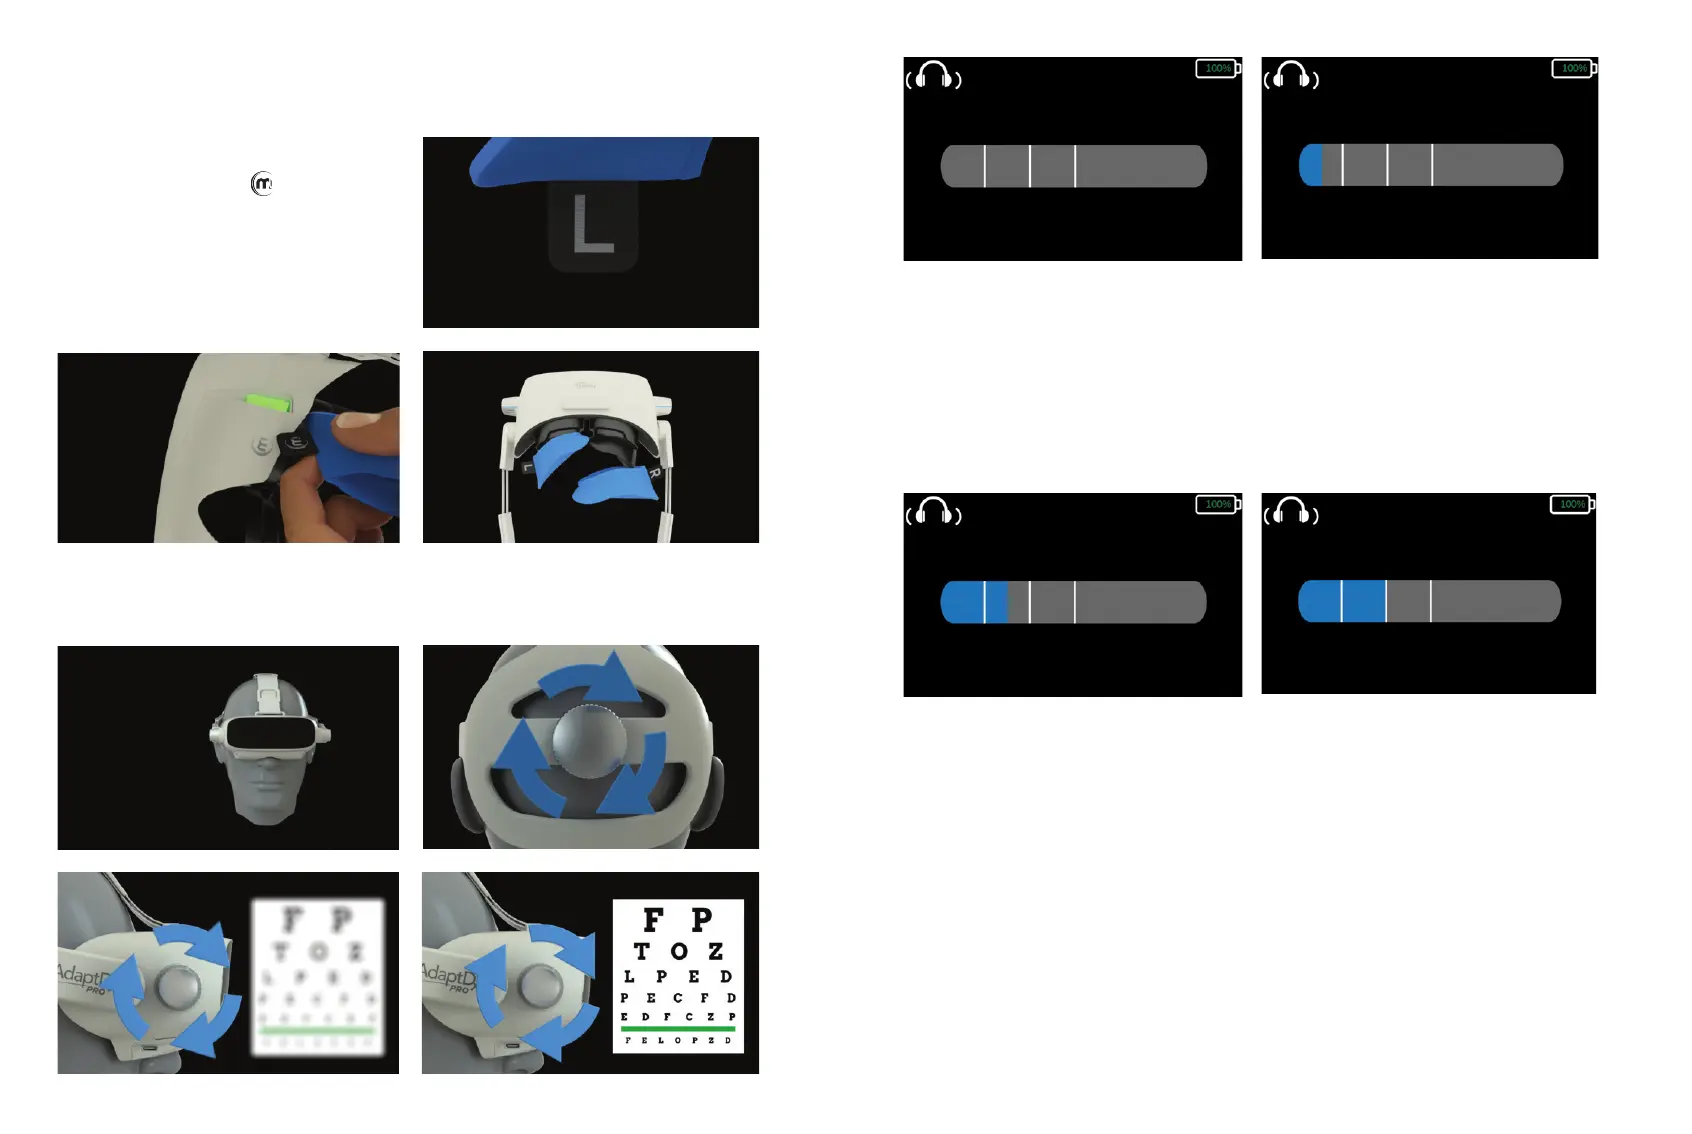
Once the test eye and test type have been
selected, install a new pair of Comfort Guard
hygienic eyecup covers. Activate the eyecup covers
by holding the “L” tag to the symbol under the
headset for ve seconds (Figures 6.1– 6.2).
Once activated, place the Comfort Guard covers
over the eyecups, left and right side respectively
(Figure 6.3).
Once the system has veried that a new pair of Comfort Guard hygienic eyecup covers have been
installed, an animation will provide step-by-step instructions for how to t the headset on the patient and
how the diopter adjustment works.
Introduction
Theia™, the on-board technician, will introduce herself to the patient and will outline the basics of the
test. At the end of the introduction, the user will be given a brief tutorial in which the pupil xation will be
established and the pupil size will be measured.
Once the test starts, a progress bar will appear on the user interface to keep the technician abreast of
each step in the process.
Bleach Demonstration
Theia will ask the patient to look directly at the small red light in the center of their visual eld and will
instruct the patient to press the response button to verify when they see the a bright ash of light.
Stimulus Demonstration
Theia will ask the patient to look directly at the small red light in the center of their visual eld and instruct
the patient to press the button every time they see a spot of light in their peripheral vision. Once a
threshold has been detected, photobleaching will be initiated to begin measuring
dark adaptation.
Figure 6.2
Figure 6.3
Figure 6.1
 Loading...