6
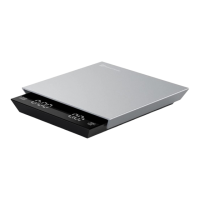
Coffee Preparation Instructions
Turn on the main switch, the display will light up. If the coffee scale goes to sleep,
click the left button to turn it on.
Click the left button to start timing, click again to stop timing, and double click the left
button to reset timing.
If you place anything on the scale, click the right button to reset the weighing.
Double click the right button to switch between the weighing units (g/oz).
Press and hold the right key to start the automatic timing function. When liquid being
poured into the cup is detected, the automatic timing starts.
In the automatic timing state, click the left button to reset all the automatic timing
and weighing data. When the liquid is refilled, the weighing and timing will start
again.
General Weighing and Timing Mode
Place the drip rack, sharing pot and filter paper on the scale surface, and then click
the left button to reset the weight.
Place the grounded coffee beans into the pot filter. After you’re satisfied with the
amount of coffee placed, click the right button to reset the weight again.
Pour twice the amount of grounded coffee beans for braising and press the left
button briefly to start the timer.
Complete the coffee brewing according to the grounded coffee beans and water ratio
and required brewing time.
Making Coffee in Automatic Timing Mode
After determining the grounded coffee beans and braising, long press the right
button to enter the automatic timing mode, and the water drop icon will appear on
the display.
After pouring water, the timer will automatically start timing. The timer stops the
moment the water is stopped being poured.
Click the left button to clear all timing and weighing data. You can refill the liquid and
start weighing again.
After brewing the coffee, long press the left key to turn off the scale.
Notice