6
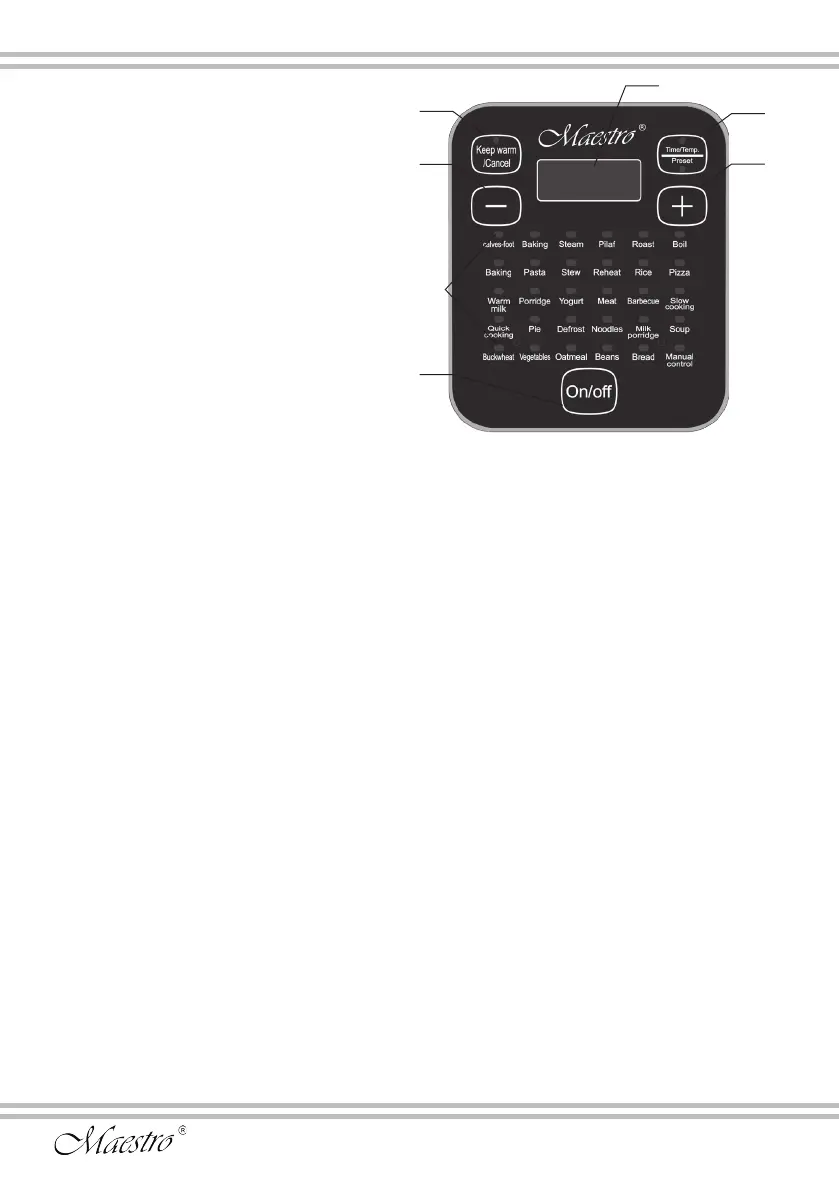
1 –«Preset time/ cooking time» button
2 – «Start « button
3 –«Keep warm/Cancel» switching-o or on
the mode “Heating”
4 – Button of timing “Time”
5 – Indicator of the selected program
6 – Button “Menu”
7 – Time indicator
Preparation for work
- Make sure that all the parts of appliance don’t have damages.
- Check the assembly of the multicooker.
- Inspect all parts of the multicooker, power cord and plug. Ensure in lack of any damages
incurred in the transportation, such as:
•damages of the frame or lid, dents or cracks;
• damages of the non-stick coating of the bowl;
• damages of power cord and plug.
ATTENTION! If any of the above mentioned damages are present, do not install the
multicooker and immediately provide the information about damages to your Seller.
- Wipe the frame of the appliance with a damp cloth. Wash the bowl, container, spoon and
ladle in warm soapy water, rinse and wipe dry.
In choosing a place for installing a multicooker, it must be not exposed to direct sunlight,
near heated appliances, or in a draft. All this can aect to the temperature inside the
multicooker and reduce the quality of the prepared dishes.
-Install the multicooker on a at, non-slip surface, giving the free space on all sides, at least
20 cm , for sucient air circulation.
For surfaces that can be damaged by heat, it is recommended to use heat-insulating, non-
ammable supports.
- Before plugging the multicooker in, make sure that the power parameters, indicated in
the table of technical characteristics, coincide with power supply of your network. The high
voltage using may cause the damage of the appliance and even make the re. The low
voltage using leads to unsatised quality cooking.
1
7
3
6
4
5
2
 Loading...