6
7
8
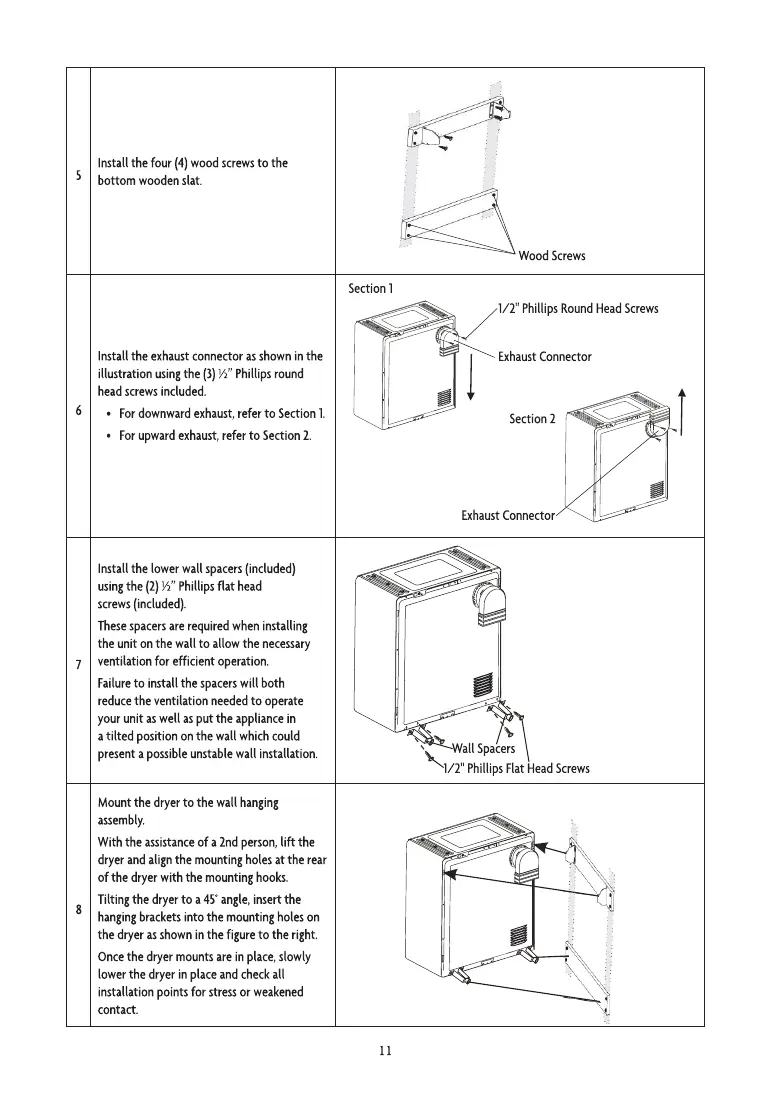
Installthefour(4)woodscrewsto the
bottom wooden Slat.
Section 1
Install the exhaust connector as shown in the
illustrationusingthe(3)h" Phillipsround
head screws included
• Fordownwardexhaust,refer to Section1.
Forupwardexhaust,referto Section2.
Installthelowerwallspacers(included)
usingthe (2)h" Phillipsflat head
screws(included).
Thesespacersarerequiredwhen installing
the unit on the wall to allow the necessary
ventilationfor efficient operation.
Failureto install the spacerswill both
reducetheventilationneededto operate
your unit aswell asput the appliancein
atilted positiononthewallwhichcould
presentapossibleunstablewall installation.
Mount the dryerto the wall hanging
assembly.
With the assistanceof a 2ndperson,lift the
dryerandalignthemountingholesattherear
of the dryerwith the mountinghooks.
Tiltingthe dryerto a450angle,insertthe
hangingbracketsinto the mountingholeson
the dryerasshowninthefigureto theright.
Oncethe dryer mountsarein place,slowly
lowerthe dryer in placeandcheckall
installationpoints for stressor weakened
contact.
11
Wood Screws
1/2" PhillipsRoundHeadScrews
Exhaust Connector
Section 2
ExhaustConnector
all Spacers
1/2" PhillipsFlatHeadScrews