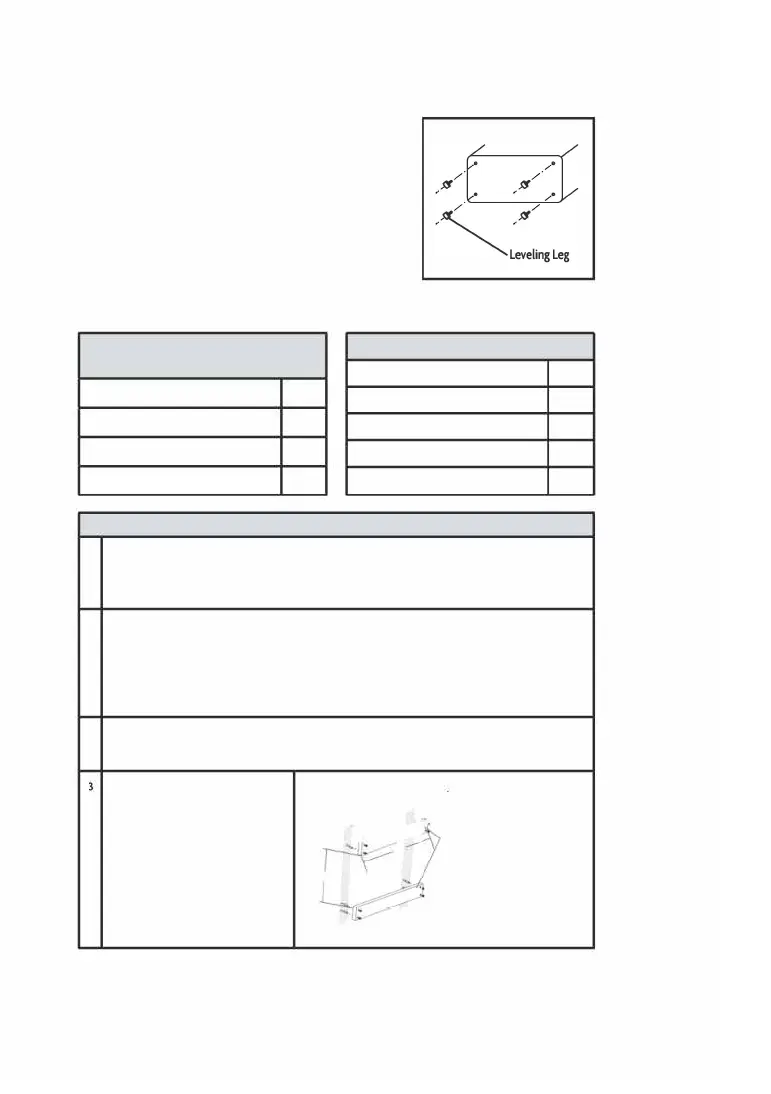
EasyManua.ls Logo

Magic Chef MCSDRY1S - Adjusting and Mounting; Adjusting Leveling Legs; Wall Mounting Instructions

Magic Chef MCSDRY1S
42 pages
Print Icon
To Next Page IconTo Next Page
To Previous Page IconTo Previous Page
Loading...
ADJUING THE LEVELING LEGS
The dryer is shipped with a bag containing the user guide and
four (4) leveling legs. See the illustration to the right to
install and adjust the leveling legs.
If the dryer is placed on an uneven o r weak surface, noise or
vibrations will occur from the appliance. If the floor is uneven,
adjust the height level of the leveling legs accordingly. DO NOT
insert pieces of wood or any other objects under the legs.
WALL-MOUNTING INRUCTIONS










 

 2


 








 
 




 












 

2
3
"
Figure 5
Figure 6
10

Related product manuals