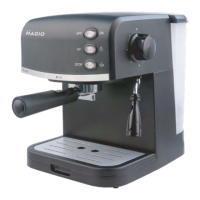
This document describes the Magio MG-963 coffee maker, an appliance designed for domestic use to prepare espresso and cappuccino, and to heat liquids.
Function Description
The Magio MG-963 is a coffee maker capable of brewing espresso and frothing milk for cappuccino. It also features a steam wand for heating other liquids. The device operates by pumping water through ground coffee to extract espresso and uses steam to create frothed milk.
Important Technical Specifications
- Rated power: 730 W
- Supply voltage: 220-240 V~
- Frequency: 50-60 Hz
- Shelf life: Unlimited before use
- Service lifetime: 3 years from the date of sale
- Storage conditions: Does not require special storage conditions
- Harmful substances: Does not contain harmful substances
Usage Features
Before First Use:
Before using the coffee maker for the first time, all removable parts, including the filter holder, coffee filter, water tank, and measuring spoon, should be washed with warm water and a neutral detergent, then dried. To ensure optimal coffee taste, the coffee maker should be rinsed with warm water.
- Fill the water tank with water up to the "MAX" mark and close the lid. The appliance has a detachable tank for easy cleaning, allowing you to fill it with water first and then place it into the coffee maker.
- Insert the coffee filter into the filter holder by aligning the tab on the filter with the slot in the holder and turning it clockwise or counterclockwise. Without adding coffee, attach the filter holder to the boiler by aligning its handle with "INSERT" on the coffee maker body, inserting it into the boiler, and turning the handle counterclockwise towards "LOCK" until it stops.
- Place a cup on the drip tray. Ensure the steam control knob is in the OFF position.
- Plug the power cord into an outlet. Turn the ON/OFF switch to the "—" position; the indicator light will illuminate.
- Turn the pump control switch to the "—" position. The pump will start to draw water. Once water begins to flow out, close the pump by pressing the pump control switch to "O". Then, set the coffee/steam selector to the "O" position. The appliance will begin to preheat until the inner lamp of the pump control switch illuminates, indicating preheating is complete. Press the pump control switch to the "—" position again, and water will flow out.
- Once water stops flowing, empty and thoroughly clean the cup and container. The appliance is now ready for coffee preparation.
Note: During the first pump operation, some noise may be heard as the appliance releases air. This is normal and should disappear after about 20 seconds.
Preheating:
To ensure a hot and flavorful espresso, it is recommended to preheat the appliance, including the filter holder, filter, and cup, to prevent cold parts from affecting the coffee taste.
- Remove the detachable water tank, open the lid, and fill it with water up to the "MAX" mark. Place the tank back into the appliance.
- Insert the steel mesh into the metal funnel, ensuring the tube on the funnel aligns with the groove in the appliance. Insert the funnel into the appliance from the "Insert" position and turn it counterclockwise to fix it firmly in the "Lock" position.
- Connect the appliance to the power supply. Ensure the steam control knob is in the OFF position.
- Press the ON/OFF switch to the "—" position; the indicator light will illuminate. Set the coffee/steam selector to the "O" position. Press the pump control button to the "—" position. When water starts flowing out, immediately close the pump. This step primes the water tank into the housing.
- When the lamp in the pump control switch illuminates, press the pump control switch to the "—" position again. Hot water will flow out. When the lamp extinguishes, close the pump. Preheating is complete.
Making Espresso Coffee:
- Remove the funnel by turning it clockwise. Add ground coffee to the steel mesh using the measuring spoon. One spoon of ground coffee is typically sufficient for a cup of high-quality coffee. Tamp the ground coffee tightly with the tamper.
- Insert the steel mesh into the metal funnel, ensuring the tube on the funnel aligns with the groove in the appliance. Insert the funnel into the appliance from the "Insert" position and turn it counterclockwise to fix it firmly in the "Lock" position.
- Empty any hot water from the cup used for preheating. Place the hot cup on the removable shelf.
- At this point, the lamp in the pump control switch should be illuminated. If it is extinguished, wait until it illuminates, then press the pump control switch to the "—" position. After a moment, coffee will start flowing out.
Note: If the indicator extinguishes during operation, close the pump and stop brewing. If the lamp illuminates again after a few seconds, you can resume brewing by pressing the pump control switch to the "—" position. The lamp cycles on and off to maintain the water at a sufficiently hot temperature.
- Manually press the ON/OFF switch to the "O" position when the desired amount of coffee is obtained or if the coffee color becomes weak. All indicators will turn off, and the coffee maker will stop working. Your coffee is now ready.
Warning: Do not leave the coffee maker unattended while brewing coffee!
- After brewing, allow the coffee maker to cool down, then remove the filter holder. To remove the filter holder, turn its handle towards "INSERT" on the coffee maker body and pull it off. Lift the filter retainer, hold the filter, invert the holder, and discard the used coffee grounds from the filter. Turn the filter clockwise or counterclockwise to remove it from the holder, then rinse it under running water.
Making Cappuccino:
- First, prepare espresso in a cup large enough to accommodate frothed milk, as described in the "Make espresso coffee" section. Ensure the steam control knob is in the OFF position.
- Press the coffee/steam selector to the "—" position. The lamp in the pump control switch will illuminate. Wait until the indicator in the coffee/steam selector illuminates.
Note: During operation, the indicator in the coffee/steam selector will cycle on and off to maintain the desired temperature.
- Take a tall, narrow glass, preferably metallic, and fill it with cold milk or cream (approximately 1/3). Ensure the cup height is sufficient.
- Slowly turn the steam control knob counterclockwise; steam will begin to come out of the frothing device.
Note: Never turn the steam control knob rapidly, as steam can accumulate quickly in a short time, increasing the risk of explosion.
- Insert the frothing device into the milk about two centimeters deep. Froth the milk by moving the vessel up and down.
- Once the desired froth is achieved, turn the steam control knob to the OFF position.
Note: Clean the steam outlet with a wet sponge immediately after steam stops generating, but be careful not to burn yourself!
- Pour the frothed milk into the prepared espresso. Your cappuccino is ready. Sweeten to taste and, if desired, sprinkle with a little cocoa powder.
- Press the ON/OFF switch to the "O" position to turn off the power. All indicators will extinguish.
Note: It is recommended to allow the coffee maker to cool down for at least 5 minutes before making coffee again. Otherwise, a burnt odor may occur in your espresso.
Producing Steam to Heat Liquids:
The steam wand (without the frothing device) can be used to heat hot beverages like drinking chocolate or water.
- Open the top cover, remove the detachable tank, and fill it with water up to the "MAX" mark. Place the tank back into the appliance.
- Replace the top cover and connect the appliance to the power supply.
- Press the ON/OFF switch to the "—" position; the lamp will illuminate.
- Ensure the coffee/steam selector is in the "O" position. Turn the pump control switch to the "—" position. The pump will draw water. When water starts flowing out, immediately close the pump. Press the coffee/steam selector to the "—" position and wait for a moment. The appliance will begin to heat until the lamp in the coffee/steam switch illuminates, indicating heating is complete.
- Remove the frothing device from the steam wand.
- Dip the steam wand into the liquid to be heated. Slowly turn the steam control knob counterclockwise to start making steam.
- When the desired temperature is reached, turn the steam control knob to the OFF position.
- Press the ON/OFF switch to the "O" position to cut off the power source.
Maintenance Features
Cleaning and Maintenance:
- If the filter openings are blocked by ground coffee remnants, clean them with a small brush.
- Clean the coffee maker body with a soft damp cloth, then wipe it dry. Do not use metal brushes or abrasive cleaning agents.
- Never immerse the coffee maker body in water or any other liquids.
- Wash the removable parts of the coffee maker with warm water and a soft detergent, then rinse and dry them.
Cleaning Mineral Deposits (Descaling):
To ensure efficient operation and optimal coffee flavor, regularly clean mineral deposits from the internal piping.
- Fill the tank with water and descaler up to the "MAX" level (a 4:1 ratio of water to descaler is recommended; refer to the descaler's instructions. Citric acid (3 parts citric acid to 100 parts water) can be used as a household descaler).
- Following the preheating program, place the metal funnel (without coffee powder) and a carafe (jug) in place. Brew water as per the "preheating" instructions.
- Press the ON/OFF switch to the "—" position; the lamp will illuminate. Press the pump control switch, ensuring the coffee/steam selector is in the "O" position. When water starts flowing out, close the pump. Wait a moment for the coffee maker to heat up.
- When the lamp in the pump control switch illuminates, indicating heating is complete, press the pump control switch to the "—" position and brew two cups of coffee. Close the pump and wait for 5 seconds.
- Press the coffee/steam selector to the "—" position. The indicator in the pump control switch will extinguish. Wait until the indicator in the coffee/steam selector illuminates. Generate steam for 2 minutes by turning the steam control knob, then turn the steam control knob to the OFF position to stop steam production. Press the ON/OFF switch to the "O" position to immediately stop the unit. Allow the descaling solution to remain in the unit for at least 15 minutes.
- Restart the unit and repeat steps 4-6 at least 3 times.
- Then, press the coffee/steam selector to the "O" position. The lamp in the pump control switch will illuminate. Press the pump control switch to the "—" position to brew until no descaler is left.
- Brew coffee (without coffee powder) with tap water at the "MAX" level, repeating steps 4-6 three times (it is not necessary to wait 15 minutes in step 6). Continue brewing until no water is left in the tank.
- Repeat step 9 at least 3 times to ensure the piping is thoroughly clean.
Storage:
- Before long-term storage, clean the coffee maker.
- Store the device in a cool, dry place, out of reach of children and people with disabilities.
Troubleshooting:
- Water leaks from the bottom:
- Cause: Too much water in the drip tray.
- Solution: Clean the drip tray.
- Cause: Coffee maker malfunction.
- Solution: Contact an authorized service facility for repair.
- Water leaks from the outer side of the filter:
- Cause: Some coffee powder on the filter edge.
- Solution: Remove the coffee powder.
- Acid (vinegar) taste in espresso:
- Cause: Incorrect cleaning after mineral deposits.
- Solution: Clean the coffee maker several times as per "before first use" instructions.
- Cause: Coffee powder stored in a hot, wet place for a long time; coffee powder has gone bad.
- Solution: Use fresh coffee powder, or store unused coffee powder in a cool, dry place. After opening a package, reseal it tightly and store it in a refrigerator to maintain freshness.
- Coffee maker does not work:
- Cause: Power outlet not plugged in well.
- Solution: Plug the power cord into a wall outlet correctly. If the appliance still does not work, contact an authorized service facility for repair.
- Steam cannot froth:
- Cause: Steam indicator not illuminated.
- Solution: Use steam to froth only after the steam indicator is illuminated.
- Cause: Container is too big or the shape is not fit.
- Solution: Use a high and narrow cup.
- Cause: Skimmed milk used.
- Solution: Use whole milk or half-skimmed milk.
Marking:
- National mark of conformity assessment: Indicates compliance with technical regulations.
- CE Mark: Indicates conformity with the requirements of the European Union.
- EAC Mark: Indicates conformity with technical regulations of the Customs Union.
- "Do not throw in the trash" symbol: Indicates the device should not be disposed of with household waste.
- RoHS Mark: Indicates compliance with the RoHS Directive 2002/95/EC, limiting harmful substances.
- Hot surface symbol: Indicates the surface heats up during use.