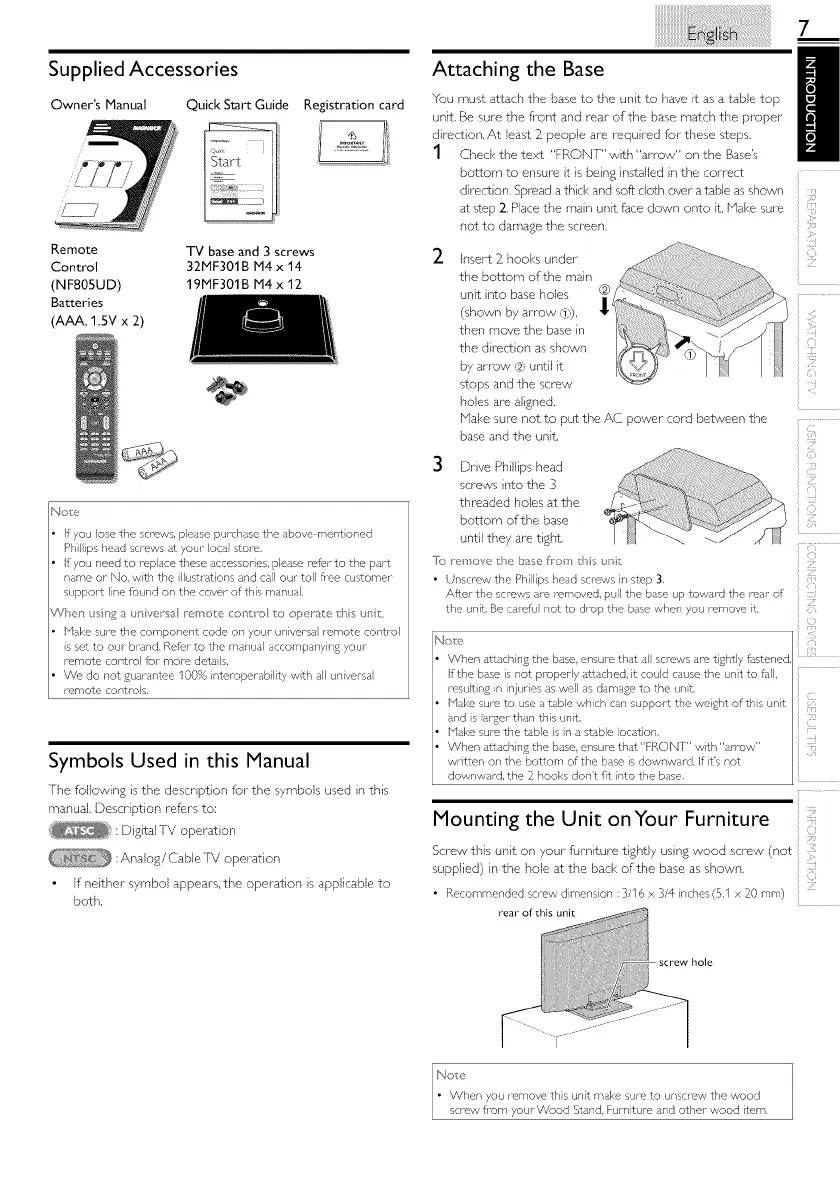
Supplied Accessories
Owner's Manual Quick Start Guide
Remote TV base and 3 screws
Control 32MF301B M4 x 14
(NF805UD) 19MF301B M4 x 12
Batteries
(AAA, 1.5V x 2)
Registration card
[4o _'
If you lose the scrows, please purchase the above merit oned
Phips head screws at your Iota stole,
If you r,eed to i ep ace these accessor es, please refer to the part
name or No, with the luss atior, s and call our toll flee customer
support ne found on the cover of this manual,
V_el s_£ a unverss _e_o e col ro o opIse rhs _s
Nake sure the component code or, your universa i emote control
s set to our brand, Re@r to the manua accompanyln£ your
romote contro for more dora s.
We do not £uarantee 100% nteroperabilty wth all universa
romote contro s,
Symbols Used in this Manual
The following s the ctescr ption for the symbols used n ths
manuak Description refers to:
:D gital]V operat on
:AnaJog/CableTV operation
If neither symbol appears, the operation s applicable to
both,
Attaching the Base
You must attach the base to the unt to have it as a table top
unit, Be sure the front and rear of the base match the proper
direction, At least 2_people are requ red for these steps,
1 Check the text "FRONT" w_th "an ow" on the Base's
bolCom to ensure t is being installed n the correct
direct on, Spread a thck and soft cloth over a table as shown
at step 2, Place the man unit face down onto it, Make sure
not to damage the screen,
2 Insert 2 hooks under
the bottom of the main
unit nto base holes
(shown by arrow d;,),
then move the base in
the direct on as shown
by arrow ,'.2.'until it
stops and the screw
holes are aigned.
b'lal<e sure not to put the AC power cord between the
base and the unit.
3 Drve Ph Ilips head
screws nto the 3
threaded holes at the
bottom of the base
until they are tght
Ion,hove b, basefo_ /s _r_
• Unscrew the Phillips head screws in step 3,
After the screws alO removed, pul the base up toward the rear of
the unit, Be ca1_'fu not to drop the base when you remove It,
i!i_ii!;
211
i!i"i_
Mounting the Unit on Your Furniture
Screw this unt on your furnture t ghtiy usng wood screw (not
supplied) in the hole at the back of the base as shown.
[
• Recommended screw dimens on :3/16 x 3/4 inches (5,1 x 20 mm)
rear of this unit
hole

 Loading...