EasyManua.ls Logo

Mail Boss DROP BOX User Manual

Mail Boss DROP BOX
2 pages
To Next Page IconTo Next Page
Page #1 background imageLoading...
Page #1 background image
Use Phillips Head screwdriver to remove handle
from inside of bin door and use provided screws
to attach handle to outside of bin door.
1
1
Have a question?... Need a part ASAP?...1-800-589-7990
Copyright © 2019 Epoch Design™ All rights reserved
We strongly recommend that you WRITE DOWN YOUR KEY NUMBER and keep it in a safe place.
Without a key number we will not be able to provide replacement keys, you will have to purchase a new
lock and keys set. For security purposes, we reserve the right to deny key replacement without proof of
purchase. Additional keys can be purchased at Mailboss.com
The Wall Mount Bin Style Locking Drop box is designed for your security and convenience.
This drop box is constructed of heavy duty galvanized steel and is designed to be installed on a
vertical wall where items may be delivered.
Below you will find a list of hardware parts and detailed installation instructions.
Please take the time to carefully sort the hardware and familiarize yourself with the function of
each piece for ease of installation. Typical installation hardware has also been provided for your
convenience. Since concrete is a hard surface, take proper care when installing this hardware
into hard surfaces, making sure not to break the drill bit or screws provided. An electric drill may
be required for hard surface installation.
If you require assistance with assembly, part replacement, or any other matter, contact the
toll-free Epoch Design Service Center from anywhere in the Continental United States,
Monday through Friday, 9 AM - 5 PM Pacific Standard Time at 1-800-589-7990. You may also
email your request or comments to info@mailboss.com and a service representative will respond.
You will also find helpful hints and tips on our website: www.mailboss.com.
®
DROP BOX DROP BOX
Thank you.
1/2
Parts and Hardware List
4
Mounting screws
Connect drop box to any wall
Drop Box mailbox
Locking security mailbox
1
TORX (T25) Drive Bit
Used to drive screw into hole.
1
Security keys
Used to lock and unlock
your Drop box
3
4 mm drill bit
For drilling holes into
concrete, brick,
mortar or wood
1
Please note that it is not the responsibility of mail carriers to open mailboxes that are locked, accept keys for this purpose or lock mailboxes after delivery.
4
Rubber Grommets
Already inserted in the box.
Steel Washers
Used with mounting screws.
4
01-May-2019
LOCKING SECURITY MAILBOXES
MAIL BOSS
®
Rain Guard
weather shield
1
Question and Answer IconNeed help?

Do you have a question about the Mail Boss DROP BOX and is the answer not in the manual?

Mail Boss DROP BOX Specifications

General IconGeneral
BrandMail Boss
ModelDROP BOX
CategoryDigital Mailing system
LanguageEnglish

Summary

Parts and Hardware List

Rubber Grommets

Rubber grommets are already inserted in the box for cushioning and sealing.

Steel Washers

Steel washers are used with mounting screws for secure attachment.

Drop Box Mailbox

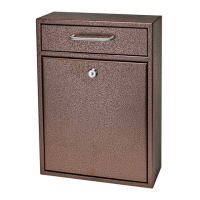
The main locking security mailbox unit.

Rain Guard

Optional weather shield to protect against moisture.

Mounting Screws

Screws used to connect the drop box to any wall.

Security Keys

Keys provided to lock and unlock the drop box.

4 mm Drill Bit

Drill bit for creating pilot holes in various materials.

TORX (T25) Drive Bit

Drive bit for inserting screws into the drop box.

Installation Instructions

Handle Attachment

Attach the handle to the outside of the bin door using provided screws.

Wall Mounting Location

Position the box on the wall at 130-165 cm, ensuring it is level.

Drilling Pilot Holes

Create pilot holes, add caulk/silicone, and ensure proper depth.

Securing the Mailbox

Use washers and screws to securely attach the mailbox to the wall.

Optional Rain Guard Installation

Install the rain guard on the top front edge for added moisture protection.

Care and Maintenance

Exterior Coating Protection

Apply car wax periodically to preserve the exterior coating.

Finish Damage Repair

Use protective paint like Rust-Oleum for exposed metal to prevent rusting.

Lock Lubrication

Apply Tri-Flow lubricant to the lock interior twice a year.

Additional Protection

Consider a lock dust cover in areas with prevalent dust, debris, or salt spray.