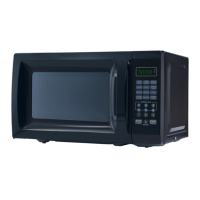
This document describes the Mainstays Microwave Oven, models EM720CGA-B, EM720CGA-W, and EM720CGA-R, providing essential information for its safe operation, use, and maintenance.
Function Description
The Mainstays Microwave Oven is designed for heating, cooking, and drying food using microwave energy. It features a control panel with various buttons for setting cooking parameters, including time, power level, and specific auto-cook menus. The oven operates with ten distinct power levels, allowing for precise control over the cooking process. It includes a clock function, a kitchen timer, and a memory function to save frequently used cooking procedures.
Key functions include:
- Microwave Cook: Allows users to set a specific cooking time and select from ten power levels (10% to 100%). The default power level is 100%.
- Speed Cook: Provides instant cooking at 100% power. Users can start cooking for 1 to 6 minutes by pressing corresponding number pads, or add 30-second increments by pressing the "START/+30SEC." button.
- Weight Defrost: Automatically calculates defrosting time based on the weight of the food, with input ranges between 4-100 oz.
- Time Defrost: Allows users to manually set a defrosting time, with a default power level of 3 (30%). The power level can be adjusted if needed.
- Auto Menus: Features pre-programmed settings for common food items such as Popcorn, Potato, Pizza, Frozen Vegetable, Beverage, and Dinner Plate. These menus simplify cooking by automatically setting appropriate times and power levels based on quantity or size.
- Multi-Stage Cooking: Supports up to two cooking stages, allowing for sequential cooking with different power levels or defrosting followed by cooking. Defrosting, if selected, is automatically placed as the first stage.
- Lock Function: A safety feature that locks the control panel to prevent accidental operation, particularly useful in households with children. It is activated and deactivated by pressing "STOP/CANCEL" for 3 seconds.
- Inquiring Function: During cooking, users can check the current time by pressing "CLOCK" or the current microwave power level by pressing "POWER."
Usage Features
The microwave oven is designed for ease of use with a clear LED display and intuitive button layout.
Setting the Clock:
To set the clock, press "CLOCK," then enter the current time using the number keys (e.g., "1,2,1,0" for 12:10). Press "CLOCK" again to confirm. The clock supports a 12-hour system. If no operation occurs for 1 minute during setting, or if "STOP/CANCEL" is pressed, the oven reverts to its previous setting.
Using the Kitchen Timer:
Press "KITCHEN TIMER," then enter the desired time using the number keys (up to 99 minutes and 99 seconds). Press "START/+30SEC." to confirm. The timer will sound 5 beeps when finished. Note that the kitchen timer operates independently of cooking programs.
Microwave Cooking:
- Press "TIME COOK."
- Enter the cooking time using number keys (up to 99 minutes and 99 seconds).
- Press "POWER." The default is 100% power ("PL10"). To adjust, press a number key corresponding to the desired power level (e.g., "5" for 50% power).
- Press "START/+30SEC." to begin.
During microwave cooking, the power level can be changed by pressing "POWER" and then a number button within 3 seconds.
Auto Menus (Popcorn, Potato, Frozen Vegetable, Beverage, Dinner Plate, Pizza):
For these menus, repeatedly press the corresponding auto-menu button until the desired quantity or size appears on the display. Then, press "START/+30SEC." to start cooking. The oven will beep once to confirm and five times when cooking is finished. For popcorn, it is recommended to fold down bag corners for 3.0 or 3.5 oz bags to ensure proper rotation and even cooking. If the bag obstructs rotation, press "STOP/CANCEL" to adjust its position.
Memory Function:
The oven can store up to three custom cooking procedures.
- In standby, press "0/MEMORY" repeatedly to select memory 1, 2, or 3.
- Set the desired cooking stages (up to two stages, e.g., "TIME COOK" + time, "POWER" + level).
- Press "START/+30SEC." once to save the procedure. The oven will beep once.
- To run a saved procedure, in standby, press "0/MEMORY" to select the memory number, then press "START/+30SEC."
General Operation Notes:
- The "STOP/CANCEL" button clears all previous settings before cooking starts. During cooking, pressing it once stops the oven, and twice stops and clears all entries.
- The "START/+30SEC." button initiates cooking and can add 30 seconds to active cooking or defrosting times.
- The oven display shows "0:00" in standby if the clock is not set, or the current time with a flashing colon if it is. During operation or pause, it displays the remaining cooking time.
- An end-of-cooking reminder sounds five beeps to alert the user.
Maintenance Features
Proper maintenance ensures the longevity and safe operation of your microwave oven.
Cleaning:
- When cleaning surfaces of the door and oven that come together upon closing, use only mild, nonabrasive soaps or detergents applied with a sponge or soft cloth.
- Regularly clean the oven cavity, especially if food spills occur, to prevent arcing or sparking.
Utensil Guidelines:
- Always use microwave-safe cookware. Refer to the "Materials you can use in microwave oven" section of the manual for a comprehensive list.
- Avoid using metal or metal-trimmed utensils, aluminum foil (unless specifically for shielding thin parts and kept at least 1 inch from oven walls), metal twist ties, paper bags, plastic foam, or wood, as these can cause arcing, fire, or contamination.
- Tightly-closed containers can explode; always open them or pierce plastic pouches before cooking.
- To test if a non-metallic utensil is microwave-safe, place it with 1 cup of cold water in the oven and cook on maximum power for 1 minute. If the utensil is warm, do not use it for microwave cooking.
Liquid Heating Precautions:
- Liquids can overheat beyond boiling point without visible bubbling. Stir liquids before and halfway through heating.
- Do not use straight-sided containers with narrow necks.
- After heating, allow the container to stand in the microwave oven for a short time before removing.
- Exercise extreme care when inserting a spoon or other utensil into heated liquids.
Troubleshooting:
The manual provides a troubleshooting chart for common issues such as the oven not starting, arcing/sparking, unevenly cooked food, overcooked food, undercooked food, and improper defrosting. Solutions often involve checking the power plug, ensuring the door is closed, using microwave-safe cookware, not operating the oven empty, cleaning the cavity, defrosting food completely, using correct cooking times and power levels, and turning or stirring food. If issues persist, contact customer assistance.
Installation and Placement:
- Install the oven on a level surface with adequate open space for intake and outlet openings. Maintain a minimum clearance of 3.0 inches (7.5cm) from adjacent walls (one side must be open) and 12 inches (30cm) above the oven.
- Do not remove the light brown Mica cover inside the oven cavity, as it protects the magnetron.
- Ensure the glass tray and turntable ring assembly are always in place and used during cooking.
- Do not install the oven over a range cooktop or other heat-producing appliances, as this can damage the oven and void the warranty.
- Place the oven away from radios and TVs to minimize interference.
Safety Precautions:
- Never operate the oven with the door open or if it is damaged (bent door, broken hinges/latches, damaged door seals).
- Do not attempt to repair or adjust the oven yourself; only qualified service personnel should perform repairs.
- This appliance must be properly grounded. Use a 3-wire grounding plug and a properly installed and grounded outlet. If an extension cord is necessary, use a 3-wire grounding type with an electrical rating equal to or greater than the appliance's rating.
- Do not overcook food, and supervise the appliance when using combustible materials.
- Remove wire twist-ties and metal handles from containers before placing them in the oven.
- If materials inside the oven ignite, keep the door closed, turn off and unplug the oven, and disconnect power at the fuse/breaker panel.
- Do not use the oven cavity for storage.
- Do not immerse the cord or plug in water, and keep the cord away from heated surfaces.