10
ASSEMBLY
CAUTION:
• Always be sure that the tool is switched off and the
battery cartridge is removed before carrying out
any work on the tool.
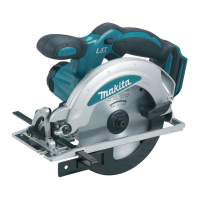
Removing or installing saw blade
1
2
006706
CAUTION:
• Be sure the blade is installed with teeth pointing up
at the front of the tool.
• Use only the Makita wrench to install or remove the
blade.
To re mo ve t he b lad e, p re ss the shaft lock so that the
blade cannot revolve and use the wrench to loosen the
hex bolt clockwise. Then remove the hex bolt, outer
flange and blade.
To i n st a ll t he bl ad e, fo ll ow t he re mo v al p ro ce du re i n
reverse. BE SURE TO TIGHTEN THE HEX BOLT
COUNTERCLOCKWISE SECURELY.
1
2
3
4
006707
When changing blade, make sure to also clean upper
and lower blade guards of accumulated sawdust. Such
efforts do not, however, replace the need to check lower
guard operation before each use. .
Only for tools with a ring (specific country)
1
2
3
4
5
013488
WARNING:
• Before mounting the blade onto the spindle,
always be sure that the correct ring for the
blade's arbor hole you intend to use is installed
between the inner and the outer flanges. Use of
the incorrect arbor hole ring may result in the
improper mounting of the blade causing blade
movement and severe vibration resulting in
possible loss of control during operation and in
serious personal injury.
Hex wrench storage
1
006708
When not in use, store the hex wrench as shown in the
figure to keep it from being lost.
Connecting a vacuum cleaner
1
2
006711
1. Inner flange
2. Saw blade
3. Ring
4. Outer flange
5. Hex bolt
1. Dust nozzle
2. Screw
1. Hex wrench
1. Inner flange
2. Saw blade
3. Outer flange
4. Hex. bolt
1. Shaft lock
2. Hex wrench
 Loading...