Do you have a question about the Makita 4350FCT and is the answer not in the manual?
Read and understand all instructions before use. Save these instructions for future reference.
Keep work area clean and well lit. Do not operate in explosive atmospheres. Keep bystanders away.
Ensure proper grounding and avoid contact with wet surfaces. Use outdoor extension cords if needed.
Stay alert, dress properly, avoid accidental starting, keep footing and balance, use safety equipment.
Secure workpiece, do not force tool, check switch, disconnect power before adjustments, store properly.
Hold by insulated surfaces, use safety glasses, avoid cutting nails and hollow pipe.
Use heavy-gauge, good condition extension cords rated for outdoor use.
Do not cut oversize workpiece, check clearance, hold firmly, keep hands away from moving parts.
Select between orbital and straight cutting actions based on material and desired cut.
Pull the switch trigger to start, release to stop. Use lock button for continuous operation.
Adjust speed using the dial between 800-2,800 strokes per minute for optimal cutting.
Table provides recommended speed settings for different materials like wood, steel, and aluminum.
Features constant speed control for consistent performance and soft start for reduced shock.
Follow procedures to securely install or remove the jig saw blade using the tool opener.
Convenient storage location for the hex wrench when not in use.
Adjust the tool base angle for bevel cuts from 0° to 45° using the hex wrench.
Adjust the base position for performing front flush cuts.
Make internal cutouts by boring a starting hole or using plunge cutting.
Perform plunge cuts without a starting hole by carefully tilting and lowering the tool.
Trim edges, make adjustments, and use coolant for metal cutting.
Attach dust nozzle for clean cutting operations, connect to vacuum cleaner.
Install the dust nozzle on either side of the base and connect a vacuum cleaner.
Use rip fence for fast, clean, straight cuts of specific widths.
Install rip fence with circular guide pin for cutting circles or arcs of specific radii.
Use cover plate for delicate surfaces and anti-splintering device for splinter-free cuts.
Tool maintenance and repairs should be performed by authorized service centers using identical parts.
List of recommended accessories including blades, rip fence, dust nozzle, cover plate, and hex wrench.
Details chemicals known to cause cancer or reproductive harm in California dust.
Details the one-year warranty policy, coverage, and exclusions.
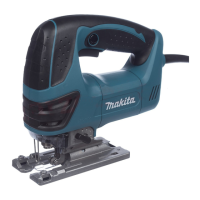
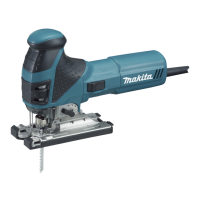
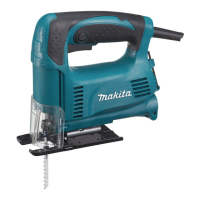
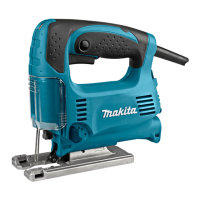
This document describes the Makita Variable Speed Jig Saw, Model 4340FCT, a double-insulated power tool designed for cutting various materials. It emphasizes safety, proper use, and maintenance to ensure personal safety and optimal tool performance.
The Makita Jig Saw Model 4340FCT is a versatile cutting tool capable of both orbital and straight-line cutting actions. The orbital cutting action thrusts the blade forward on the cutting stroke, significantly increasing cutting speed, which is beneficial for faster material removal. The straight-line cutting action, on the other hand, provides a cleaner cut, suitable for more precise applications.
The tool features a speed adjusting dial that allows for infinite adjustment of the strokes per minute, ranging from 800 to 2,800. This variable speed control enables users to select the appropriate speed for different workpieces and cutting tasks, optimizing both cutting efficiency and blade life. Higher speeds generally result in faster cuts but may reduce blade service life.
An electronic function enhances the tool's operability, incorporating constant speed control and a soft start feature. The constant speed control maintains a consistent rotating speed even under load conditions, ensuring a fine finish. The soft start feature suppresses the initial starting shock, contributing to safer and smoother operation.
For improved visibility during operation, the tool is equipped with lamps that illuminate the cutting area. These lamps turn on when the switch trigger is pulled and turn off when released.
The jig saw is also designed for bevel cutting, allowing the tool base to be tilted to angles between 0° and 45° (left or right). This feature enables users to make angled cuts for various applications.
Cutouts can be performed using two methods: boring a starting hole or plunge cutting. Boring a starting hole involves pre-drilling a 12 mm (1/2") or larger hole for internal cutouts without a lead-in cut from an edge. Plunge cutting allows for starting cuts without a pre-drilled hole by carefully tilting the tool and gradually lowering the blade into the workpiece.
For clean cutting operations, a dust extraction system can be utilized with an optional dust nozzle connected to a Makita vacuum cleaner. This helps to manage dust and debris, maintaining a clearer work area.
Selecting the Cutting Action: The cutting action is changed by turning a lever to one of four positions (0, I, II, III).
Switch Action: The tool is started by pulling the switch trigger and stopped by releasing it. For continuous operation, the switch trigger can be pulled and then the lock button pushed in. To stop from the locked position, the trigger is pulled fully and then released. Users are advised to ensure the switch trigger actuates properly and returns to the "OFF" position before plugging in the tool.
Speed Adjustment: The speed adjusting dial allows users to set the desired strokes per minute. Turning the dial towards number 5 increases speed, while turning it towards number 1 decreases it. It is important not to force the dial past its limits (5 or 1) to avoid damaging the speed adjusting function. The manual provides a table recommending speed settings based on the workpiece material (Wood: 4-5, Mild steel: 3-5, Stainless steel: 3-4, Aluminum: 3-5, Plastics: 1-4).
Installing/Removing Saw Blade: To install a blade, the tool opener is opened, the blade is inserted into the blade clamp until its two protrusions are no longer visible, and then the tool opener is returned to its original position. After installation, the blade's security should be checked by attempting to pull it out. To remove, the tool opener is opened, and the blade is pulled out towards the base. Users are cautioned to clean chips or foreign matter from the blade and holder to ensure proper tightening and to avoid touching hot blades or workpieces immediately after operation.
Hex Wrench Storage: The hex wrench, used for adjustments, can be conveniently stored on the tool when not in use.
Operation: The tool should always be held with its base flush against the workpiece. After turning the tool on and allowing the blade to reach full speed, it should be gently moved forward along the cutting line. When cutting curves, the tool should be advanced very slowly.
Bevel Cutting: To perform bevel cuts, the bolt on the back of the base is loosened with the hex wrench. The base is then moved to position the bolt in the center of the bevel slot, and tilted until the desired angle (indicated by the V-notch on the gear housing) is achieved. The bolt is then tightened to secure the base.
Front Flush Cuts: For front flush cuts, the bolt on the back of the tool base is loosened, and the tool base is moved all the way back before tightening the bolt to secure it.
Finishing Edges: To trim edges or make dimensional adjustments, the blade should be run lightly along the cut edges.
Metal Cutting: When cutting metal, a suitable coolant (cutting oil) should always be used to prevent significant blade wear. Greasing the underside of the workpiece can serve as an alternative to a coolant.
Rip Fence Set (Optional Accessory): For straight cuts of 160 mm (6-5/16") or less, the rip fence ensures fast, clean, and straight results. It is inserted into the rectangular hole on the side of the tool base with the fence guide facing down, slid to the desired cutting width, and then secured by tightening the bolt.
Circular Cuts (with Rip Fence Set): For cutting circles or arcs of 170 mm (6-11/16") radius or less, the rip fence is installed with the fence guide facing up. A circular guide pin is inserted through one of the two holes on the fence guide, and a threaded knob is screwed onto the pin to secure it. The rip fence is then slid to the desired cutting radius, the bolt is tightened, and the tool base is moved all the way forward. Specific blades (B-17, B-18, B-26, or B-27) are recommended for circular cuts.
Cover Plate: The cover plate is used when cutting decorative veneers, plastics, or other sensitive surfaces to protect them from damage. It fits on the back of the tool base.
Anti-splintering Device: For splinter-free cuts, this device can be installed by moving the tool base all the way forward and fitting it from the back. If using the cover plate, the anti-splintering device is installed onto the cover plate. It cannot be used when making bevel cuts.
General Maintenance: Before any inspection or maintenance, the tool must be switched off and unplugged. To maintain product safety and reliability, all repairs, carbon brush inspections and replacements, and any other maintenance or adjustments should be performed by Makita Authorized or Factory Service Centers, using only Makita replacement parts.
Blade Roller Lubrication: The blade roller should be occasionally lubricated.
Lamp Lens Cleaning: The lens of the lamp should be wiped with a dry cloth to remove dirt. Care should be taken not to scratch the lens, as this may reduce illumination.
Cord Inspection: The extension cord should be in good condition and of adequate gauge to carry the current drawn by the tool, preventing voltage drop and overheating. A table is provided in the manual to determine the minimum gauge for cords based on ampere rating and length.
Accessory Use: Only accessories or attachments recommended by Makita for this specific tool should be used. Using unauthorized accessories may pose a risk of injury. Recommended accessories include jig saw blades, rip fence sets, dust nozzles, cover plates, anti-splintering devices, and hex wrenches.
| Stroke length | 26 mm |
|---|---|
| Cutting depth in wood | 135 mm |
| Cutting depth in non-alloyed steel | 10 mm |
| Output power | 720 W |
| Power source | AC |
| No-load stroke rate | 2800 spm |
| Bevel adjustment | Yes |
| Bevel capacity (max) | 45 ° |
| Weight | 2585.48 g |
|---|