9 ENGLISH
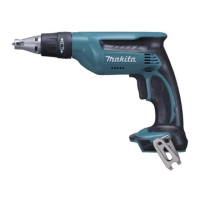
For DFS250
►Fig.8: 1. Locator
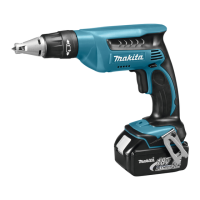
For DFS251
►Fig.9: 1. Locator
Adjustthelocatorsothatthedistancebetweenthetip
of the locator and the screw head is approximately 3
mm(1/8")asshowninthegures.Driveatrialscrew
into your material or a piece of duplicate material. If the
depthisstillnotsuitableforthescrew,continueadjust-
inguntilyouobtaintheproperdepthsetting.
Hook
CAUTION: Always remove the battery when
hanging the tool with the hook.
CAUTION: Never hook the tool at high loca-
tion or on potentially unstable surface.
►Fig.10: 1. Hook
The hook is convenient for temporarily hanging the tool.
ASSEMBLY
CAUTION: Always be sure that the tool is
switched off and the battery cartridge is removed
before carrying out any work on the tool.
Installing or removing driver bit/
socket bit
For DFS250
►Fig.11: 1. Locator
►Fig.12: 1. Locator 2.Driverbit3.Magneticbit
holder
Toremovethedriverbit,pullthelocator,andthengrasp
thebitwithapairofpliersandpullthebitoutofthe
magneticbitholder.Toinstallthedriverbit,pushitrmly
intothemagneticbitholder.Theninstallthelocatorby
pushingitrmlyback.
For DFS251
►Fig.13: 1. Locator
►Fig.14: 1. Locator 2.Socketbit
Toremovethesocketbit,pullthelocator,andthenpull
thesocketbit.Toinstallthesocketbit,pushitrmlyinto
thesleeve.Theninstallthelocatorbypushingitrmly
back.
Hook
►Fig.15: 1. Groove 2. Hook 3. Screw
The hook is convenient for temporarily hanging the tool.
Thiscanbeinstalledoneithersideofthetool.
To install the hook, insert it into a groove in the tool
housing on either side and then secure it with a screw.
To remove, loosen the screw and then take it out.
OPERATION
Screwdriving operation
►Fig.16
Fitthescrewonthepointofthebitandplacethepoint
ofthescrewonthesurfaceoftheworkpiecetobefas-
tened.Applypressuretothetoolandstartit.Withdraw
the tool as soon as the clutch cuts in. Then release the
switch trigger.
CAUTION:Whenttingthescrewontothepoint
ofthebit,becarefulnottopushinonthescrew.If
the screw is pushed in, the clutch will engage and
the screw will rotate suddenly. This could damage a
workpieceorcauseaninjury.
CAUTION:Makesurethatthebitisinserted
straightinthescrewhead,orthescrewand/orbit
maybedamaged.
MAINTENANCE
CAUTION: Always be sure that the tool is
switched off and the battery cartridge is removed
before attempting to perform inspection or
maintenance.
NOTICE: Never use gasoline, benzine, thinner,
alcohol or the like. Discoloration, deformation or
cracks may result.
TomaintainproductSAFETYandRELIABILITY,
repairs,anyothermaintenanceoradjustmentshould
beperformedbyMakitaAuthorizedorFactoryService
Centers, always using Makita replacement parts.
OPTIONAL
ACCESSORIES
CAUTION: These accessories or attachments
are recommended for use with your Makita tool
specied in this manual. The use of any other
accessories or attachments might present a risk of
injurytopersons.Onlyuseaccessoryorattachment
for its stated purpose.
If you need any assistance for more details regard-
ing these accessories, ask your local Makita Service
Center.
• Driverbits
• Magneticbitholder
• Socketbits
• Makitagenuinebatteryandcharger
• Plastic carrying case
NOTE:Someitemsinthelistmaybeincludedinthe
tool package as standard accessories. They may
differ from country to country.
 Loading...