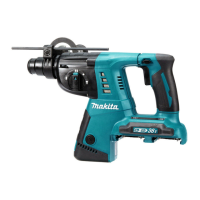
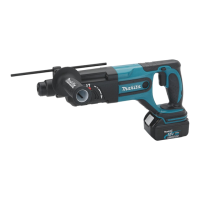
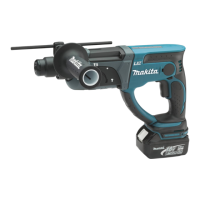
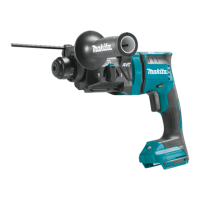
The Makita XRH05 is a cordless combination hammer designed for various drilling and hammering operations. It is a versatile power tool suitable for tasks involving concrete, steel, wood, and for chipping, scaling, or demolition.
Function Description:
The XRH05 operates as a cordless combination hammer, offering three primary action modes:
- Rotation with hammering: Ideal for drilling into concrete, masonry, and similar hard materials using tungsten-carbide tipped bits.
- Rotation only: Suitable for drilling into wood, metal, or plastic materials with twist drill bits or wood bits.
- Hammering only: Used for chipping, scaling, or demolition operations with accessories like bull points, cold chisels, or scaling chisels.
The tool is powered by Makita 36V DC battery cartridges (BL1830/BL1840) and features a tool/battery protection system that automatically cuts off power to the motor to extend tool and battery life. This system includes overload protection, overheat protection for the battery (for battery cartridges with a star marking), and overdischarge protection, indicated by a blinking battery indicator when capacity is low.
Important Technical Specifications:
- Capacities:
- Concrete: 26 mm (1")
- Steel: 13 mm (1/2")
- Wood: 32 mm (1-1/4")
- No load speed (RPM): 0 - 1,250/min
- Blows per minute: 0 - 5,000
- Overall length: 350 mm (13-3/4")
- Net weight (with battery cartridge): 4.6 kg (10.1 lbs)
- Rated voltage: D.C. 36 V
- Standard battery cartridge(s): BL1830 / BL1840
Usage Features:
- Battery Installation/Removal: Always ensure the tool is switched off. Hold the tool and battery cartridge firmly. To remove, slide the button on the front of the cartridge and pull it out. To install, align the tongue with the groove and push until it clicks, ensuring the red indicator is not visible. The tool requires two battery cartridges to operate.
- Switch Action: The tool is started by pulling the switch trigger. Speed increases with pressure on the trigger. Releasing the trigger stops the tool.
- Lamp: A built-in lamp illuminates when the switch trigger is pulled and stays on for 10-15 seconds after release.
- Reversing Switch: A reversing switch allows changing the direction of rotation (clockwise or counterclockwise). It should only be used when the tool has come to a complete stop to prevent damage. A neutral position locks the switch trigger.
- Action Mode Selection: A lock button and a rotating knob are used to select the desired action mode (rotation with hammering, rotation only, or hammering only). The knob should not be rotated while the tool is running.
- Torque Limiter: The torque limiter disengages the motor from the output shaft when a certain torque level is reached, stopping the bit. This prevents premature wear and should prompt immediate tool shutdown. Hole saws are not recommended as they frequently actuate the torque limiter.
- Side Grip (Auxiliary Handle): An auxiliary handle is provided for operating safety. It should be installed with its teeth fitting between the protrusions on the tool barrel and tightened by turning clockwise. It can be swung 360 degrees.
- Bit Installation/Removal: Clean the bit shank and apply bit grease before insertion. Insert the bit, turn it, and push until it engages. After installation, verify it's securely held by pulling. To remove, pull the chuck cover down and pull the bit out.
- Bit Angle Adjustment: For chipping, scaling, or demolition, the bit angle can be adjusted by depressing the lock button and rotating the action mode changing knob to the "O" symbol.
- Depth Gauge: A depth gauge can be inserted into the side grip and adjusted to drill holes of uniform depth. It cannot be used if it strikes the gear housing.
- Dust Cup (Optional Accessory): Used for overhead drilling to prevent dust from falling. It attaches to bits within specific diameter ranges (6 mm - 16 mm).
- Blow-out Bulb (Optional Accessory): Used to clean dust out of drilled holes.
- Drilling in Wood or Metal: For these operations, an optional drill chuck assembly is installed, and the action mode changing knob is set to the rotation-only symbol. "Rotation with hammering" should not be used with the drill chuck assembly. Excessive pressure will not speed up drilling and can damage the bit and shorten tool life.
- Hammer Drilling Operation: Position the bit, pull the trigger, and apply light pressure. Do not force the tool. If the hole clogs, run the tool at idle and partially remove the bit to clear debris. Always use the side grip and hold the tool firmly with both hands, especially during breakthrough or when striking reinforcing rods, to prevent loss of control and injury.
Maintenance Features:
- General Maintenance: Always switch off the tool and remove the battery cartridge before inspection or maintenance. Avoid using gasoline, benzine, thinner, alcohol, or similar solvents as they can cause discoloration, deformation, or cracks.
- Carbon Brush Replacement: Regularly check carbon brushes and replace them when they wear down to the limit mark. Keep them clean and free to slip in their holders. Both brushes should be replaced simultaneously with identical carbon brushes. Use a screwdriver to remove brush holder caps.
- Lubrication: Apply a small amount of bit grease (0.5-1 g) to the bit shank head before installation to ensure smooth action and longer service life.
- Screw Tightness: Check the tightness of screws carefully before operation.
- Cold Weather Operation: In cold weather or after long periods of disuse, warm up the tool by operating it under no load to loosen lubrication.
- Handle Maintenance: Keep handles dry, clean, and free from oil and grease.
- Repair: For product safety and reliability, repairs and other maintenance should be performed by Makita Authorized or Factory Service Centers using genuine Makita replacement parts.