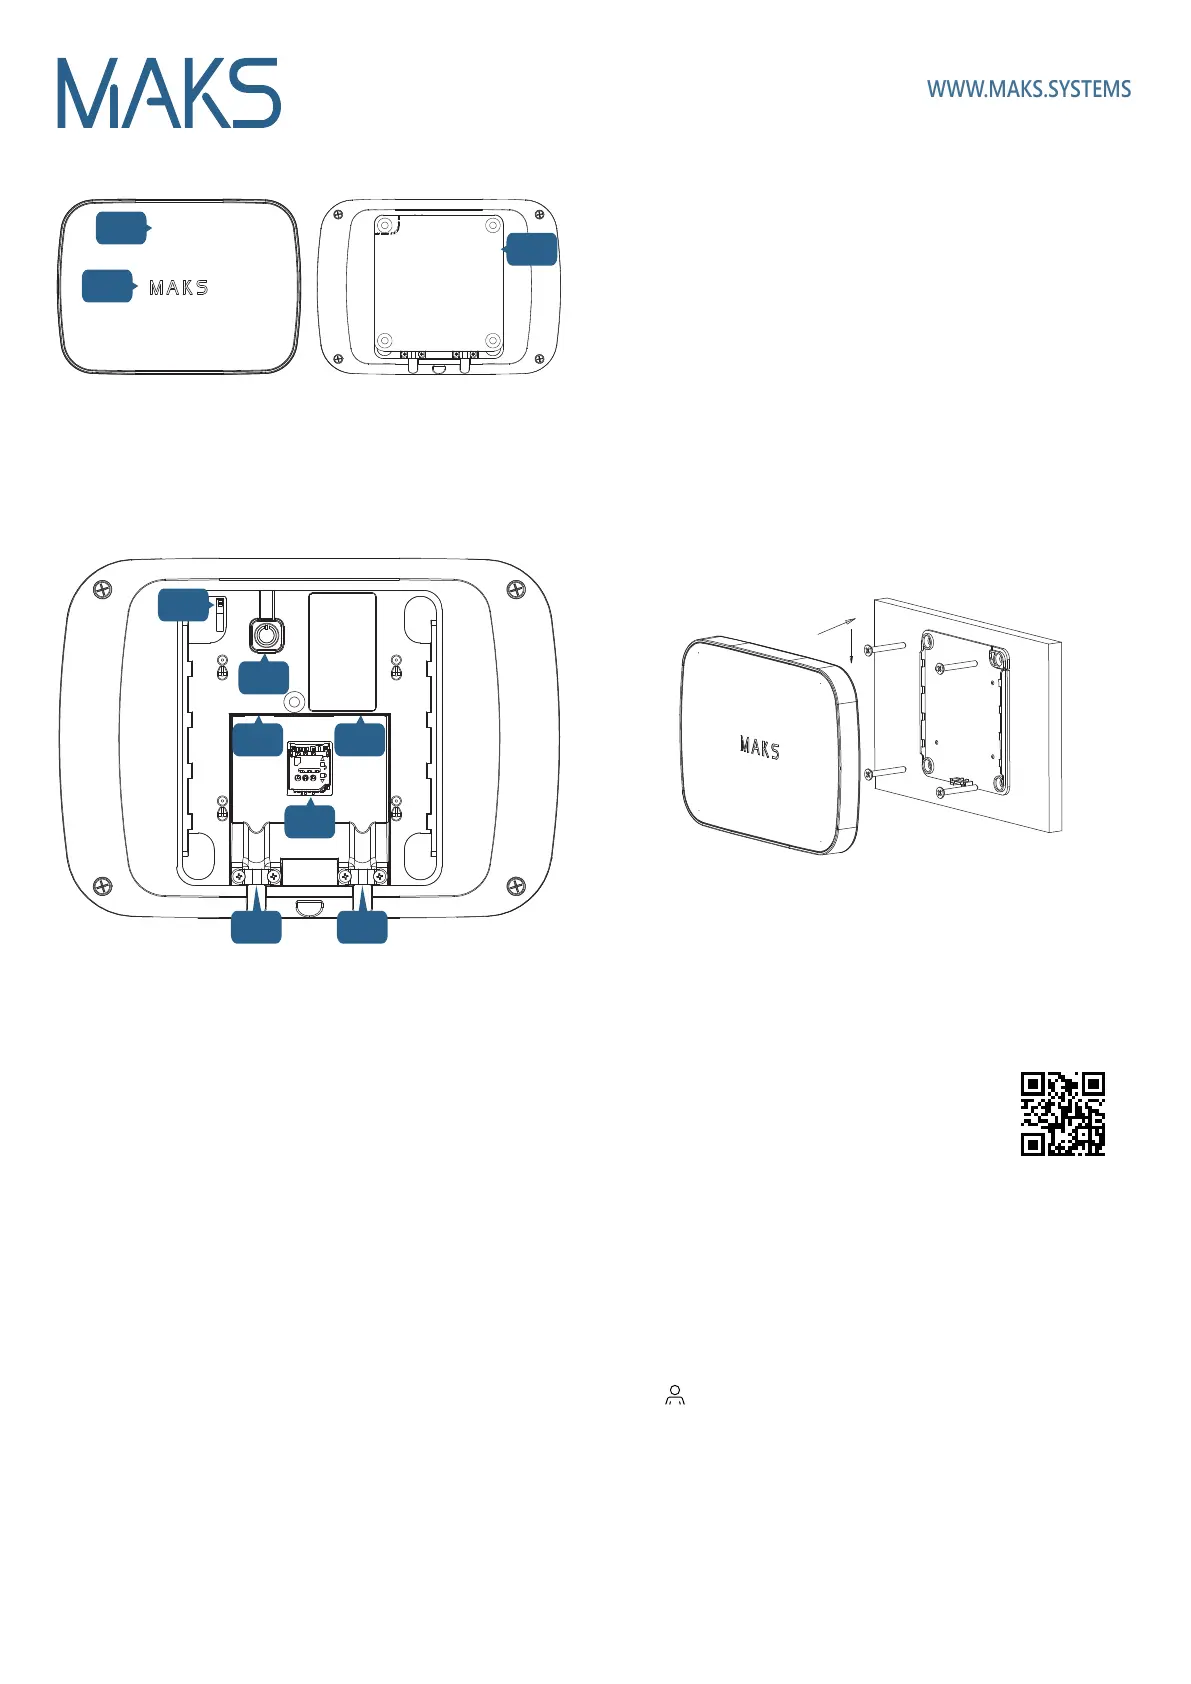
Functional parts of the device
2
3
4
5
6 7
8
1. Device case
2. Light indicator
3. Mounting plate
4. Tamper contact
5. On/Off button
6. Power supply connector
7. Ethernet cable connector
(computer network)
8. SIM card holder (micro SIM)
9. Cable clamps
Selecting the installation location
Carefully select the location of the wireless security center MAKS PRO.
Make sure the location meets the following criteria:
1. Reliable communication with MAKS wireless devices
2. Internet access via Ethernet and/or GSM/GPRS
3. The device must be kept out of sight
MAKS PRO should not be placed:
1. Outdoors or in areas with unacceptable humidity and temperature
2. In places with a high level of radio interference
3. Near objects that can cause radio, metal, mirrors, etc. to fade out.
Installation and connection
1. Slide the mounting plate 3 down and disconnect it
2. Fit plate 3 on the surface (e.g. on the wall), using the screws and plugs
included in the kit.
9 9
3. Connect the MAKS PRO and router with an Ethernet cable
(connector 7)
4. Insert the GSM operator's SIM card into the holder 8, with the PIN
code request disabled,
5. Connect the power supply to connector 6 of the device
6. Secure the cables with clamps 9
7. Place the device on mounting plate 3 and slide it down to fix it and
lock the tamper contact 4
Setting up
1. Download and install the MAKS Setup applica-
tion, launch it and sign up
2. Break the tamper switch of the device. To do it, slide the device
mounted on the mounting plate upwards
3. In MAKS Setup, log in to the created account and click the "+" (Add)
button to add the device.
4. Then select the created device from the list and press the "Add radio
devices" button to register the detectors, keypads, etc. and configure
them.
5. After registering all available wireless devices, add the first user to the
tab ("Users") and enter their name. Provide it with a keyboard PIN
code, a key fob, if used. Enter the e-mail address of the user if he or she
is going to use the MAKS PRO mobile application to control the system.
An invitation will be sent to the e-mail with a link to download the
application. Once the application is installed, the user password must be
created.
6. To connect the device to security companies in MAKS SETUP, use the
settings available.
Please note! The user cannot change the settings of the
device if it is connected to a security company.
Switching on and off
In order to turn on the device, just plug it in the power supply unit connect-
ed to the socket. To turn on the device without the main power supply,
press button 5.
The light indicator will turn on and the device will start loading.
To turn off the device, turn off the power supply, press and hold button 5
for 3 seconds, until you hear the sound signal.
1
Indication
MAKS light indicator:
• glows green - communication with MAKS Cloud
• glows red - no communication with MAKS Cloud (none of the Ethernet
or GPRS channels are working)
• flashes green every 30 seconds - no main power, the device is in
power saving mode, and there is a connection to the MAKS Cloud
• flashes red every 30 seconds - no main power supply, the device is in
power saving mode, and there is no communication with MAKS Cloud
(none of the Ethernet and GPRS channels are working)
Resetting to default
Press and hold button 5 for 40 seconds. You will hear series of sound signals
- continue to hold button 5. When indicator MAKS glows yellow and you
will hear long sound signal - release button 5. Device resets to default.

 Loading...