flashing LED and the
steady
LED
coin-
cide
o
When the shutter
speed setting
is
ap-
propriate
for
lhe apedure, a
single
LED
will light
(but
not flash)
o
With manual
shutter speed settings,
the LED remains lit for 10
seconds after
the
shutter
release
button is
oushed
lightly
and
then released
11 the
shutter
release button is released
after the ex-
posure
is completed, the LED will
go
out
even before ten seconds have
elaosed
11 light
pressure
is maintained
on the
shutter release button for more than
ten
seconds, the LED will disappear
as soon
as the button is released
Manual Exposure
Focusing
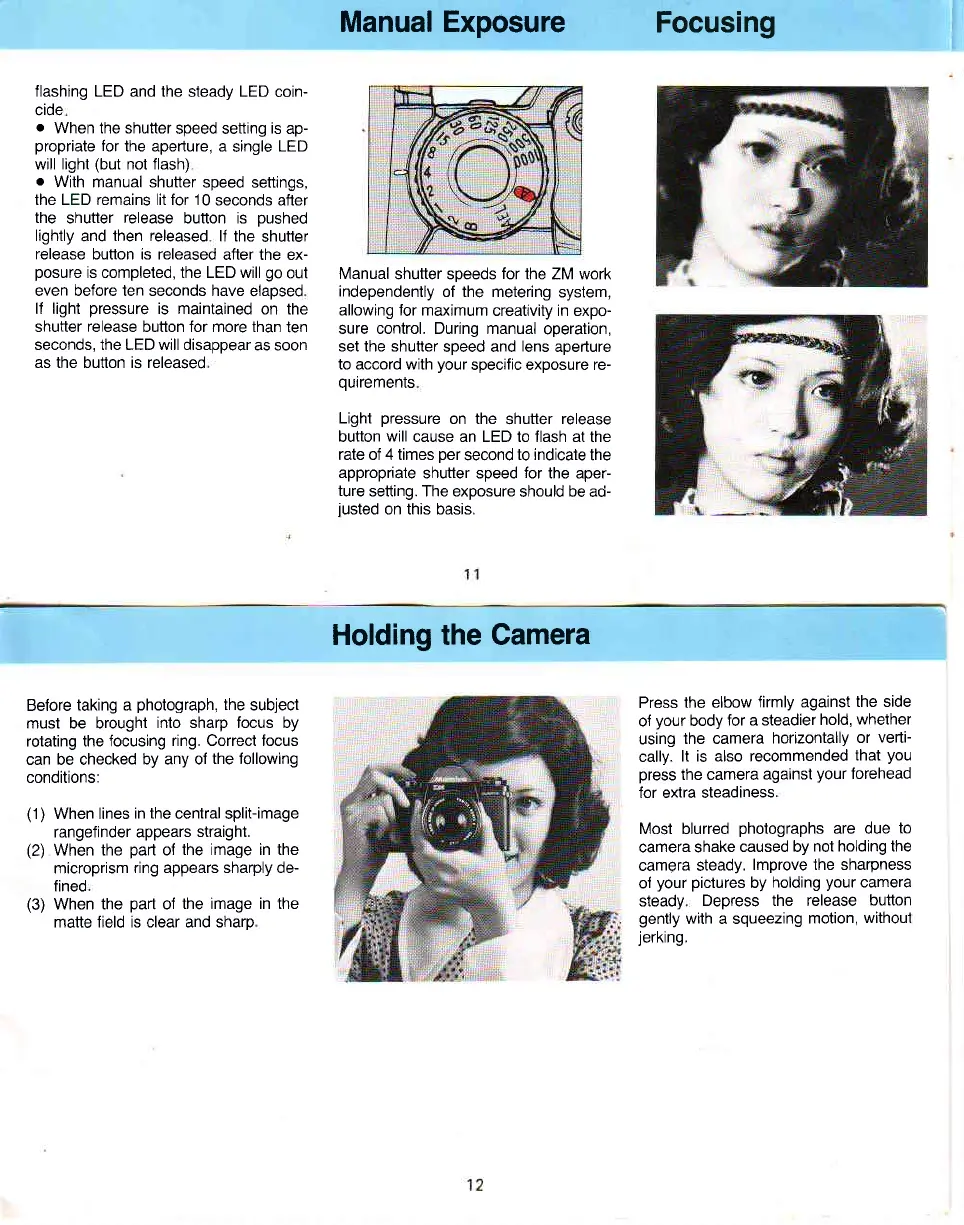
Manual
shutter soeeds
for
lhe ZM work
independently
of the metering
system,
allowing for maximum
creativity in expo-
sure control. During manual
operation,
set the shutter
speed and
lens
aperture
to accord with
your
specific exposure re-
ouirements
Light
pressure
on the
shutter
release
button
will
cause an LED to llash at the
rate of 4 times
per
second
to indicate
the
appropriate
shutter speed
for
the aper-
ture
setting. The exposure
should be ad-
iusted on this basis.
Holding the Gamera
Before
taking a
photograph,
the
subject
must be brought
into sharp focus by
rotating the focusing
ring. Correct locus
can be checked
by any of
the following
conditions:
(1)
When lines
in the
central split-image
rangefinder appears
straight.
(2)
When the
pan
of
the image in the
microprism
ring appears sharply de-
fined
(3)
When the
part
of
the image in the
matte field is clear and sharp
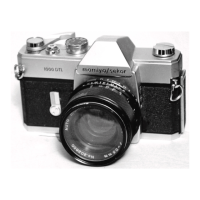
Press
the elbow
firmly against
the side
of
your
body
for a steadier
hold,
whether
using
the camera
horrzontally
or
vedi-
cally.
lt is also recommended
that
you
press
the camera
agarnst
your
forehead
for extra steadiness
Most bluned
photographs
are due
to
camera shake
caused by
not holding the
camera steady.
lmprove the sharpness
oi
your pictures
by
holding
your
camera
steady
Depress the release
button
gently
with a squeezing
motion,
withoul
jerking.