3-30
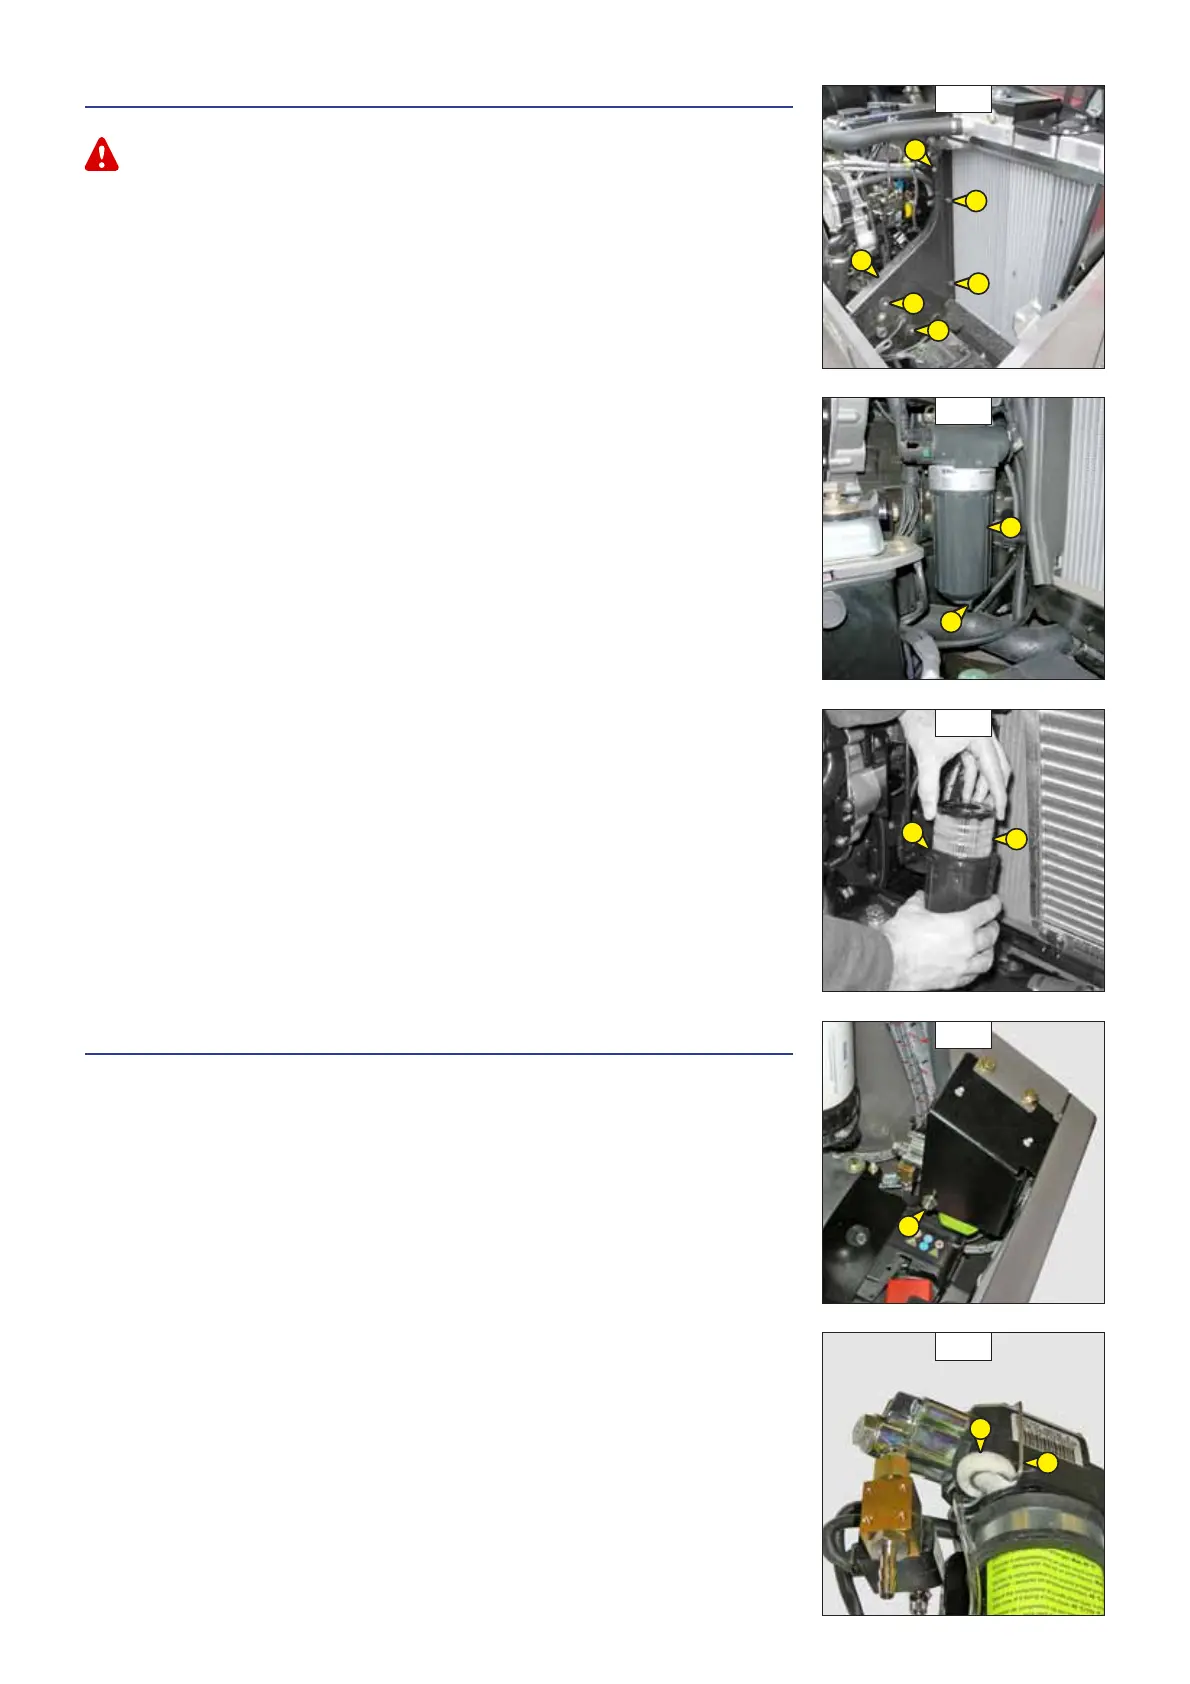
D5 - FUEL FILTER
CHANGE
Make sure the electrical contact on the lift truck is cut, otherwise fuel will be released if the lift pump is on.
- Open the I.C. engine bonnet.
- Unscrew the fastening screws 1 (fig. D5/1).
(according to model)
- Remove the protective housing 2 (fig. D5/1).
(according to model)
- Carefully clean the outside of the filter and its holder, to prevent dust from getting into the
system.
- Place a container under the filter and drain it through drain plug 3 (fig. D5/2).
- Loosen the body of filter 4 (fig. D5/2).
- Remove the filter cartridge by pressing cartridge 5 (fig. D5/3) down against the pressure of the
spring and turn it to the left to extract it.
- Insert a new cartridge (see: 3 - MAINTENANCE: FILTERS AND BELTS), by pressing cartridge 5 (fig.
D5/3) down against the pressure of the spring and turn it to the right to lock it into the body
of the filter.
- Place the new seal 6 (fig. D5/3) onto the body of the filter and lightly lubricate the contact
surface of the seal using clean motor oil.
- Refit the body of the filter onto its holder, hand-tighten it only and lock it with a quarter-turn.
- Close drain plug 3 (fig. D5/2) and remove the container.
- Before starting the I.C. engine, leave the ignition on for three minutes on the lift truck, to give
the lift pump time to release air from the filter.
- Start up the I.C. engine and make sure there is no leakage.
- If necessary, bleed the fuel circuit (see: 3 - MAINTENANCE: G1 - FUEL SYSTEM).
D6 - CLEANFIX COMPRESSOR FILTER (OPTION)
CHANGE
- Open the I.C. engine bonnet.
- Remove compressor securing nut 1 (fig. D6/1).
(according to model)
- Remove clip 2 (fig. D6/2).
- Replace filter 3 (fig. D6/2) with a new one (see: 3 - MAINTENANCE: FILTERS CARTRIDGES AND
BELTS) and correctly refit clip 2 (fig. D6/2).
- Refit the compressor securing nut.
(according to model)
D5/2
4
3
D5/3
6
5
D5/1
1
1
1
2
1
1
D6/1
1
D6/2
3
2