Do you have a question about the Manusa Op. Visio L1H and is the answer not in the manual?
Defines abbreviations and calculations for door dimensions and safety distances.
Illustrates key dimensions like opening width and beam height for installation.
Details measurements for door width, including sliding and fixed leaf dimensions.
Outlines essential checks for floor level, beam, and wall overhangs before installation.
Details the drilling process for the main profile and track.
Instructions for assembling the track profile onto the main profile.
Guides on adjusting the track profile for smooth operation.
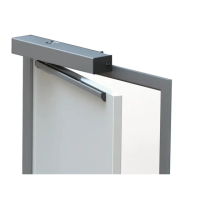
Shows how to arrange the main profile and top lintel sections.
Steps for marking and screwing the top lintel into place.
Instructions for introducing, drilling, and screwing the main profile.
Covers cutting, drilling, and screwing the lower lintel.
Details drilling and positioning the fixed leaves and securing them.
Instructions for screwing the bottom lintel (PL) to the top lintel.
Covers inserting nuts and assembling lateral end stops.
Instructions for introducing and positioning the central lock mechanism.
Steps for distributing trolleys and assembling separators.
Guides on inserting trolleys into the main profile and adjusting wheels.
Covers cutting arms, attaching anchors, and screwing arms to trolleys.
Shows the correct final layout of trolleys and arms.
Instructions for marking, positioning, and drilling floor guides.
Details inserting screws into bars and hanging the sliding leaves.
Steps for inserting nuts and screwing the drive unit to the main profile.
Covers cutting the belt, placing anchors, and attaching to arms.
Guides on assembling the bottom and front covers.
Instructions for inserting nuts and mounting brackets.
Steps for positioning and fixing the top cover.
Details assembling snap-on clips to the top element cover.
Instructions for assembling the bottom cover onto brackets and fixing it.
Covers screwing end covers to both ends of the main cover.
Steps to open and remove the front and bottom covers.
Section detailing the manual unlock mechanism assembly.
Guides on screwing the piece to the lock and ensuring actuator placement.
Instructions for introducing and attaching the bottom and front covers.
Details inserting the toothed piece onto the bottom cover.
Covers inserting the actuator and securing washer.
Instructions for inserting the toothed cylinder until it snaps into place.
Guides on checking manual operation of the lock bolts.
Presents the main wiring diagram for the system components.
Details general connections for power supply, sensors, and controls.
Explains the self-adjustment procedure using different selectors.
| Brand | Manusa |
|---|---|
| Model | Op. Visio L1H |
| Category | Door Opening System |
| Language | English |