IMPORTANT INFORMATION:
If you are missing any parts, do not return to the retailer. Please contact the manufacturer at:
Marathon Industries, Inc. | Toll Free Number – 1 (877) 425-1640 | Email – sales@marathonind.com
Visit www.marathonind.com for additional instructions
!
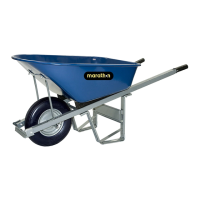
Wheelbarrow Assembly Instructions
Parts Included
Steps
# – Description (Qty.)
A – Tray (1)
B – Handles (2)
C – Wedges (2)
D – Legs (2)
E – Leg Brace (1)
F – Long Cross Brace (1)
G – Short Cross Brace (1)
H – Nose Guard (1)
I – Axle Bracket (2)
J – Axle (1)
K – Wheel (1)
L – Tray Brace (2)
M – Hardware Set (1)
1 – Bolt 4
3
/
4
” 2pcs
2 – Bolt 3
1
/
4
” 2pcs
3 – Bolt
3
/
4
” 2pcs
4 – Bolt
1
/
4
” 6pcs
5 – Screw
3
/
4
” 2pcs
6 – Lock Washer 14pcs
7 – Flat Washer 14pcs
8 – Nut 14pcs
Lay out all of the wheelbarrow components to confi rm the
parts list is complete.
Tools Required: adjustable wrenches or metric socket
(preferably) and a fl at screwdriver.
*Note: Bolts are installed
with fl at washer, lock washer
and nut, in that order.
Place tray (A) upside
down onto a table or
stand. Insert the carriage
bolts* (1, 2) from the inside of
the tray through the square
tray holes. Rubber washers
can be used to hold carriage
bolts in place. The long
carriage bolts (1) go toward
the front. Attach the tray
braces (L) to the front of the
tray using the short carriage
bolts (3). Do not tighten.
Place the wedges
(C) over the carriage
bolts with the counter bores
next to the tray and thicker
end toward the front. Put the
handles (B) over the wedges
with the carriage bolts
coming all the way through
the handle.
1 2
A
E
C
B
G
F
6
3
5
7
4
2
1
D
L
I
K
I
J
H