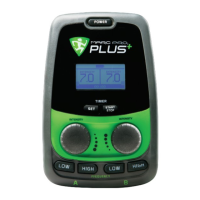
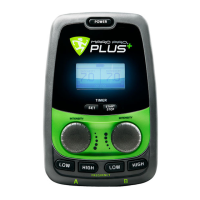
CONTROLS |
1. Power Button
To power on or off device; push the “POWER”
button at the top of the device.
2. Frequency Control
Frequency buttons are located in the section
above the word “FREQUENCY”; each button
is equipped with its own LED to light up when
pressed as an aesthetic feature.
Each channel has its own frequency control.
From here you can adjust frequency by pushing
“LOW” to lower and “HIGH” to raise your
frequency.
3. Knobs
Once desired frequency is reached, output is
controlled by 1 1/4” knob per channel. Each
knob is individually marked with diagrams
stating “INTENSITY” at the top and a semi-circle
reducing in thickness to “OFF”; thus indicating
the direction in which to spin the knob to reach
desired level. To raise intensity, which as a
maximum of 9.0, spin knobs to the right. To
lower and turn off, spin knobs to the left.
4. Timer
Timer buttons are located under display in an
outlined section labeled “TIMER”. To use timer:
press “SET” until desired treatment time is shown
on display, then you may press “START STOP” to
start or stop your timer.
5. Output Jacks
Output Jacks are located at front of device;
directly above channel A’s jack is labeled “A”
and directly above channel B’s jack is labeled
“B”.
Custom connector on device has a shape similar
to a sideways 8 or infi nity symbol, which is ¾”
end to end. Simply insert plug into device’s jack
when desired (there is no up/down or polarity to
achieve).
For more information on use and/or
recommendations for device, electrodes or other
accessories, please see “Instructions” or “Care
of your Marc Pro Plus” sections.
2
5
4
5
3 3
2
1
8
MPRO_19-003_MPP_MANUAL_FINAL_IMAGES_C8.5.indd 8MPRO_19-003_MPP_MANUAL_FINAL_IMAGES_C8.5.indd 8 9/1/20 5:43 AM9/1/20 5:43 AM
 Loading...