7
EN
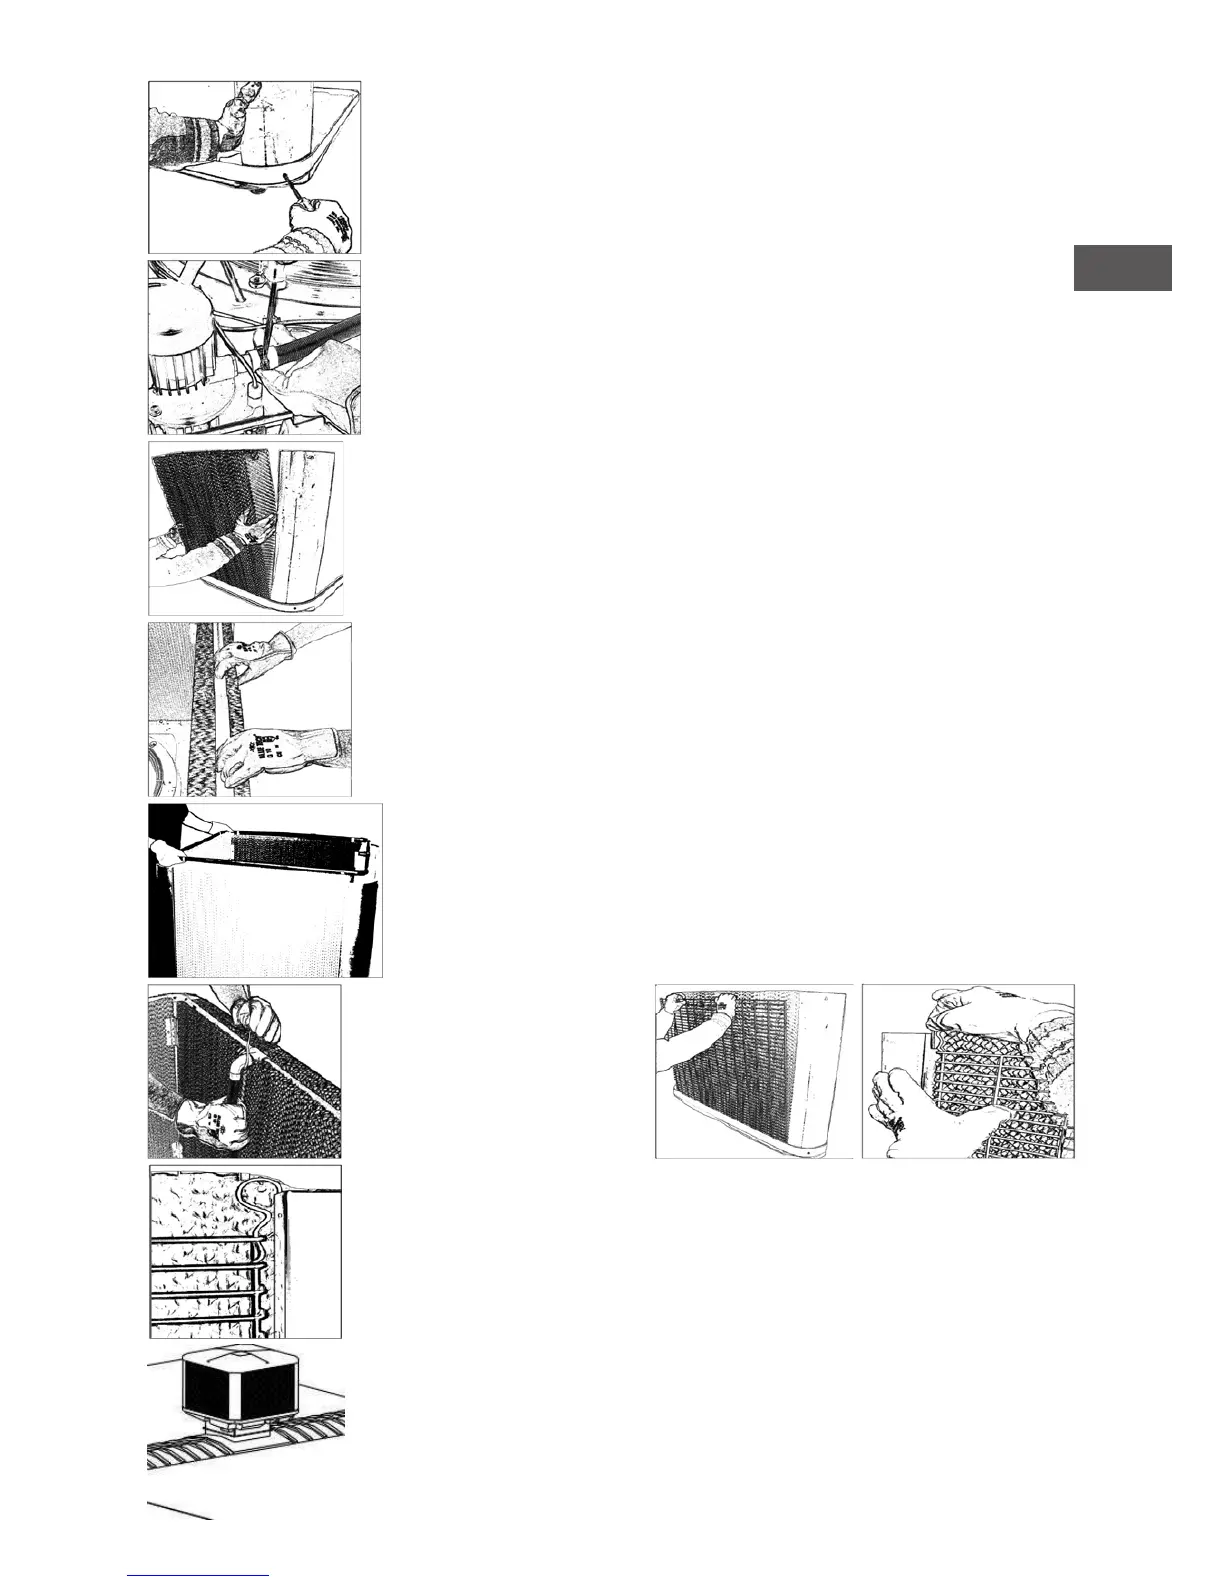
Position and x the 4 coloumns at the cooling unit base by using provided
screws.
Check the tightness of the pump exible hose clamp.
Positioning and applying cooling pads. Maintain the groove (made on one
side of the pad) in the upper position and towards the external part of the
machine.
Insert the water distribution stripes into the pad grooves.
Check that stripes are well pressed down to the bottom of their seat.
Insert the water distributor into the pad grooves and make sure that the
water distributor rests in a uniform manner over the distribution stripes.
Maintain the hose-end tting on the side of the water pump. Make a hole
through the pads to allow the passage of the hose-end tting.
Connect the distributor
hose-end tting to the
exible hose coming from
the pump and x them with
an hose clamp.
Insert the grates on the sides and rear of the unit and x them by using
the clips provided. Do not assemble the front unit grate (connections/
components side). At rst insert the clips till to their rst “click” on
the two upper corners of the grate. Finally force the clips until they are
completely inserted so that they do not protrude from the cooling pads.
Position the cap without xing it to allow the front unit grate insertioning.
The cap must be lifted so the grate slots into its seat. Do not use clips to
x the front unit grate to facilitate any necessary maintenance operation.
Once the protection grates have been positioned, x the cup by using
supplied screws.