Digi-Motor
®
Installation Guide
4
www.marsdelivers-contractors.com
To prevent electric shock, personal injury, or death, turn off the electric power at the disconnect or main service
panel prior to making any electrical connections.
The installation of this motor must comply with all local codes and the NEC, article 430.
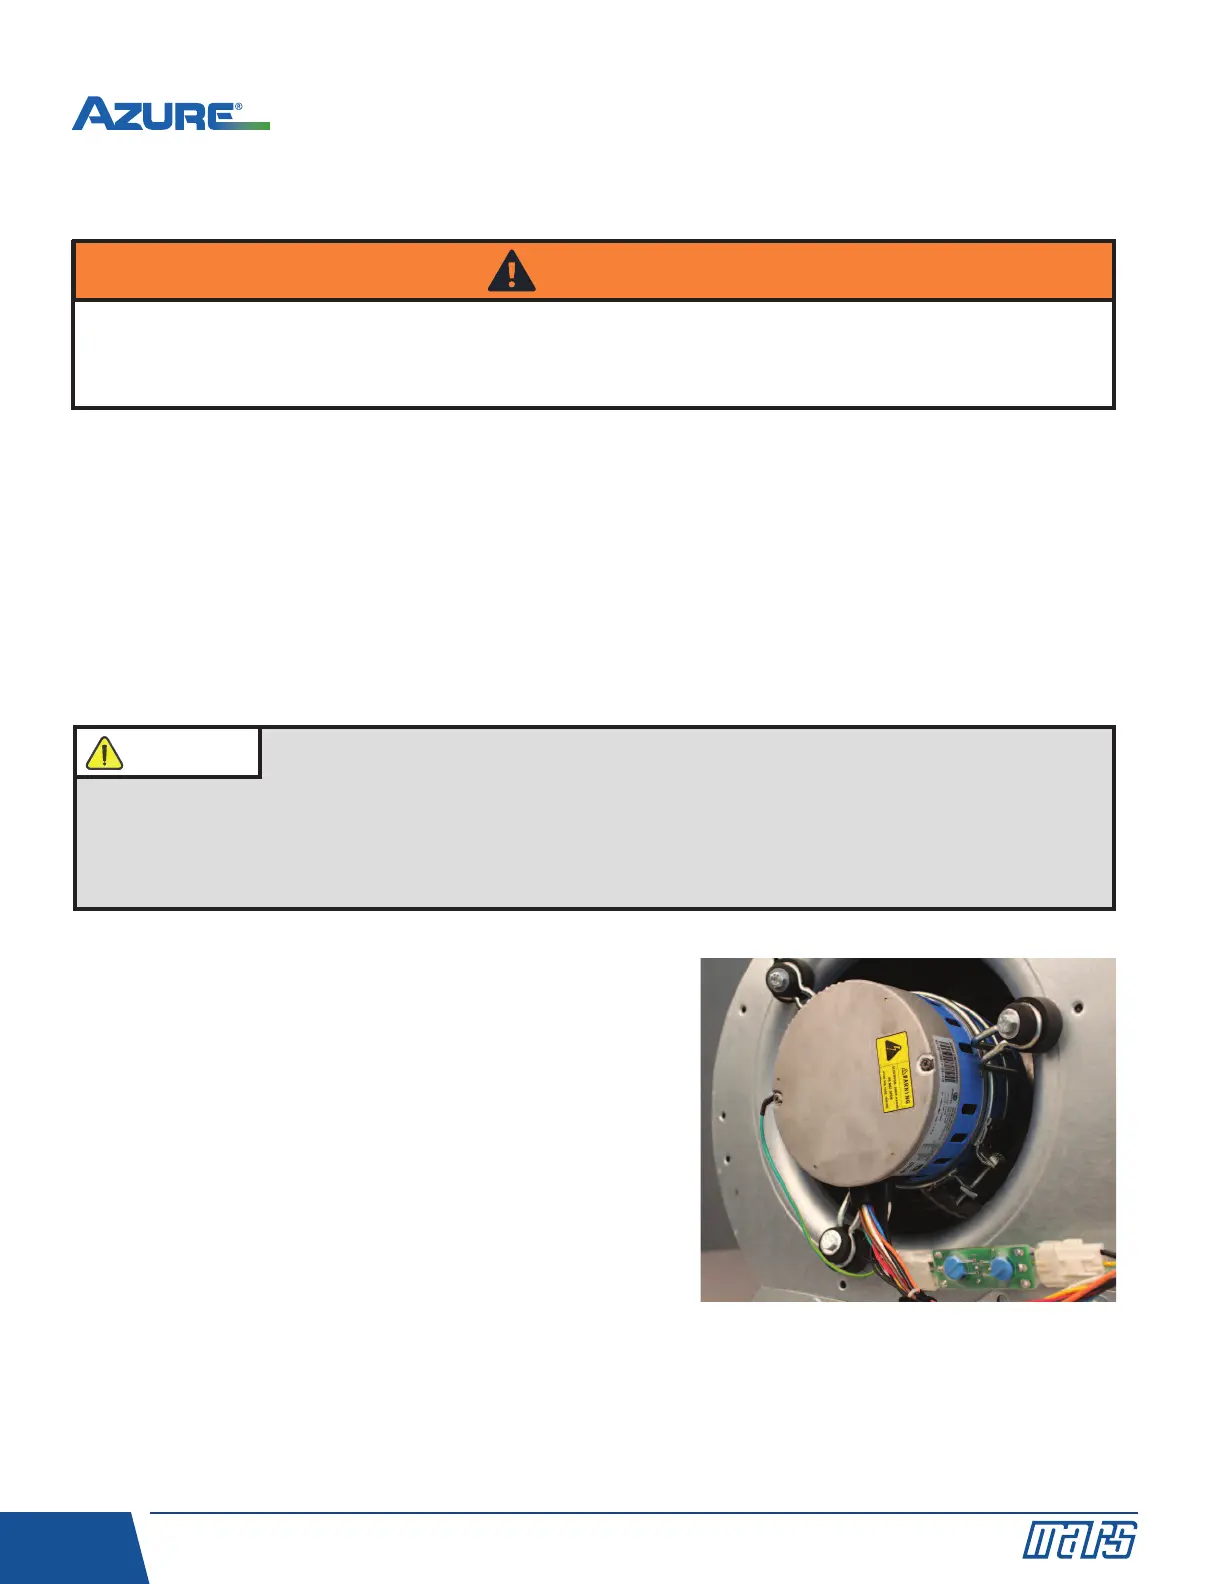
1) Install the Azure
®
Digi-Motor
®
into the blower housing using a
high quality bellyband. Be careful not to block the oval
ventilation holes nearest the end bell (shown in the image
below).
• MARS No. 08025 (10” bolt pattern)
• MARS No. 08026 (11” bolt pattern)
• MARS No. 08027 (13” bolt pattern)
Orient the power harness downward (between the 4 o’clock
and 8 o’clock positions). This will help prevent moisture from
penetrating the control module on the motor. Refer to Image 1.
2) Secure the blower wheel to the motor shaft ensuring the wheel
is centered within the housing.
Image 1: Motor Orientation
WARNING!
The Azure
®
Digi-Motor
®
must be securely mounted to minimize noise and vibration.
A high quality bellyband with bolts is the desired means for mounting Azure
®
.
Ensure the Azure
®
Digi-Motor
®
is an equivalent (in terms of HP rating) for the motor being replaced.
Azure
®
MARS No. 10860: 1/5 HP – 1/2 HP
Azure
®
MARS No. 10861: 1/2 HP – 1 HP
NOTICE
1) Disconnect main power to the HVAC system.
2) Note the motor voltage, horsepower, and rotation of the motor being replaced.
3) Disconnect the existing motor wire harness (from the control board), neutral, ground, and capacitor.
4) Remove the blower assembly and discard the capacitor.
5) Remove the old motor and mounting bracket.
Removing The Old Motor
Configuring The Azure
®
Digi-Motor
®

 Loading...