4
Lynx 100, Voyager, Discovery, Adventurer
Setup
Unpack
&KHFNýWKHý SDFNDJHýIRUýWKHýIROORZLQJýLWHPVïý3OHDVHýFRQWDFWý\RXUý0DUWLQýGHDOHUýLPPHGLð
DWHO\ýLIýDQ\ýDUHýPLVVLQJýRUýGDPDJHGïý
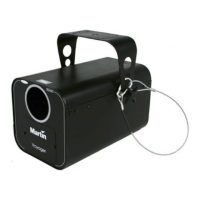
‡ìýIL[WXUH
‡ ìýPRXQWLQJýEUDFNHWýõ3î1ýëìíëíçèíô
‡ WKLVýXVHUýPDQXDOýõ3î1ýêèííííêæô
‡ ëýEODFNýKDQGýQXWVýõ3î1ýíåìêêéíìô
‡ ëýSODVWLFýZDVKHUVýõ3î1ýíåëçíìíìô
‡ ìý,(&ýPDLQVýFDEOHñýêðSLQñýìïèýPñýEODFNýõ3î1ýììèíìíìëô
8VHýWKHýRULJLQDOýSDFNLQJýPDWHULDOVýZKHQýVKLSSLQJýWKHýIL[WXUHï
Install lamp
7ZRý GLIIHUHQWýKD O RJHQý O DPSVñý QR WýLQFOXGH Gñ ýDUHýDYD LODEOH ýIURPý\R XU ý0DU WL QýG HDO HU ýIRUýXVH
LQý WKHý /\Q[ý ìííñý 9R\DJHUñý 'LVFRYHU\ñý DQGý $ GYHQWXUHUï ý 7KH ý KLJKý LQWHQVLW \ý ODP Sý KDV
DSSUR[LPDWHO\ýWZLFHý WKHýRXWSXWýR Iý WKHýORQJýOLIHý ODPSïý 6HHýWKHýVSHFLILFDWLRQVý IRUýRUGHULQJ
LQIRUPDWLRQï
WARNING!
Disconnect the fixture from power. Allow lamp to cool for 10 minutes.
1. Remove one Phillips screw from the lamp access plate and loosen the other.
Move the plate out of the way so you can get to the lamp.
2. If changing or removing a lamp, slide it sideways out of the metal holder.
With the socket attached, remove the lamp from the fixture and pull the
socket off the lamp.
3. Insert the pins of the new lamp fully into the ceramic socket.
4. Slide the lamp, with socket attached, sideways into the metal holder.
5. Turn the lamp until the tab snaps into the slot in the holder.
6. Replace the lamp access plate.