2. Connecting and Installing
You are now ready to connect and install the subwoofers. If you are color match
painting do so now before proceeding. Follow painting instructions provided
earlier.
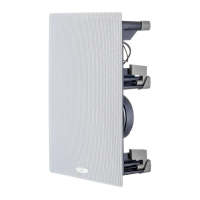
With grille removed and bracket attached to speaker, place subwoofer against wall
and follow the directions below.
Connecting Subwoofer:
Connect subwoofer cable as outlined in the Owners Manual
included with your MartinLogan subwoofer amplifier (sold
separately). Once connected, follow directions below.
Installing Subwoofer:
a) Holding the subwoofer’s front lip with your thumbs and index fingers, push the
mounting screws toward each other with our other fingers, so the mounting brackets
can fit through the hole with an “up-and-in” motion. (Fig.3b)
b) Release the screws and gently push the subwoofer into the wall;
c) Alternately tighten all screws until subwoofer is firmly installed. (Fig. 3c)
3. Installing the Grille
Press the grille into the groove on the front face of the speaker (not shown).
10
 Loading...